Showing posts with label Pear Blossom Press. Show all posts

Wednesday, January 11, 2023

Catherine Pooler Love & Lace Release!

 Hi friends,


It's been quite a while since you've seen me! My creativity took a hit when my depression spiked, the new Catherine Pooler sparked my creativity and I couldn't be more excited to show you what I created!


Today's card was inspired by the Roses are Red Stamp Set. I love this layering roses set, it's difficult to mess up honestly. I decided to stamp out 3 of the roses and several of the stems and leaves to create a pretty bundle then fussy cut them out, I recommend that you get the die set though since this was a little tedious!


Ink Colors used:

Rose Petals

Rouge

Garden Party

In the Park

Mardi Gras

Sage

Eucalyptus

Midnight


I used the Double Duty Circle Dies to cut a circle in a rosy pink cardstock, the another out of white cardstock to stamp the "Happy Birthday" from the Roses are Red Stamp Set.


I taped a Halo Light to the back of the card face and centered it on the backside of the white circle and used Double Thick Foam Tape to hold the card face up when I adhered it to the card base. 


I finished it off with a few enamel dots and I think the end result is pretty illuminating! Be sure to check out the entire new release from Catherine Pooler! I hope my card inspires you as much as this stamp set inspired me!


Stop by tomorrow for another new card using the Catherine Pooler new release!

Love,

R. Winn

Thursday, November 11, 2021

Light Up Christmas Card with i-crafter Dies and Pear Blossom Press Halo Lights

 Hello again friends,

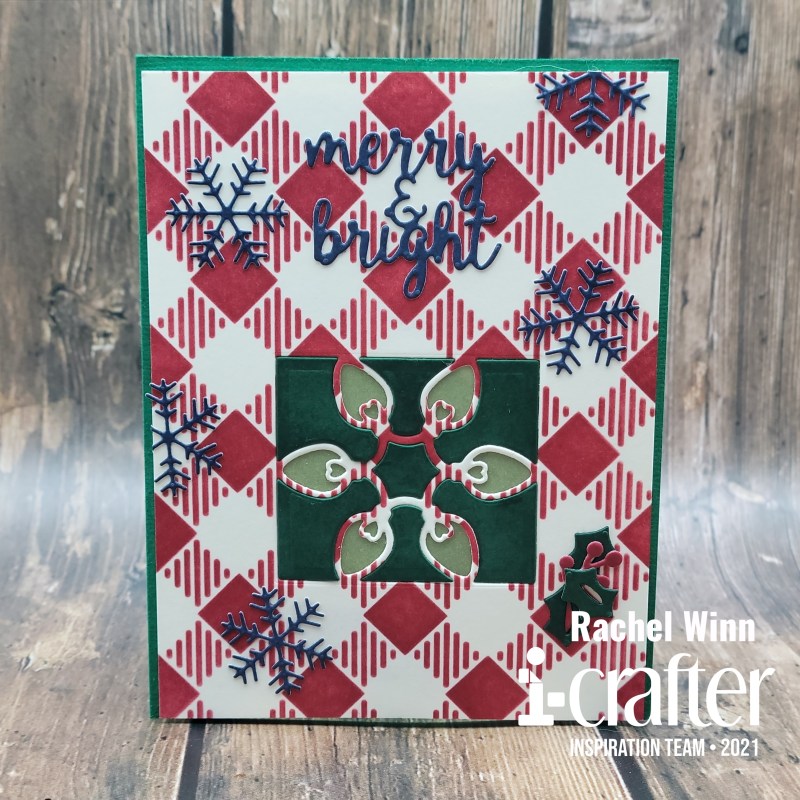
It's Rachel here showing off my take on the new i-crafter Christmas Treat Lantern Add-On die set! I wanted to light this die set up since I first saw it. Since I just did a light up lantern, I thought it would be fun to create a Christmas card instead this time. 

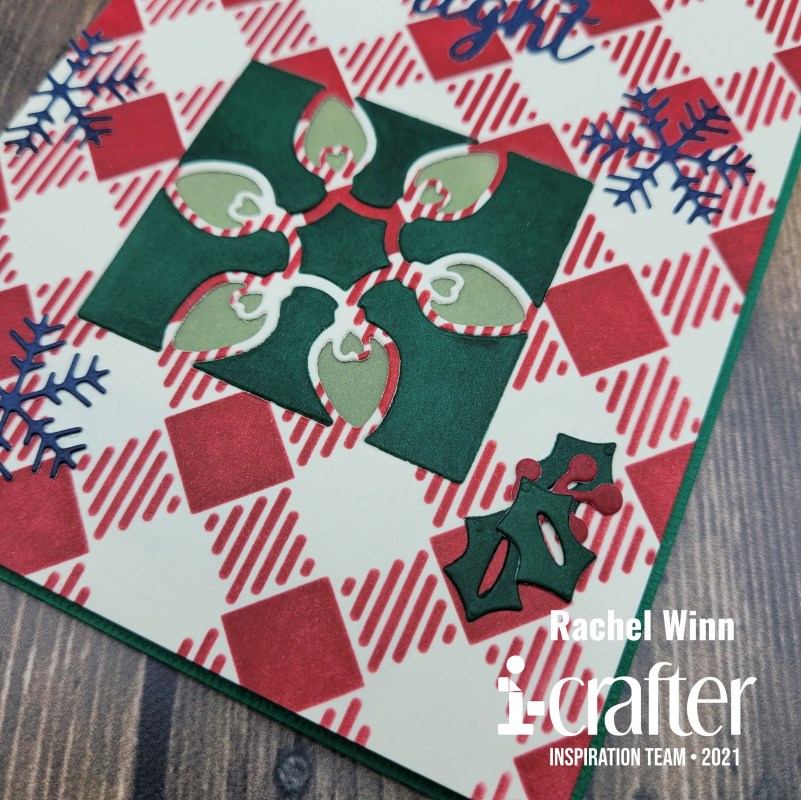
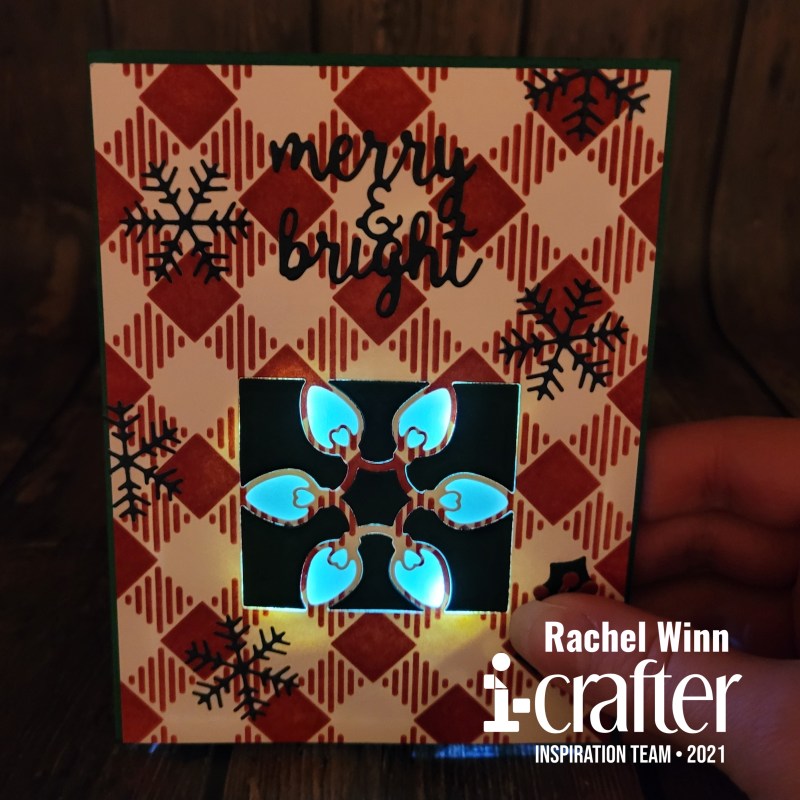
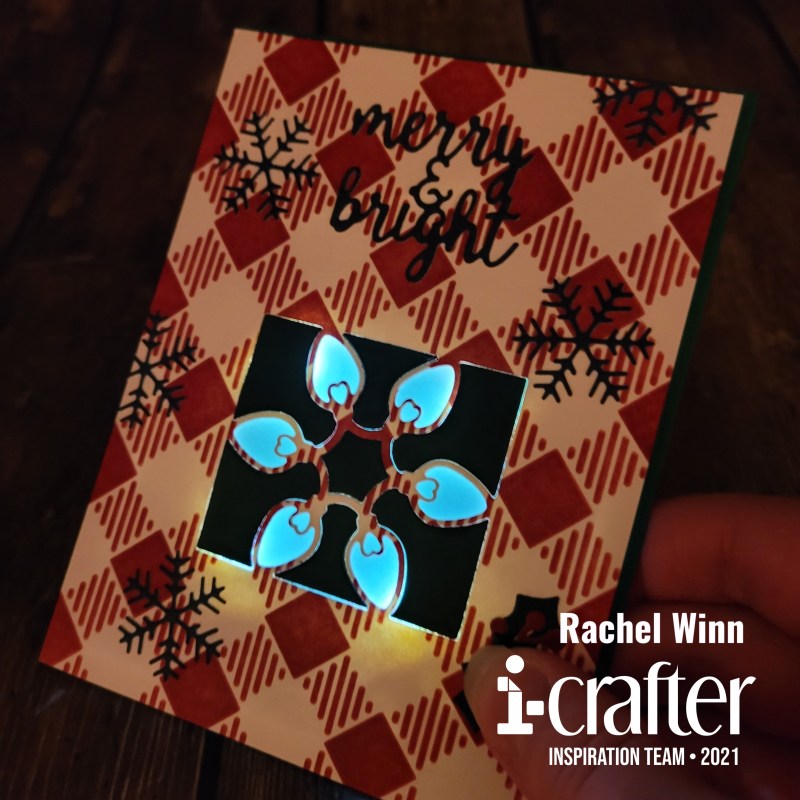
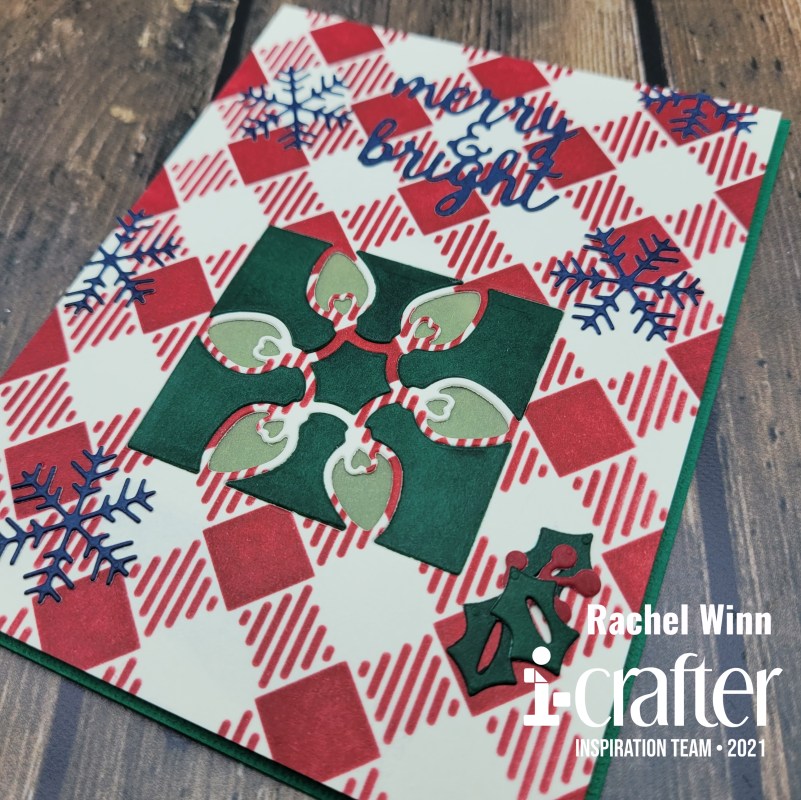
I started with the i-crafters's Buffalo Plaid Stencil and used Catherine Pooler's Cranberry Fizz ink over a vanilla cardstock. Next, I used the lights die from the Christmas Treat Lantern Add-On die set in the bottom center of the panel that I stenciled on. Used Catherine Pooler's Deck the Halls ink on the vanilla cardstock and ink smooshed the pad directly onto the cardstock, then used the lights die again to get the center pieces of the image. To create a yellow glow for the lights, I ink smooshed Catherine Pooler's Chiffon, a bright yellow ink onto vellum and glued it the back of the plaid panel. Once that was glued down, I added the green center pieces back into the image.

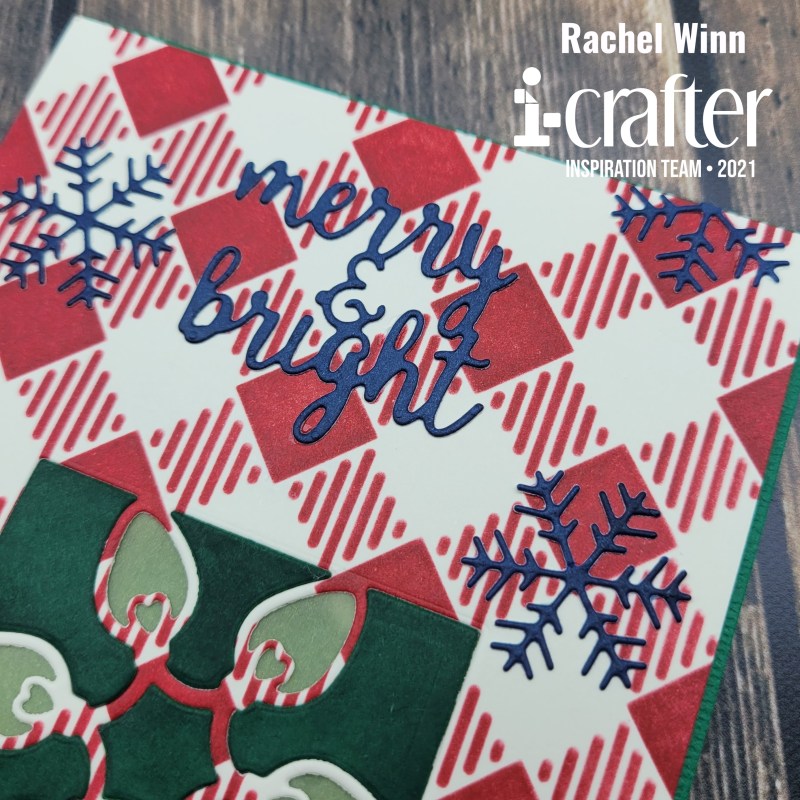
 I used the "Merry & Bright" word dies and the snowflake from the i-crafters's Holiday Dovetail Card die set to decorate the card. Again, I ink smooshed Catherine Pooler's Juniper Mist ink directly onto the vanilla cardstock. I cut out the words and five snowflakes. I cut two down so that I could position them on the edges.

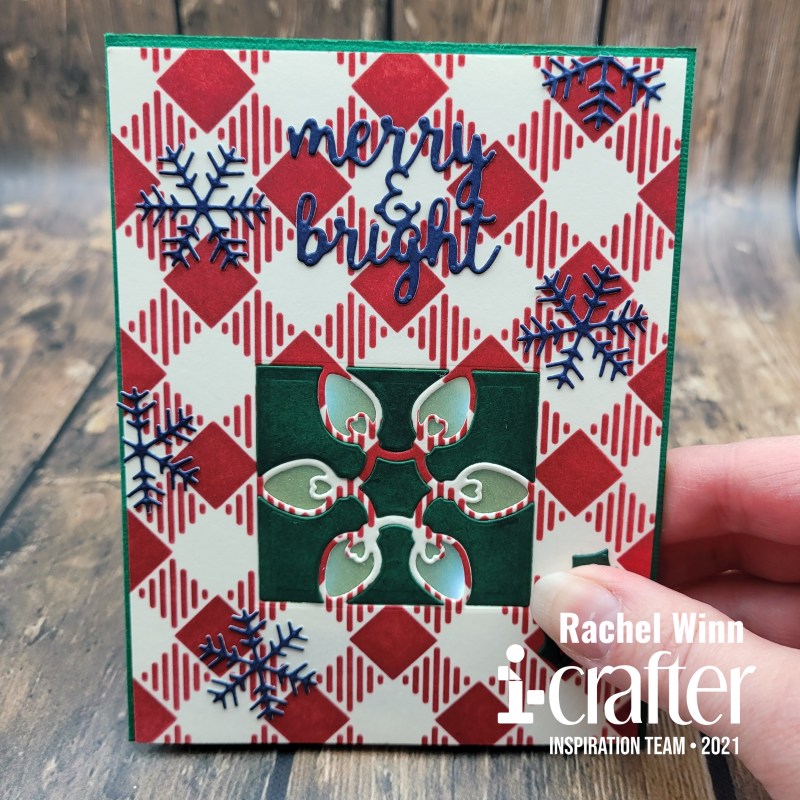
I then took the holly and berries from the i-crafters's Christmas Treat Lantern Add-On die set and positioned them over the button to my Pear Blossom Press Halo Lights, which is what I used to light up the card. I should have taken a picture of the back of the panel before I glued it down. I wanted something quick and easy and the Pear Blossom Press Halo Lights were perfect, they have 4 built in LED lights. I positioned the lights so they hit the corners of the box instead of positioning it straight up and down.

You cane see how perfectly the lights from the Pear Blossom Press Halo Lights worked with the box when it's lit up.

I couldn't be happier with how it turned out!

Here is a short video with the card in action! I hope that you enjoy it as much as I do!

If you’d like to see more of my projects, you can follow me here: Instagram, and Facebook page.

 
Until next time,
Rachel
 
For more inspiration, updates, and news make sure to check out these awesome places!
 
 
Thank you so much for stopping by today!

Monday, September 27, 2021

A-Haunting We Will Glow!


Welcome to the A-Haunting We Will Glow Collab Hop with i-crafter and Pear Blossom Press! We're sharing spooky sweet projects for Halloween. Featuring interactive dies from i-crafter, and with help from Pear Blossom Press, they all really light up! Be sure to hop along with us for lots of inspiration; we’ve come up with some brilliant cards. Let me show you mine...

I started with the i-crafter Halloween Treat Lantern dies and a Graphic 45 Halloween Paper Pad. I decided the purple paper would work nicely for my lantern. I used the spiderweb insert for the i-crafter Halloween Treat Lantern and then cut a piece of 2.25"x2.25" piece of vellum to back the spiderweb with. I lightly covered the exterior of the frame and the web strings with Art Glitter Glue to attach the vellum. 


Next, I added the haunted house from the i-crafter Tunnel Card, Halloween Add-On die set cut out of black cardstock. I trimmed it down so that it fit to in the lantern and added it behind the vellum, again attaching it with Art Glitter Glue. I knew that I wanted the lights to shine through the windows so I pried the shutters back into the lantern a bit. After I had the haunted house attached, I flipped it over and used Pear Blossom Press's White Essential Gel Pen to write "Press Me" and drew an arrow to where I planned to place the button for my EZ-Lights to light up my project.


I used a Large Zots to secure the Power Pack of the EZ-Lights to the back of the Lantern, then used Small Zots to position my lights. 


To give me a little more control of the placement, I first wrapped the Zot around the wire just below the LED light, then positioned the light above the window or door, and firmly pressed down to secure the light's position. This allowed me better control of where the light was pointed than simply placing the light on the Zots like I have in the past. 


I used the same technique to secure the wires as they traveled down the back of the haunted house to the Power Pack. Typically I do this with washi tape since I have so much of it on hand, but in order to have a lower chance of them showing the Zots seemed to be a better choice to me.


Finally, to secure the extra length of wire on each string, I gathered it all up and used washi tape to secure it to the Power Pack of the EZ-Lights.


 It was hard to get a good picture of these "guts" because my camera kept trying to focus on one piece or another!


I decorated the front of the lantern last, I die cut the pumpkin from the i-crafter Tunnel Card, Halloween Add-On die set out of orange glitter cardstock and backed it with a small piece of black cardstock. I glued this over the button on the EZ-Lights.


The last piece was the ghost from the Tunnel Card, Halloween Add-On die set, I die cut it out of a White Flock Sheet backed with Foam Adhesive. I backed the ghost's face with a small piece of black cardstock as well. I used a black jewelry cord to create a loop that would allow me to hang this from a door knob or hook.


I love the finished look. It's really neat both unlit and lit up!


Here is a short video showing it light up as well!


Now, be sure you keep hopping to be inspired further by the i-crafter Inspiration Team and the wonderful ladies joining us from Pear Blossom Press. Here is the hop line up:
Rachel Winn (You are here)
Cassie Trask (Next Stop)

Every good hop has prizes, right? So i-crafter, and Pear Blossom Press are each giving away a $25 store credit! Comment on this post by October 4, 2021 to be entered to win. Winners will be announced on October 8th. Ready for more inspiration? Amanda from Pear Blossom Press will be live on YouTube today, and Lynda from i-crafter will be live on Facebook today at 11:00am. Be sure to tune in!

Thanks for stopping by,
R. Winn

For more inspiration, updates, and news make sure to check out these awesome places!


Thank you so much for stopping by today!

Friday, July 2, 2021

Lighting Up the Sky with Fairy Magic!


Today, we’re sharing lots of whimsical cards that will really brighten your day. They feature dreamy new stamps and dies from Scrappy Tails, and with a little help from Pear Blossom Press, they all light up! Be sure to hop along with us for lots of inspiration; our designers have come up with some stunning cards...

Now, for my card! I am so obsessed with this card you guys.


The entire June release from Scrappy Tails is really magical but I selected the Fairy Girl to begin my card with. I stamped her using my MISTI 2.0 onto watercolor paper. I used two different yellows on her hair (these were given to me and I'm not sure of the brand.). For her skin, I used Crayola Colors of the World Markers, I scribbled these on my palette then used them as watercolors. For her wings, I broke out these AMAZING watercolors from HydraColour on Etsy the blue of the wings is Scarab, with a bit of Poseidon over top in certain places, the purplish color is Fantasia. Her shirt is the Purple from HydraColour's Neon Pan Dot Card.

I mixed a few dark blue and dark purple watercolors together and did a quick wash of the color on a sheet of watercolor paper for the background. Next, I used Deco Foil Foam Adhesive and a White Latte Flock Sheet to create the cloud border with Scrappy Tails' Cloud Frame Cover Plate.

I came back to my watercolored indigo background and placed my Fairy Girl and Cloud Frame to see where I wanted my Crescent Moon die (which was an incentive die from the June release). I cut the moon out of the watercolored background, then used a gold cardstock scrap to die cut my moon. To create the holes in the background under the wings, I used a cloud die from the Scrappy Tails' Cloud Frame Cover Plate set that was the perfect size to create a hole that filled most of the center of the wings.


Next, I flipped the card over and backed the hole in vellum. I decided to use 2 EZ-Lights so that each hole had 2 LED lights since they were rather large spaces. I use glue dots to attach the top of the EZ-Light to the back of the card front, then used washi tape to wrangle the wires and position the LEDs. My next task was lining the back of my card front with Crystal Clear Double Thick Foam Tape before I could flip it back over to finish the front.
 

I used a few stars from the Scrappy Tails' Cloud Frame Cover Plate in the gold as the moon for embellishment. The largest star, I wrote "Push" on and placed in the "sweet spot" that if it's pushed on just right will activate both EZ-Lights.
 

Now, I very rarely put sentiments on the inside of my cards, but I just loved this sentiment from Scrappy Tails' Fairy Friends stamp set. I stamped it using Catherine Pooler's Juniper Mist Ink and my MISTI.

This card is honestly one of my new favorites and in the dark it's even more stunning, all lit up.


Here is a little video of it in action!


Be sure to visit are blog to get more inspiration and more entries into the giveaways!

Rachel Winn (You are here!)
Teresa Plunkett (Your next stop!)

We’d love to see what you would create with these lovely new products, so we’re giving some away! Scrappy Tails and Pear Blossom Press are each giving away a $25 store credit! Comment on this post by July 9, 2021 to be entered to win. Winners will be announced on July 12th.

Thank you for stopping bye and I will see you soon!

R. Winn

Friday, June 18, 2021

EZ-Lights Creating Bright Days with Catherine Pooler

Hello friends,

Welcome to the Catherine Pooler Designs x Pear Blossom Press Collab Hop! We're sharing fun, interactive cards to brighten your day! They feature awesome new stamps and dies from Catherine Pooler Designs, and with help from Pear Blossom Press, they all really light up! Be sure to hop along with us for loads of inspiration; our designers have come up with some brilliant cards.


We got to play with Pear Blossom Press EZ-Lights with the new Catherine Pooler Bright Days stamp and die set. I think they are a match made in crafty heaven! I created a mini slimline for the hop. I started by stamping the light fixture and light switch out using Midnight Ink on to Catherine Pooler Premium Paper.


Next, I used a Tombow Blender Pen to watercolor the light fixture using Limoncello ink for the light bulb, Cove Blue ink for the top and bottom pieces of the fixture, and Tranquil ink for the glass. The light switch was also colored with a Tombow Blender Pen, for the plate I used Sea Glass ink, for the switch I used Bay Breeze ink. I added some of the illumination lines from the Bright Days stamp to the light bulb and the wall in the Limoncello ink.


I used the light fixture die to cut a hole in the Happy Hearts Patterned Paper that I selected, I wanted it to look like it could be a wall and I thought the pretty diamond grid pattern could be used for that. Once the hole was cut, I fit my colored piece into it and flipped it over to add my EZ-Lights. I used the Narrow Double Thick Foam Tape carried by Pear Blossom Press to create a pocket around the lights (which I gathered at the center of the light bulb) to trap the light in the area I wanted it to be seen. I added the foam tape all over the back of the card, using washi tape to wrangle the wires and glue dots to adhere the lights to the paper.


I added some light blue glittery ribbon to the bottom of the card where I wanted to place my sentiment, then adhered the card front to my card base. Then I got to start building the card front! I added the light switch over the power button for my EZ-Lights, I thought it was clever. The final piece was the sentiment, I selected the yellow hearts Happy Hearts Patterned Paper to stamp on. I love the sentiments in this stamp set and selected the "thank you for brightening my day" to stamp in Bay Breeze ink and used a die cut from my stash to cut in out in a pretty shape. I popped this up on a thin foam tape and centered it over my ribbon.


Here is a short video showing my card "in action".


Every good hop has prizes, right? So Catherine Pooler Designs, and Pear Blossom Press are each giving away a $25 store credit! Comment on this post by June 25, 202 to be entered to win. Winners will be announced on June 28th. Be sure to continue hopping for additional inspiration and entries into the giveaway!

Your next stop on the hop is:

Here is the full line up if you missed anyone:


Rachel Winn (You are here)


Thank you for stopping by today!

Until next time,

R. Winn

Saturday, May 1, 2021

Dashed Circles, i-crafter May Release

Hi again friends!

It's i-crafter's Release Day and I am so excited to share the new Dashed Circles dies. This set is super versatile and allows you to use your other i-crafter products (and every other company's products) in even more fun ways! The dies cut dashes on two sides of the cut circle creating a positive and negative space that can be used on your projects. I have 3 cards to show you today with fun ways to create using this great new set.

My first two projects use paper from Echo Park's Perfect Princess paper pad. I have two adorable little girls that are getting a package from me soon and I wanted to include some cards for them. 

The first card, I folded my card base out of a dark gray, and took the die to the very edge of the fold. By placing the cutting circle just over the fold, I was able to cut *almost* a full circle card base. My cutting machine didn't fully cut the bottom circle's dashes, I could have recut or used a shim to help it, but decided that I liked the look and kept it as is.


Next, I picked my patterned papers from the Perfect Princess pad, and die cut two Dashed Circles from it, the larger of the two circles is the princesses, the smaller is a sentiment that says "little girls have a magic of their own, princess." 

I added a medium sized Dashed Circle in a bright yellow to contrast with the gray and create space between the two patterned papers. This was popped-up on a thin foam tape, then the smallest Dashed Circle was added to it. I finished the card with 3 light purple heart embellishments from HAI Supply

The second card, I used the same paper pad, but wanted to show off a few more tricks the Dashed Circles die set can do! I started with a blue-green card base then cut down another piece of the yellow to add on top of that. I cut out various pieces of the patterned paper that I wanted to include. Next, I took a medium sized Dashed Circle die, and added the die one size smaller in the center of it. I cut both of these at the same time, creating a frame for my unicorns (I lined up the outer circle dashes on both the unicorns and the frame) and a back layer for my crowns.


After playing with the layout of the 4 patterns, I turned my attention to the sentiment circle "You're a princess". In order to highlight this circle, I positioned the smallest Dashed Circle die in the top left of the yellow layer, creating a negative space that opened up to the blue-green base. I added foam tap to the back of the sentiment to give it more depth. I finished this card off with some Raspberry DoubleClick Skittles.

My last card is super shiny! I stared with a black card base to make the Holographic Cardstock pop more, in the center of this shiny layer, I used second from the smallest Dashed Circle die and cut a negative space. I used this to line up the location for my Halo Lights. I added the center cut piece of the Holographic Cardstock to help the light reflect upwards more (black tends to absorb light so this helped more go upward.) I also used a metallic blue marker to fill in the rest of the black, thinking I would be using vellum to fill the negative space, which I later decided against.


Next, I cut out 2 partial Dashed Circles from a striped pink cardstock scrap. I grabbed the scraps of my yellow cardstock from earlier and cut out "Shine on" for the top circle, and "like a" for the bottom circle with i-crafter's Carly alphabet dies. For "diamond" and to fill the negative space in the center, I used Light Blue Metallic Paper.


I finished the card off with Diamond Clear Jewels from HAI and by writing in "Push" since I failed to stamp it before I glued everything together! Here is a short video show off card all lit up!


Head over to i-crafter to get the new Dashed Circles die set, and check out the other wonderful new release items too! Be sure to join the i-crafter Facebook Fan Club, then follow us on Instagram, and Pinterest too! We love seeing all of your creations using the i-crafter products.

Until next time,
R. Winn

Friday, October 23, 2020

Ink! Pink 2020

 Hello Friends!

I am honored to guest blogging on the Pear Blossom Press blog for today's Ink! Pink 2020 Cardmakers for a Cause Instagram Hop. Head over to see all the details about my card and learn how you can join the hop now.

I am really proud of this card and love the solidarity found in this hop.

~R. Winn

Saturday, September 12, 2020

Pear Blossom Press & Pink & Main Collaboration


Today's card is part of a collaboration with Pear Blossom Press and Pink & Main! I am superrrrrr excited to share my card!

I started by stamping out the mugs on Pink & Main's Need to Venti stamp set and cutting them out with the matching die set. I stamped with Ink On 3 Black Out ink and colored with Copic markers.


Next, I used the Pink & Main Leafy Slim Line Die with a Sparkle Sheet in Construction, I backed this with vellum. I also cut the Leafy Slim Line die out with a deep blue card stock, I filled in the exterior pieces surrounding the leaves with these.


After that, I worked on getting the "guts" built. I started by laying out the EZ-Lights, I back them and the Power Pack base with Glue Dots. In order to keep the wires from showing through the vellum, I used a black washi tape to mute the colors and secure the wires, of course! 


I used the Double Thick Foam Tape that Pear Blossom Press carries (life changing!) to back the card, normally I use it as is, but because the lines of this die are SO thin, I cut it down into super skinny strips. In order to kinda trap the light in the areas I wanted them, I also enclosed each area so that no light escaped.


Next, I stamped the little leaves from Need to Venti out in a dark yellow ink, on a lighter yellow cardstock and die but them. I also stamped out the sentiment "Thanks a latte" (so cute!) on The Stamp Doctor's Tag #1 Stitched Dies in a brown ink. I stamped out "Push Here" from a Lawn Fawn stamp set on the yellow cardstock and used one of the small leaf dies to cut it out too!


Tada! I'm obsessed!


Lit up with the lights on!


Lit up with the lights off!


I move the card part way through the video so I apologize!

Thank you for hopping along with us for the Pink and Main & Pear Blossom Press Collab Hop! For more inspiration, check out all of the stops in the hop!

Rachel Winn (You are here!)

~R. Winn


Wednesday, April 22, 2020

En Pointe!

Hello again friends! 

I'm so excited to show you the light up box card that I made using Kindred Stamps new "En Pointe" stamp set! This set is full of the cutest little critters doing ballet!

I started by coloring up the ballerinas in realistic colors using Copics. I gave them each their own colored tutus, and for the unicorn, I went with bright bold colors. After they were colored I used Ink on 3 Liquid Pixie Dust painted on with a small paintbrush to accent their tutus, headbands and shoes.

I decided that I wanted to make a box card using The Stamp Doctor's A2 Card in a Box #2 die set to make a stage for my dancing cuties.  I started with a tan cardstock and cut 3 of the panels for the card using it. Then I cut the 4th out of black cardstock.

I built my card and used a champagne bokeh (I think that's how it's spelled!) scrapbook paper to create panels on the 3 outward facing tan panels. For the front top panel I stamped the "Dance Your Heart Out" sentiment from "En Pointe."


For the inside, I used the Kindred Stamps Woodgrain Stencil, I ink blended Catherine Pooler Sand Castle and Over Coffee inks to create a wood floor for the stage. I did this on the 3 tan panels for their inner facing side. I added the same scrapbook paper to the 3 inner facing tan panels too. I used the stencil on the 3 strips I was  placing my ballerinas on too.


For the back of the stage, I sprayed Tonic Nuvo Mica Mist in Fog on the black cardstock. After the card was built, I decided I wanted to make it light up so I took a second layer of the black card stock and sprayed it. Then I used a star hole punch and punched out a few stars in the second layer. 


I used Pear Blossom Press EZ Lights that come pre-wired with 3 led lights. I chose where to put the lights and fed them through the back of the box securing them with glue dots and the wires with washi tape. The Power Pack battery holder and button for the EZ-Lights is secured in the bottom of the back half of the card using larger glue dots. I covered this with another panel of the tan woodgrain stenciled cardstock. I marked the button with a "Press here" stamp from Heffy Doodle's Interactively Yours stamp set.


For the back, I cut down a piece of white cardstock and used i-crafter Candy Coated ink to stamp the "I hope your birthday is" and "en pointe" sentiments from "En Pointe" leaving space for the card to be written on as well.


The entire Kindred Stamps April release will be available Friday, April 24 at 8am PST/11am EST. Be sure to subscribe to the Kindred Stamps blog to see a daily line up of sneak peeks from our amazing Design Team and see the full product release on Friday! Come join the Fan Club and release event to be part of the release fun, and you may just win some Kindred Stamps credit!!

Until next time,

~R. Winn