Showing posts with label Snow. Show all posts

Thursday, November 11, 2021

Light Up Christmas Card with i-crafter Dies and Pear Blossom Press Halo Lights

 Hello again friends,

It's Rachel here showing off my take on the new i-crafter Christmas Treat Lantern Add-On die set! I wanted to light this die set up since I first saw it. Since I just did a light up lantern, I thought it would be fun to create a Christmas card instead this time. 
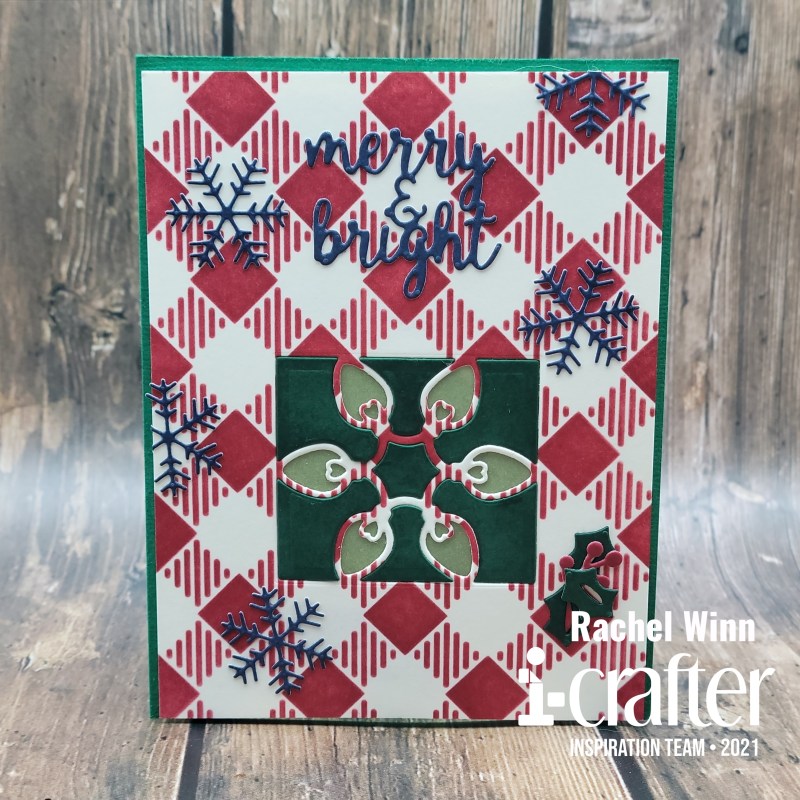
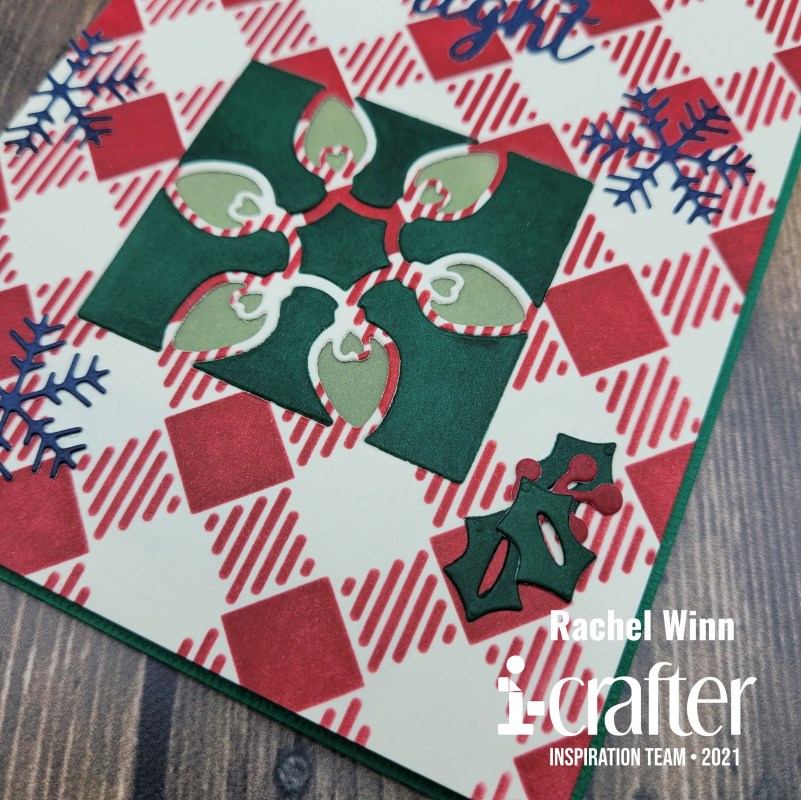
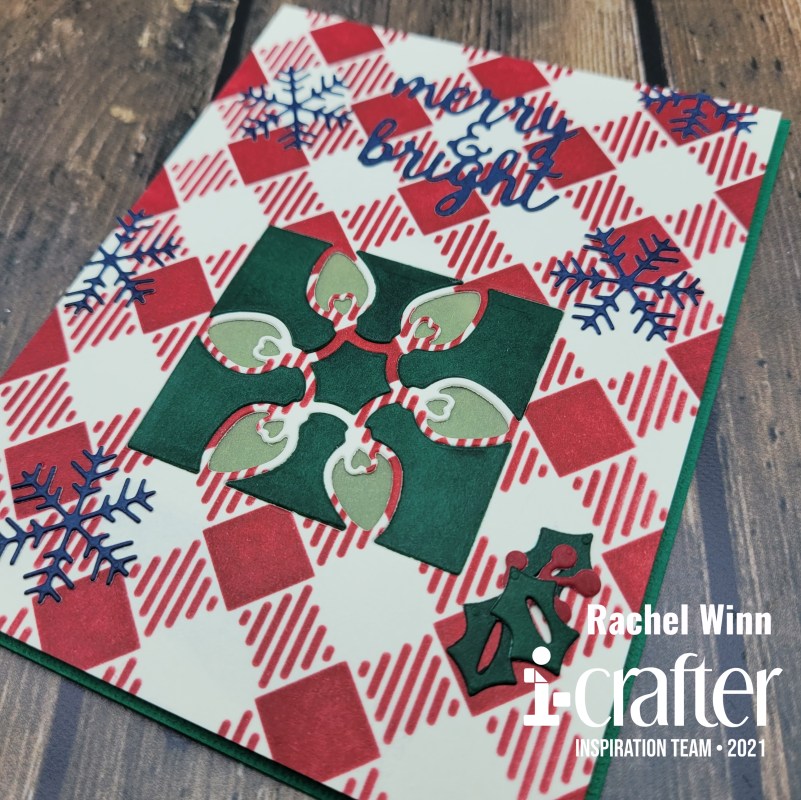
I started with the i-crafters's Buffalo Plaid Stencil and used Catherine Pooler's Cranberry Fizz ink over a vanilla cardstock. Next, I used the lights die from the Christmas Treat Lantern Add-On die set in the bottom center of the panel that I stenciled on. Used Catherine Pooler's Deck the Halls ink on the vanilla cardstock and ink smooshed the pad directly onto the cardstock, then used the lights die again to get the center pieces of the image. To create a yellow glow for the lights, I ink smooshed Catherine Pooler's Chiffon, a bright yellow ink onto vellum and glued it the back of the plaid panel. Once that was glued down, I added the green center pieces back into the image.
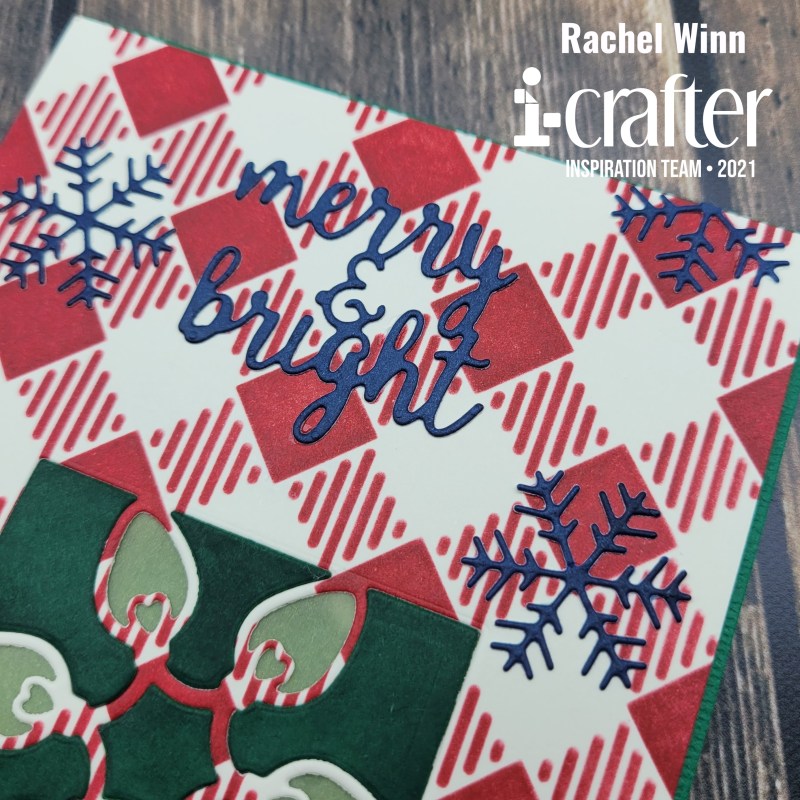
 I used the "Merry & Bright" word dies and the snowflake from the i-crafters's Holiday Dovetail Card die set to decorate the card. Again, I ink smooshed Catherine Pooler's Juniper Mist ink directly onto the vanilla cardstock. I cut out the words and five snowflakes. I cut two down so that I could position them on the edges.
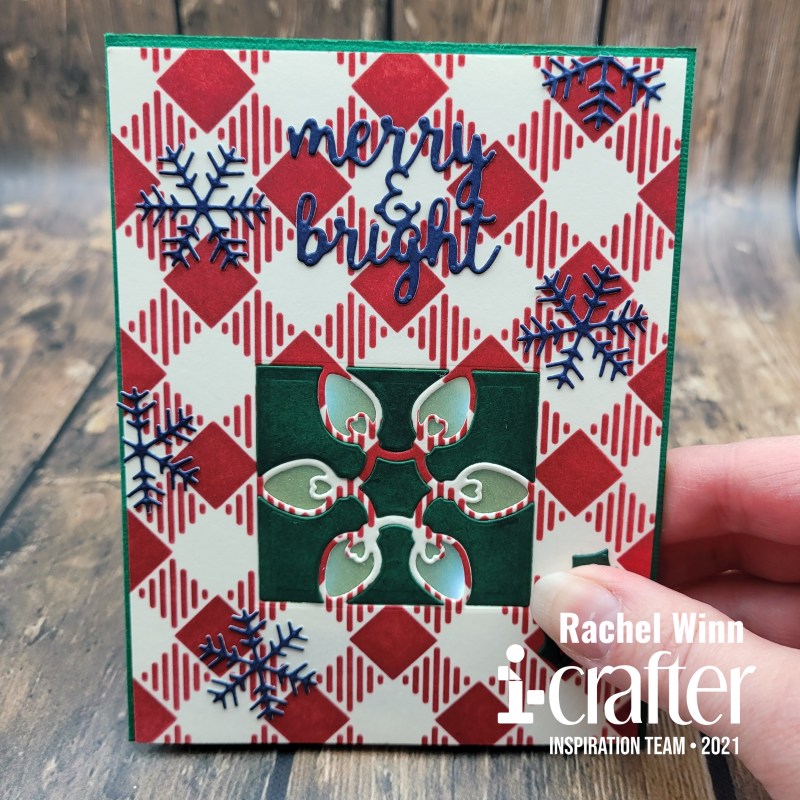
I then took the holly and berries from the i-crafters's Christmas Treat Lantern Add-On die set and positioned them over the button to my Pear Blossom Press Halo Lights, which is what I used to light up the card. I should have taken a picture of the back of the panel before I glued it down. I wanted something quick and easy and the Pear Blossom Press Halo Lights were perfect, they have 4 built in LED lights. I positioned the lights so they hit the corners of the box instead of positioning it straight up and down.
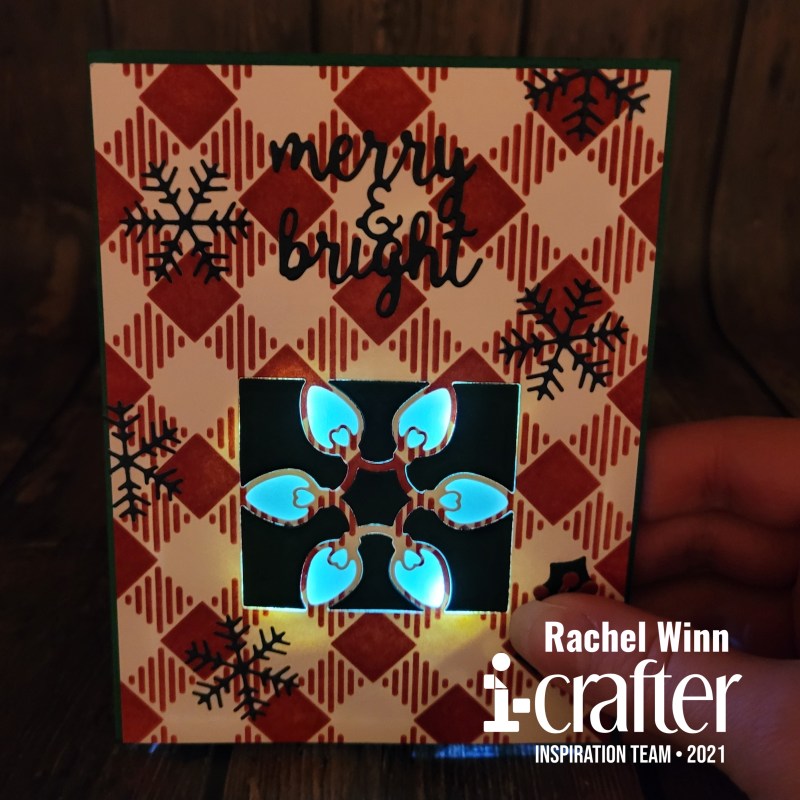
You cane see how perfectly the lights from the Pear Blossom Press Halo Lights worked with the box when it's lit up.
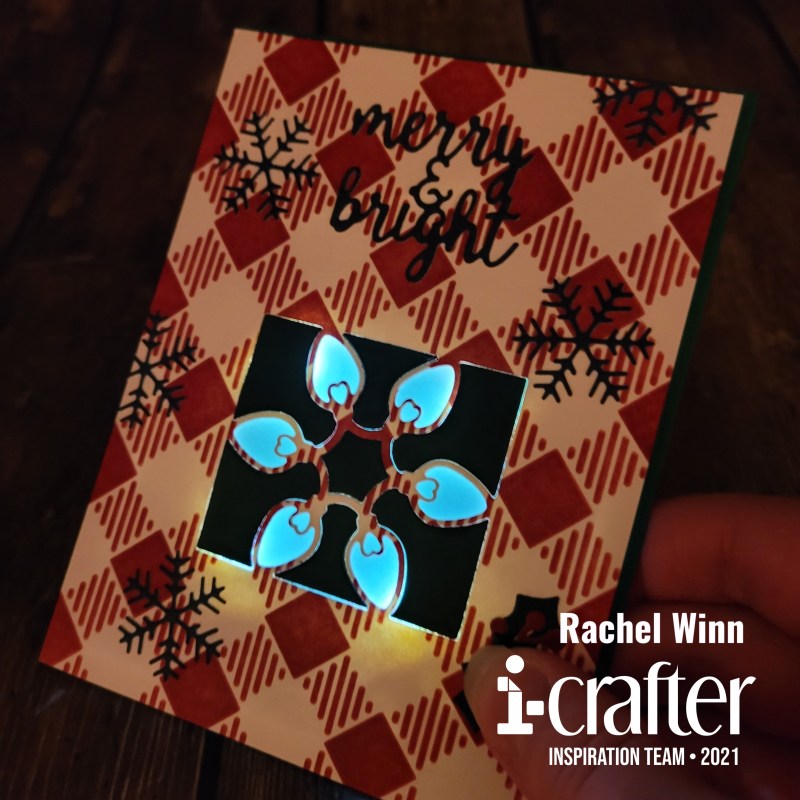
I couldn't be happier with how it turned out!
Here is a short video with the card in action! I hope that you enjoy it as much as I do!

If you’d like to see more of my projects, you can follow me here: Instagram, and Facebook page.

 
Until next time,
Rachel
 
For more inspiration, updates, and news make sure to check out these awesome places!
 
 
Thank you so much for stopping by today!

Thursday, August 26, 2021

Memories Circular Mini Album

Hi again friends,

I’m here to show off the Circular Mini Album that I created for one of my best friends of her two littles! They are two of the sweetest kids and she is like a sister to me so creating this was SO much fun!

I’m going to start by with a video showing a flip through of the full album then I will show you the individual sections!


To start, I cut out 4 of the Circular Mini Album base panel from a light gray cardstock and glued them together using liquid adhesive. The tutorial on i-crafter's YouTube channel explains that the little tab should be glued to the bottom of your creased section so the seam doesn't show on your album's pages, I loved this tip because I'm that person who wouldn't realize my error until I was halfway finished with my project! For the project, I used patterned papers from Echo Park, Bo Bunny, My Minds Eye, and Queen & Co. My memory isn't fantastic so I can't say for sure which is which!


The cover of the Circular Mini Album features the kids playing at the beach during a gorgeous sunset. I used bright fun colors that really pop off that gray background. On the tag, I penned "memories" keeping it simple since I don't know exactly when and where each photo was taken. She will be able to fill little journaling cards out that I created for most of the sections. To finish the cover off, I added a few yellow embellishments from Queen & Co. I made sure to use one to cover the tag's hole since I don't like the look of "naked" tags. 


The first section, I played with papers from the My Minds Eye "Wander" Paper Pad (this is honestly the only one I remember for sure!) I knew that this image was from a camping trip and the camper from this pad was just SO perfect for this memory. I positioned the square die so the camper would be the background on one side, then I added the pocket die that I centered over "wild & free". I glued the bottom tab of the pocket to the back of the square to help avoid the journaling card from catching on it when it is taken out or put back in. 


In order to print small enough photos, I used my Sprocket. Then, I used the instant photograph frame to die cut the picture down to size. I used the frame from Mini Album, Divider #2 die set to cut down some vanilla colored cardstock to create a journaling card. I added a second square using the same word patterned paper behind the image. The frame and triangle details used the same paper pad.


This next section is at the beach again! I kept it fairly simple for this section. To the left, I used double-sided removable tape to add a small rectangle cut using a die from Matchbox Stories this will allow for her to journal on the card, then use stronger adhesive to glue it down permanently. I used the vanilla frame that was cut when I created the first journaling card and trimmed two of the corners a bit so I could place is crooked so the background square felt less awkwardly cut. I added the "family" word die over the dark red triangle. 


This next section features her little girl blowing bubbles and was sooooo fun to create! The bubble paper was actually from an underwater paper pad. I mixed it with a pretty pink plaid patterned paper. I added a few Queen & Co. bubble embellishments around the image. 


Opposite the photo, I added "Dream" from the Matchbox Stories die set over the fun bubbles patterned paper. Now, I didn't create a journaling card for this section, but she could add details on the pink plaid triangle if she wanted to!


This next section, I used a winter paper pad to showcase the kids playing in the snow. The journaling card and "happy" are from the Mini Album, Accordion die set. 


I added a few iridescent snowflakes that I purchased from the dollar section of Target years ago around "happy" and the photo.


On the back cover, I had to use this picture of the kids playing in a puddle... is there anything more fun as a kid? The image fit best in the instant photograph frame turned sideways. I didn't care for the heart turned sideways though so I cut out a blue and pink heart and covered the sideways heart with them layered. I used the same blue to cut out "adventure" from the Mini Album, Accordion die set. I finished the album off by adding a few rhinestone rain drops. 

I hope that you've enjoyed my project! 

Until next time,
Rachel

For more inspiration, updates, and news make sure to check out these awesome places!


Thank you so much for stopping by today!

Thursday, July 8, 2021

How about Hanukkah in July?

Hello again!

Today I am showing off the new i-crafter Holiday Words dies paired with the i-crafter Snowflake Border die set on two cards.

I wanted to my cards today to have a Hanukkah theme rather than Christmas. There are plenty of other holidays celebrated in December that we can begin to prepare a card stash for now, plus I happen to know some amazing folks who celebrate Hanukkah, I will be sending these cards to them!

To start my first card, I began by cutting some Erin Lee Creative Holographic Cardstock down to 4"x 5.25" & then die cut my "Happy Holidays" out of the center. I angled the dies slightly to add a touch of whimsy. For this card, I used the negative space created by cutting out the words, I set my words to the side to use in my second card. I trimmed some blue scrapbook paper down to fit on my card base, leaving it slightly larger than the Holographic Cardstock so there would be a nice layered look when I finished.


Next, I backed the Holographic Cardstock with foam tape to add some dimension to the card. Once this was placed, I used the center bits of the words to fill some of the negative space and make it easier to read.


I die cut snowflakes using a blue glitter cardstock. The snowflakes are a mix of the extra dies in both the Holiday Words and the Snowflake Border die sets, along with the smallest 3 snowflakes being negatives from the border die itself.

My second card also pairs the i-crafter Holiday Words and Snowflake Border die sets. I chose a 5.5"x5.5" white card base for this project. I die cut the snowflakes from each die set using Holographic Cardstock to match the words that had been set aside from the first card.


Next, I took the same blue glitter cardstock as I used in my first card and cut it down to 5.5"x5.5". I should have laid my words down and made sure that I was happy with the fit first, instead I eyeballed it and as a result my words are closer together than I would have liked and "Holidays" dips into the snowflake border a bit.

A "pro tip" when using the Snowflake Border, this die is so intricate that some of the pieces take a extra passes through the machine or even a precision cutting plate if you have on, which I don't instead I run it through twice with the die facing sideways, then another two times with the die facing up and down.

I glued everything together flat with no foam tape and no extra embellishments other than the snowflakes that I had die cut. Even with the "imperfections" in these cards, they are absolutely gorgeous and I am so excited to send them this Winter!

I hope that you’ve enjoyed my cards and that you feel inspired to go create! Be sure to join the i-crafter Facebook Fan Club, then follow us on Instagram, and Pinterest too! We love seeing all of your creations using the i-crafter products so don’t forget to tag us or use #icrafter when you share!

Until next time,
R. Winn