Showing posts with label Queen & Co.. Show all posts

Thursday, August 26, 2021

Memories Circular Mini Album

Hi again friends,

I’m here to show off the Circular Mini Album that I created for one of my best friends of her two littles! They are two of the sweetest kids and she is like a sister to me so creating this was SO much fun!

I’m going to start by with a video showing a flip through of the full album then I will show you the individual sections!


To start, I cut out 4 of the Circular Mini Album base panel from a light gray cardstock and glued them together using liquid adhesive. The tutorial on i-crafter's YouTube channel explains that the little tab should be glued to the bottom of your creased section so the seam doesn't show on your album's pages, I loved this tip because I'm that person who wouldn't realize my error until I was halfway finished with my project! For the project, I used patterned papers from Echo Park, Bo Bunny, My Minds Eye, and Queen & Co. My memory isn't fantastic so I can't say for sure which is which!


The cover of the Circular Mini Album features the kids playing at the beach during a gorgeous sunset. I used bright fun colors that really pop off that gray background. On the tag, I penned "memories" keeping it simple since I don't know exactly when and where each photo was taken. She will be able to fill little journaling cards out that I created for most of the sections. To finish the cover off, I added a few yellow embellishments from Queen & Co. I made sure to use one to cover the tag's hole since I don't like the look of "naked" tags. 


The first section, I played with papers from the My Minds Eye "Wander" Paper Pad (this is honestly the only one I remember for sure!) I knew that this image was from a camping trip and the camper from this pad was just SO perfect for this memory. I positioned the square die so the camper would be the background on one side, then I added the pocket die that I centered over "wild & free". I glued the bottom tab of the pocket to the back of the square to help avoid the journaling card from catching on it when it is taken out or put back in. 


In order to print small enough photos, I used my Sprocket. Then, I used the instant photograph frame to die cut the picture down to size. I used the frame from Mini Album, Divider #2 die set to cut down some vanilla colored cardstock to create a journaling card. I added a second square using the same word patterned paper behind the image. The frame and triangle details used the same paper pad.


This next section is at the beach again! I kept it fairly simple for this section. To the left, I used double-sided removable tape to add a small rectangle cut using a die from Matchbox Stories this will allow for her to journal on the card, then use stronger adhesive to glue it down permanently. I used the vanilla frame that was cut when I created the first journaling card and trimmed two of the corners a bit so I could place is crooked so the background square felt less awkwardly cut. I added the "family" word die over the dark red triangle. 


This next section features her little girl blowing bubbles and was sooooo fun to create! The bubble paper was actually from an underwater paper pad. I mixed it with a pretty pink plaid patterned paper. I added a few Queen & Co. bubble embellishments around the image. 


Opposite the photo, I added "Dream" from the Matchbox Stories die set over the fun bubbles patterned paper. Now, I didn't create a journaling card for this section, but she could add details on the pink plaid triangle if she wanted to!


This next section, I used a winter paper pad to showcase the kids playing in the snow. The journaling card and "happy" are from the Mini Album, Accordion die set. 


I added a few iridescent snowflakes that I purchased from the dollar section of Target years ago around "happy" and the photo.


On the back cover, I had to use this picture of the kids playing in a puddle... is there anything more fun as a kid? The image fit best in the instant photograph frame turned sideways. I didn't care for the heart turned sideways though so I cut out a blue and pink heart and covered the sideways heart with them layered. I used the same blue to cut out "adventure" from the Mini Album, Accordion die set. I finished the album off by adding a few rhinestone rain drops. 

I hope that you've enjoyed my project! 

Until next time,
Rachel

For more inspiration, updates, and news make sure to check out these awesome places!


Thank you so much for stopping by today!

Monday, March 1, 2021

i-crafter Prize Ribbons

 It's release day at i-crafter and I had fun playing with the new Prize Ribbon dies!

I started by creating a Prize Ribbon for my BFF, Molly. She loves candy and I found this super cute patterned paper from Queen and Co. in my stash that reminded me of her. This was my first attempt at the Prize Ribbon, so there was a little bit of a learning curve when I tried to glue the folds together (don't do that!) The key to making these look perfect on the front is cutting an extra center circle out and gluing it to the back of the face to hold it all in place.


I used different paper from the same pad for each piece of the ribbon and decided to add Doodlebug Sprinkles to the top add a bit of sparkle. In order to make my bottom ribbons kinda wavy, I used the round handle of the i-Press tool to curl the papers in different directions. 


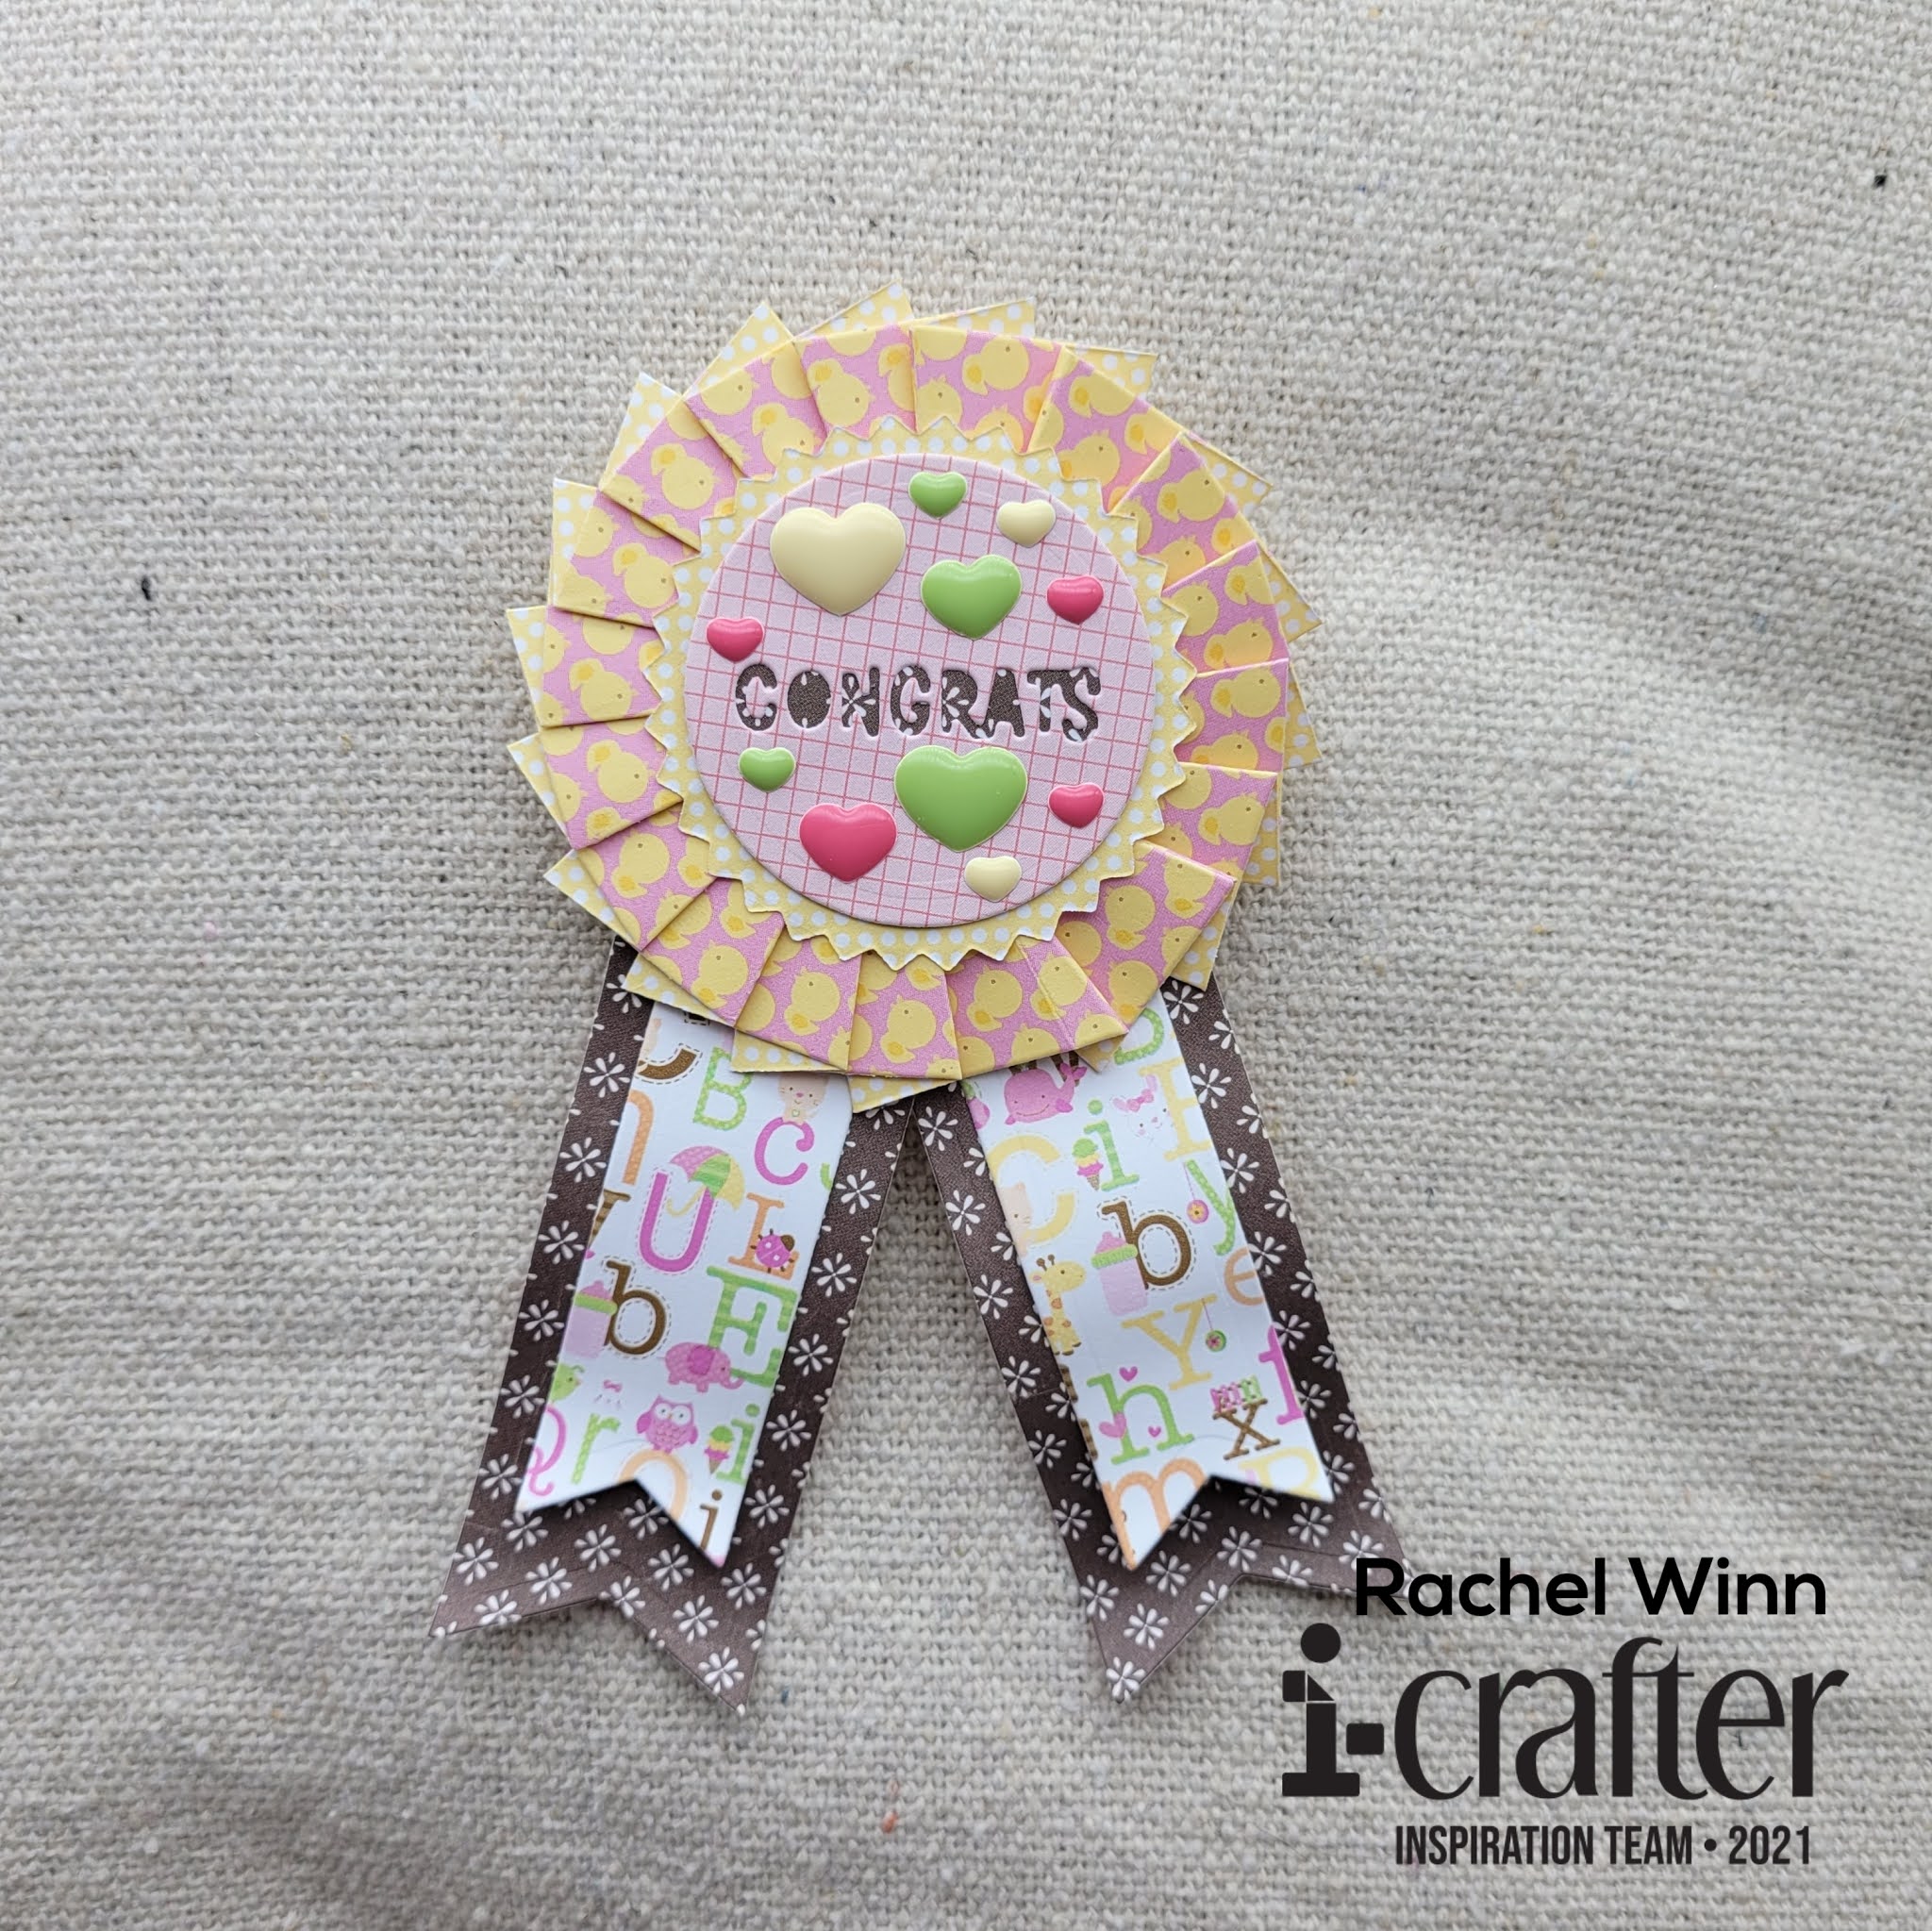
My next Prize Ribbon is intended for a momma-to-be who is a baby girl! I think this would be SO cute pinned to a dress at a baby shower. I loved this ducky paper that I found to use, the only hard part was keeping them facing the "right" way since you need 3 of the piece that gets folded to create the back part. All in all, I think it turned out pretty sweet!


I used some heart enamel "dots" to embellish this time. I also cut word in the circle instead of using the cut negatives; this added another layer to my ribbon center and let me tie the brown from the bottom ribbons into the top half of the project. 


My last Prize Ribbon is for a momma-to-be expecting a baby boy! This one is probably my favorite. Again, I used the same ducky patterned paper, this time with a blue backing.


I used solid enamel dots this time, no sparkles here! I also used the negative cut out letters. I used the brown paper again to pick up the brown in the lettered paper. I also got a little more brave with my curling and exaggerated the curve more. It looks REALLY nice in person.


I wanted my ribbons to be functional, so I reached out to my local secondhand craft store (yes, it's a thing, and yes it's awesome!), Lost and Found Crafts, to see if she had any pin backings that are often used for jewelry making. I used some thin foam tape to adhere the backings to my ribbons. Plus, I got a big bag of the backings for future projects for super cheap!


This was way outside my norm, but these Prize Ribbons are so cute and easy to put together, I can see creating them for all sorts of events! Plus, I have plans to used the pieces to create a card as well, this ends up being a really versatile set when you look at the pieces individually then put them together differently than they were meant for.


We have five new die sets that are all begging to come home with you this month! Be sure to head over and grab them at i-crafter. Be sure to join the i-crafter Facebook Fan Club, then follow us on Instagram, and Pinterest too! We love seeing all of your creations using the i-crafter products.

Until next time,
R. Winn

Monday, March 18, 2019

Let's Stick Together!

Hello again friends!

I'm absolutely in love with this month's Kindred Stamps new release line up. I got to play with "Stick Together", which features two adorable hedgehogs! The sentiments on this set cover all sorts of occasions too.

I made two cards, my first card is fairly simple, I used Kraft paper on top of a white base. On the craft paper, I used the heart from "Stick Together" and stamped it randomly about halfway up the card using a red Distress Oxide ink.

I used the hedgehog on his back and colored him using Copic Earth tones. I also colored up a heart using light pinks then cut them both out and had the little guy hold the heart. 


I picked the "I love you even when you're prickly" sentiment and stamped it on a white banner. To finish the card off, I added a few Queen & Co pokey embellishments. Like I said, simple, but I think whomever ends up receiving this card will smile!

My next card is a little... more! I love this little sitting hedgehog, and the butterfly is just so cute. I colored this hedgehog up a little lighter. I colored the butterfly orange and had him land on the hedgehog's nose. I bent the butterfly in the middle so one wing was up. 

To create the background, I used the Witt & Sass Hill Builder Stencil (no longer in business 😞). For the grass, I blended Catherine Pooler Mardi Gras and Eucalyptus. The sky is a blend of Catherine Pooler Baby Boy and Skylight.


I took Memory Box Stitched Cloud dies and covered them in Ink On 3's Liquid Pixie Dust using a paint brush (I covered 4 clouds with only 2 drops, and while the picture doesn't show it well, they are heavily covered in sparkles). Next, I took my Tag #1 die from The Stamp Doctor, and die cut my sentiment, which I stamped in Catherine Pooler Mandarin Spice ink. I mounted my card onto a gold foiled base from Michaels.

I hope that you've enjoyed my take on "Stick Together" and cannot wait to see what you dream up with this set! The entire Kindred Stamps March release will be available Friday, March 22nd at 8am PST/11am EST. Be sure to check out the Kindred Stamps blog on Friday for the full product release as well as the complete line up of all the Kindred Stamps Design Team projects from release week! If you visit and comment on all of the designers' blogs this week, you could win $15 in Kindred Stamps shop credit! So join the Fan Club and release event, show the design team some love, and get ready to empty those wallets this Friday!

~R. Winn