Sunday, March 7, 2021

Seas the Day with i-crafter

Hello again friends,

It's Rachel Winn showing off my take on the new i-crafter Borders & Edges dies. I love this knot looking die and had this thin corkboard material that would easily represent rope when die cut.

To make my card feel more nautical, I used the Layered Shell Sentiment stamp set to create a background. Now, I'm not amazing with layered stamp sets, but this sets is pretty darn forgivable, and even though my stamping wasn't perfect, I love how ended up. I kept the colors soft and simple so that the die stood out well.

I finished the card off with a the simple sentiment "Seas the day" from the Layered Shell Sentiment set.


There are 3 other awesome dies in the i-crafter Borders & Edges set and I plan on using them all! Time just got away from me before today's post, so be sure to keep an eye on my Instagram to see them when I get the chance to play.

If you’d like to follow me, here is my blog, Instagram, and Facebook page. Be sure to join the i-crafter Facebook Fan Club, then follow us on Instagram, and Pinterest too! Don't forget to include this month's Anything Goes Challenge hashtag #icrafterMar21  to enter our giveaways. We love seeing all of your creations using the i-crafter products!

Until next time,
Rachel

Monday, March 1, 2021

i-crafter Prize Ribbons

 It's release day at i-crafter and I had fun playing with the new Prize Ribbon dies!

I started by creating a Prize Ribbon for my BFF, Molly. She loves candy and I found this super cute patterned paper from Queen and Co. in my stash that reminded me of her. This was my first attempt at the Prize Ribbon, so there was a little bit of a learning curve when I tried to glue the folds together (don't do that!) The key to making these look perfect on the front is cutting an extra center circle out and gluing it to the back of the face to hold it all in place.


I used different paper from the same pad for each piece of the ribbon and decided to add Doodlebug Sprinkles to the top add a bit of sparkle. In order to make my bottom ribbons kinda wavy, I used the round handle of the i-Press tool to curl the papers in different directions. 


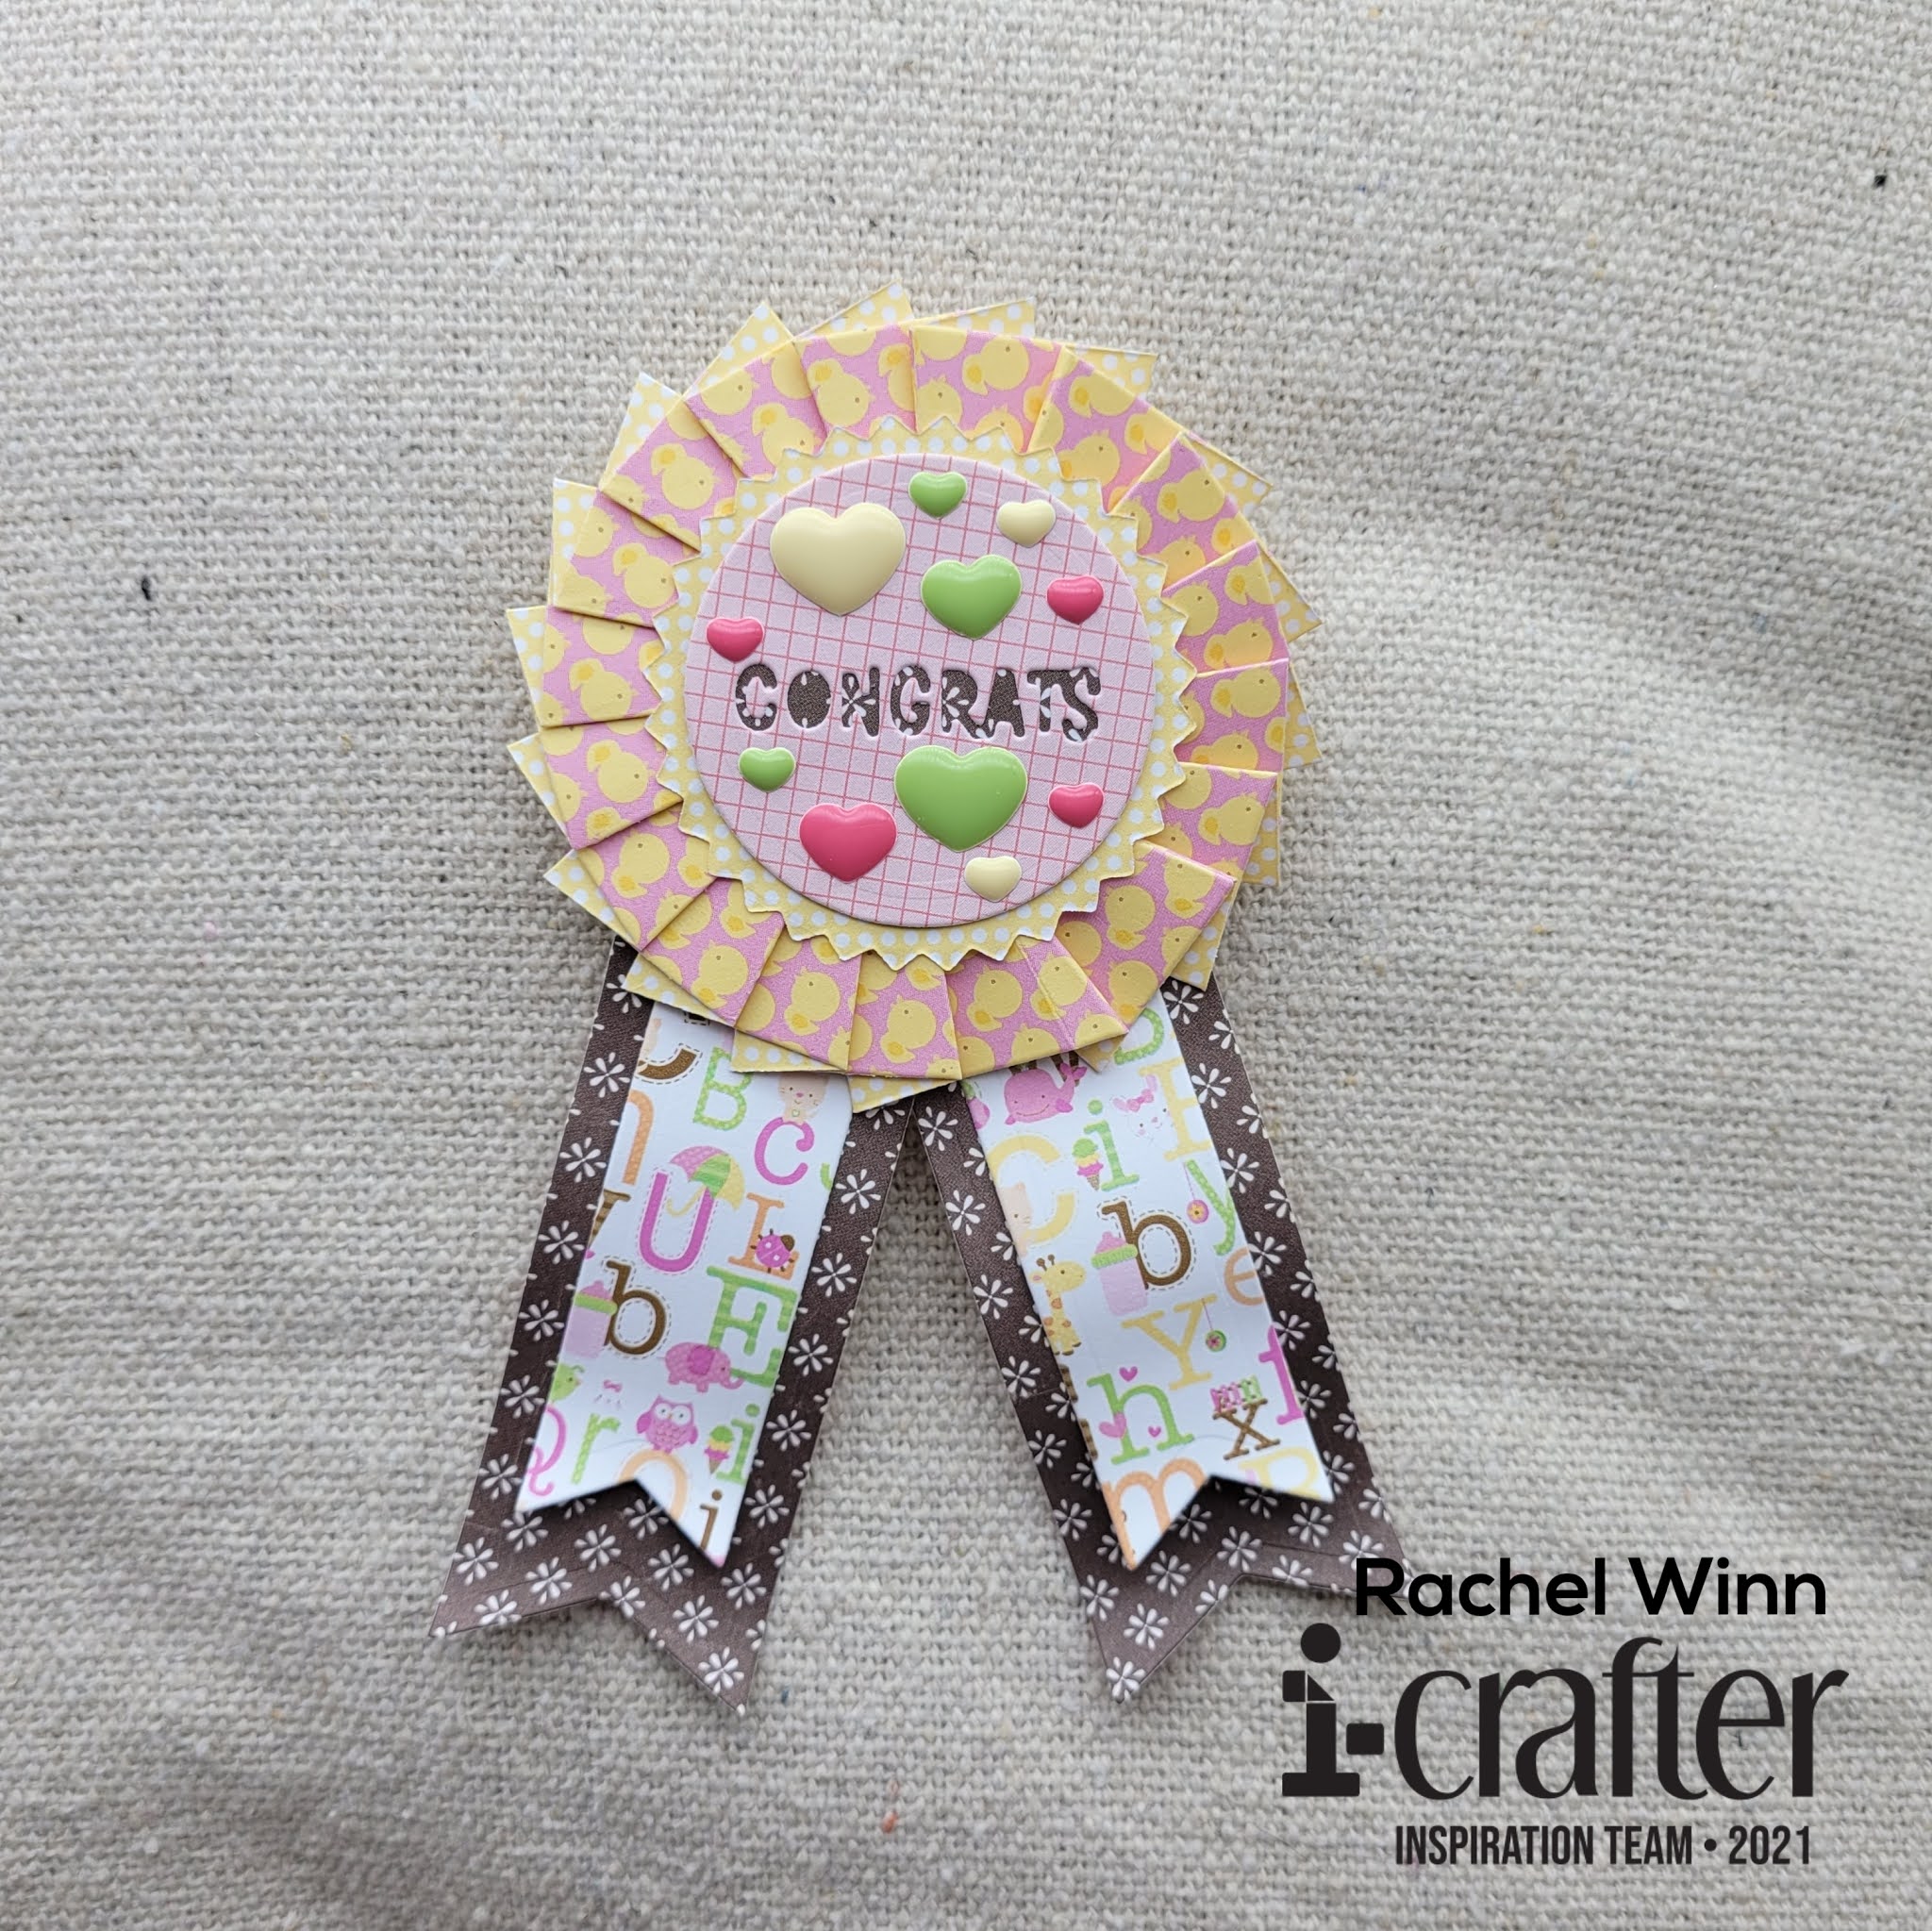
My next Prize Ribbon is intended for a momma-to-be who is a baby girl! I think this would be SO cute pinned to a dress at a baby shower. I loved this ducky paper that I found to use, the only hard part was keeping them facing the "right" way since you need 3 of the piece that gets folded to create the back part. All in all, I think it turned out pretty sweet!


I used some heart enamel "dots" to embellish this time. I also cut word in the circle instead of using the cut negatives; this added another layer to my ribbon center and let me tie the brown from the bottom ribbons into the top half of the project. 


My last Prize Ribbon is for a momma-to-be expecting a baby boy! This one is probably my favorite. Again, I used the same ducky patterned paper, this time with a blue backing.


I used solid enamel dots this time, no sparkles here! I also used the negative cut out letters. I used the brown paper again to pick up the brown in the lettered paper. I also got a little more brave with my curling and exaggerated the curve more. It looks REALLY nice in person.


I wanted my ribbons to be functional, so I reached out to my local secondhand craft store (yes, it's a thing, and yes it's awesome!), Lost and Found Crafts, to see if she had any pin backings that are often used for jewelry making. I used some thin foam tape to adhere the backings to my ribbons. Plus, I got a big bag of the backings for future projects for super cheap!


This was way outside my norm, but these Prize Ribbons are so cute and easy to put together, I can see creating them for all sorts of events! Plus, I have plans to used the pieces to create a card as well, this ends up being a really versatile set when you look at the pieces individually then put them together differently than they were meant for.


We have five new die sets that are all begging to come home with you this month! Be sure to head over and grab them at i-crafter. Be sure to join the i-crafter Facebook Fan Club, then follow us on Instagram, and Pinterest too! We love seeing all of your creations using the i-crafter products.

Until next time,
R. Winn

Wednesday, February 17, 2021

Making Faces with i-crafter's Hello Flower

Hello friends!


Today, I am showing off a really fun pairing of i-crafter's new Hello Flowers die set and their Making Faces die set! I wanted to make something bright and playful with these sets.


When I first started cardmaking, I can remember going to a class that we did a card by stamping "happy birthday" over and and over with different colors, like a waterfall. I though that this "Hello" die would be fun to mimic that technique with. I am a little extra though so I used scraps of glitter paper for my "Hello"s and went from light to dark, layering them just slightly. I backed them in a dark purple cardstock to give some contrast.


Next, I started making my faces! The Making Faces die set has a ton of fun options, I used a sandy colored cardstock, for the two faces. Then I used fun, lightly colored patterned paper for the hair. For the bow and glasses, I used the same yellow glitter paper from the middle "hello". Faces without eyes kinda freak me out so I used a thin marker to add closed eyes to the girls.


My last piece was making a few of the rosettes from the Hello Flower die set. I didn't add the leaves underneath because I wanted to keep them simple. It was a bit of trial and error but I ended up with 3 of varying size and they finished the card off nicely.


I think it is a nice addition to my card stash. I hope that you enjoy it as much as I do!
If you’d like to follow me, here is my blog, Instagram, and Facebook page. Be sure to join the i-crafter Facebook Fan Club, then follow us on Instagram, and Pinterest too! We love seeing all of your creations using the i-crafter products.

Until next time,

Rachel