Showing posts with label Patterned Paper. Show all posts

Thursday, May 27, 2021

Encouraging Matchbox Stories

Hello again friends!

I am excited to share two projects I created pairing i-crafter's Ribbon Rosette Funny Add-On dies & Matchbox Stories dies! The idea behind the Matchbox Stories is that you can give a little pocket-sized message to someone, or keep it for yourself.
 

My first Matchbox, I pulled out some origami paper that I picked up at Dasio in Seattle forever ago to create a sweet outer sleeve for the box. I then used the Ribbon Rosette, Funny Add-On die that says "did my BEST" to cut a sparkly cardstock from a friend's wedding invite. It was way too pretty to just toss! I used the negative letters instead of the full circle. These were glued to the top of the sleeve.


For the base of the Matchbox, I cut out a pretty raspberry pink. I added another piece of the origami paper to the bottom interior of the box. Last, I added a few acrylic roses that have sat in my stash for years.


This box is for me, to help me remember that no matter what life throws my way, I am doing my best, and to try to stay positive in the face of adversity!


My next Matchbox, seems a bit snarky, but I promise, it's filled with so much love. One of my favorite people in the whole world, has a lot of social anxiety. That being said, they push the boundaries of their comfort zone for the people they love often and have to cope at social gatherings despite the fact that they'd rather be home crafting.


She is self-proclaimed as "Socially Awkward" so the Ribbon Rosette, Funny Add-On for this box was really easy to pick! After cutting the words out, I used the oval die from the Matchbox Stories set to cut out the topper for this box.


I used Catherine Pooler's Happy Hearts Slimline Patterned Paper pack for the sleeve purple sleeve and yellow box base. My friend LOVES color and these heart filled papers just make me smile. Once my Matchbox was built, I added small crystal pieces that are intended to encourage positive energy, protection, health, love, and confidence. This will be easy for her slip into her pocket or purse for those uncomfortable social situations.


Be sure to join the i-crafter Facebook Fan Club, then follow us on Instagram, and Pinterest too! We love seeing all of your creations using the i-crafter products so don't forget to tag us or use #icrafter when you share!

Until next time,
Rachel Winn

Wednesday, February 17, 2021

Making Faces with i-crafter's Hello Flower

Hello friends!


Today, I am showing off a really fun pairing of i-crafter's new Hello Flowers die set and their Making Faces die set! I wanted to make something bright and playful with these sets.


When I first started cardmaking, I can remember going to a class that we did a card by stamping "happy birthday" over and and over with different colors, like a waterfall. I though that this "Hello" die would be fun to mimic that technique with. I am a little extra though so I used scraps of glitter paper for my "Hello"s and went from light to dark, layering them just slightly. I backed them in a dark purple cardstock to give some contrast.


Next, I started making my faces! The Making Faces die set has a ton of fun options, I used a sandy colored cardstock, for the two faces. Then I used fun, lightly colored patterned paper for the hair. For the bow and glasses, I used the same yellow glitter paper from the middle "hello". Faces without eyes kinda freak me out so I used a thin marker to add closed eyes to the girls.


My last piece was making a few of the rosettes from the Hello Flower die set. I didn't add the leaves underneath because I wanted to keep them simple. It was a bit of trial and error but I ended up with 3 of varying size and they finished the card off nicely.


I think it is a nice addition to my card stash. I hope that you enjoy it as much as I do!
If you’d like to follow me, here is my blog, Instagram, and Facebook page. Be sure to join the i-crafter Facebook Fan Club, then follow us on Instagram, and Pinterest too! We love seeing all of your creations using the i-crafter products.

Until next time,

Rachel

Monday, February 1, 2021

Unicorn Pop-Up Oval Card with i-crafter New Release

I absolutely LOVE the card I am sharing with you today! i-crafter has a fantastic new release today, I am showing off the new Box Pops Oval Base die and Box Pops Unicorn Add-On!

These fun dies fit into a normal A2 envelope and can be combined in so many neat ways.


I started by die cutting the unicorn out from Sweet Sentiment's white paper, it's got a faint shimmer to it and is Copic friendly, so it lends well to coloring a unicorn! I chose shades from the Violet family of Copic markers to color the unicorn. I used a silver marker to color the horn. I used a fabric backed sheet of glitter to cut out the unicorn's mane and tail.


Next, I built my base, the Box Pops Oval Base die got cut out twice, from this adorable cloud paper that I wish I could remember the brand of. I thought it would be super cute for the unicorn to be walking on clouds and this paper was perfect for that.


As I assembled the box, I added the star inserts from the Box Pops Unicorn Add-On to the the base. The stars were cute from white glitter paper. I saved the little stars that ended up as a by product of the inserts to add around the sentiment.


I used the "stay magical" sentiment dies from the Box Pops Unicorn Add-On die set for the sentiment and cut it out of some silver mirrored cardstock. I finished the card off by adding several large silver mirrored cardstock stars and little white glitter paper stars using the Box Pops Unicorn Add-On die set.


Personally, I think this creation is straight up magical! I hope that you think so too! Head over to i-crafter to get the new Box Pops Oval Base and Box Pops Unicorn Add-On die sets, and check out the other wonderful new release items too! Be sure to join the i-crafter Facebook Fan Club, then follow us on Instagram, and Pinterest too! We love seeing all of your creations using the i-crafter products.

Until next time,
R. Winn

Wednesday, January 20, 2021

i-crafter Cherry Blossom Box Two Ways

 Hello again friends!

I am showing off the new i-crafter Cherry Blossom Box two different ways today!

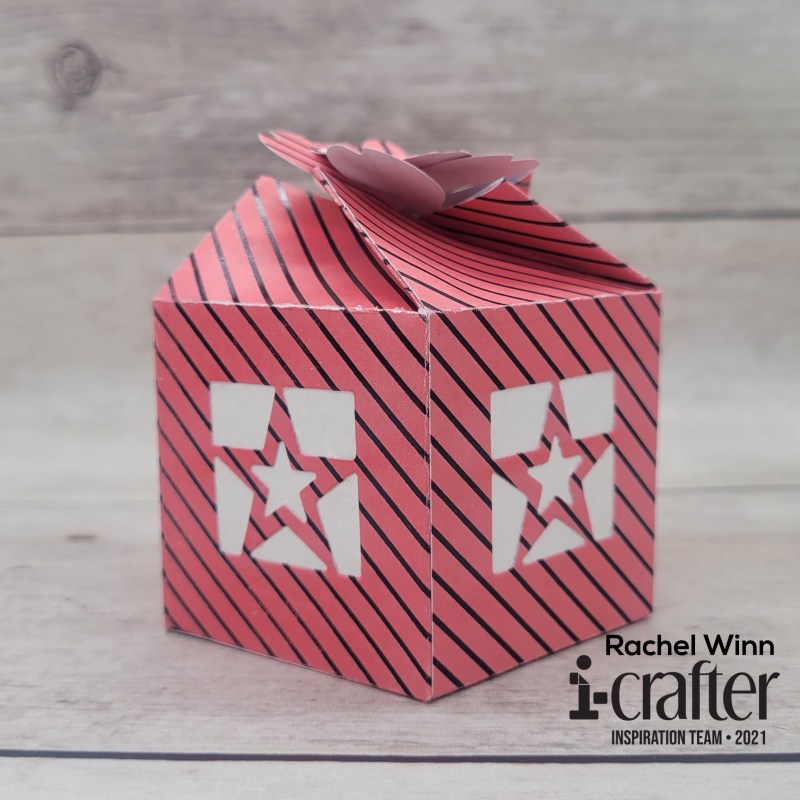
My first project is using the i-crafter Cherry Blossom Box dies and adding an insert from the Zip Gift Tag die set! This fun pink & black patterned paper seemed like a great chance to create a luminary of sorts.

The star from the Zip Gift Tag die set played nicely with the fun paper. I backed the stars with some light weight paper, it may have been rice paper, but it was from a friend's stash so I'm not positive!

I added one of the cherry blossoms from the Cherry Blossom Box set to the top pedals of the box to help it stay closed. I layered the pink with black stripes, the white paper, and then a yellow paper to create a beautiful cherry blossom.

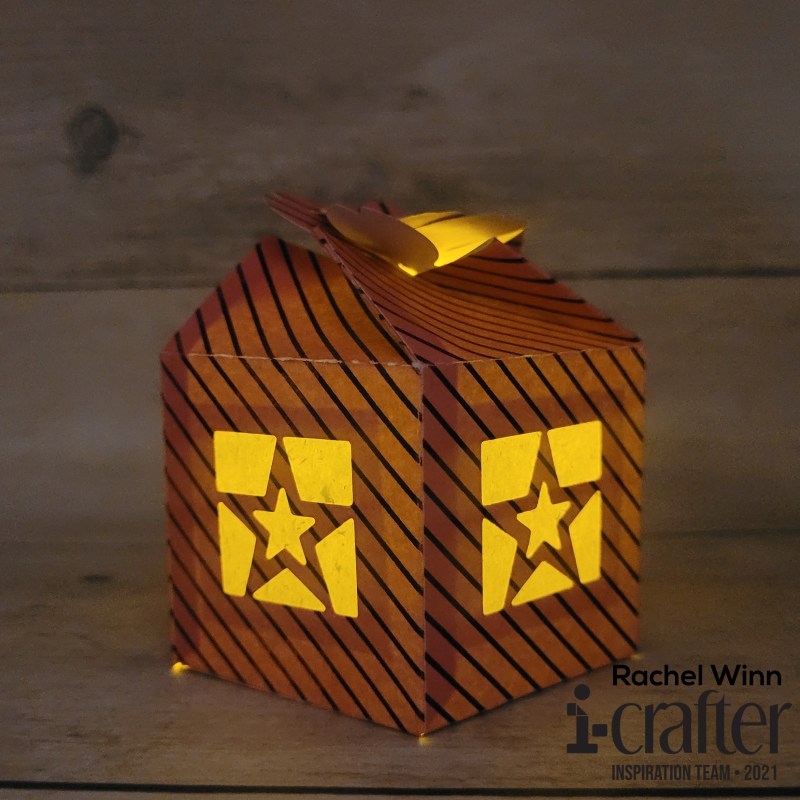
Here it is all lit up! I used a battery operated tea light to light it up safely. I love the effect from the lights and the star inserts really gave it a fun, rather than traditional feel.

Even the top is gorgeous lit up.

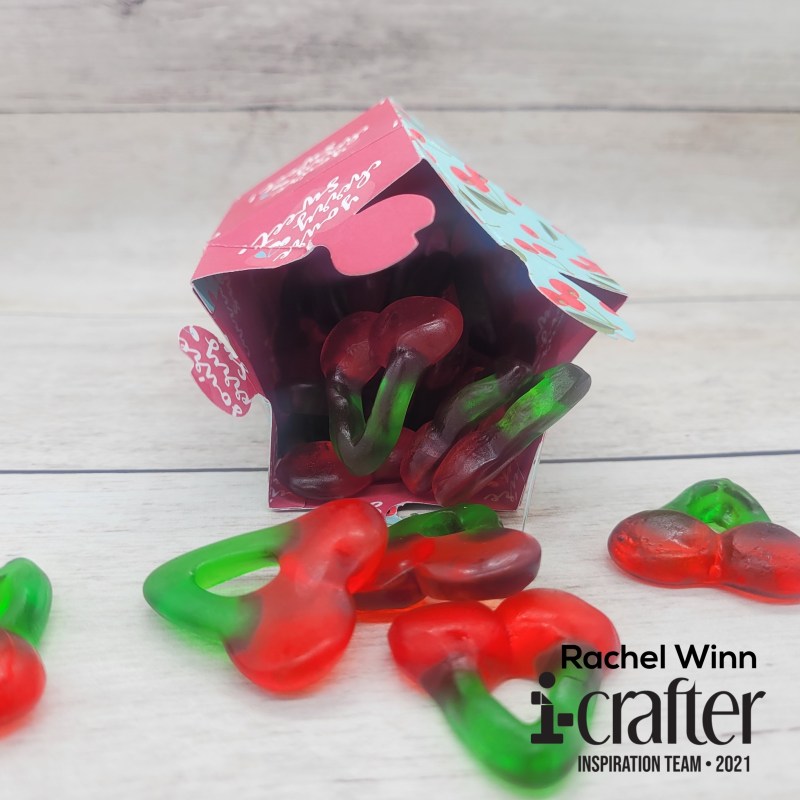
My next Cherry Blossom Box is a candy box! My best friend LOVES candy and had all this gorgeous patterned paper that played well creating a candy box for her with some gummy cherry candy.

The paper that I used was double-sided. I started with the red side, featuring this cute "You're cherry sweet!" saying and cut out one panel with that saying centered. I then cut out 4 more panels using the blue background covered in cherries.

I filled my Cherry Blossom Box with cherry gummy candies.

I added just a single die cut stamina to the top petals to help keep it closed.

I hope you enjoyed my take on the i-crafter Cherry Blossom Box! Be sure to join the i-crafter Facebook Fan Club, then follow us on Instagram, and Pinterest too! We love seeing all of your creations using the i-crafter products.


Until next time,

Rachel

Sunday, January 3, 2021

Koi Pillow Boxes by Rachel Winn

 Hello friends,

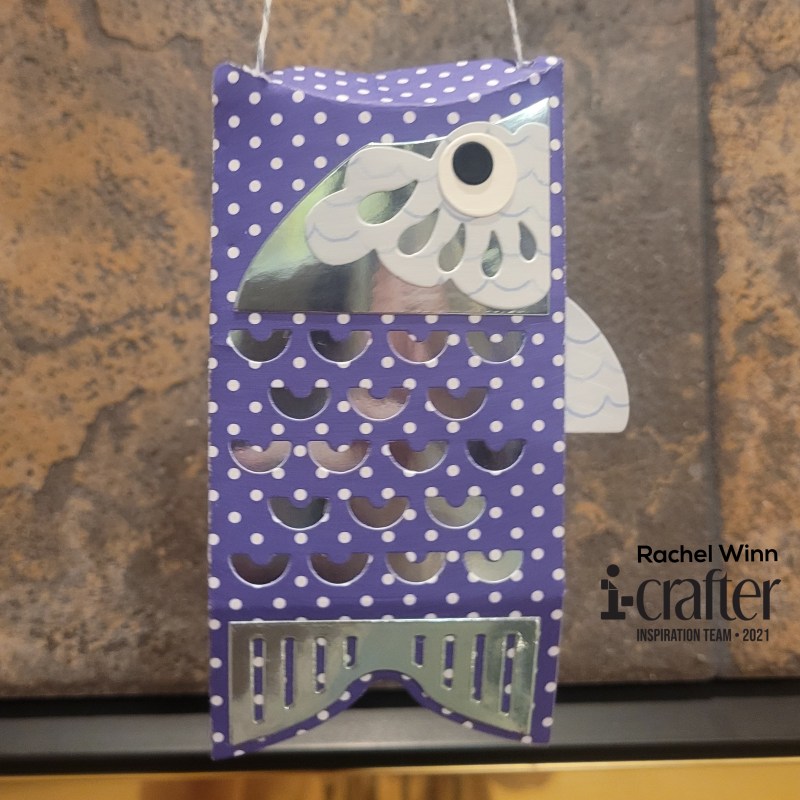
I am excited to be joining the i-crafter Inspiration Team! Today, I am showing you my take on the new i-crafter Koi Pillow Box die set! I spent some time researching what different colors meant in Japanese culture, and used that as the inspiration in the colors I used. I settled on creating fish that were blue, black, and gold.

I started with the blue Koi Pillow Box, blue representing peace and tranquility, seemed like an excellent hidden meaning to a gift. I decided on using a combination of patterned papers, and a pretty shiny metallic paper. For the body, I used a 6"x6" dotted patterned paper. I decided that I wasn't a fan of the gills being open, so I backed the gills with a piece of the metallic paper. I used the same metallic paper for the back of the face and the tail fin. For the top fin and front, kinda frilly piece of the face, I used a paper that looked like waves to me. I finished with plain white paper for the eyeball, and plain black for the pupil.

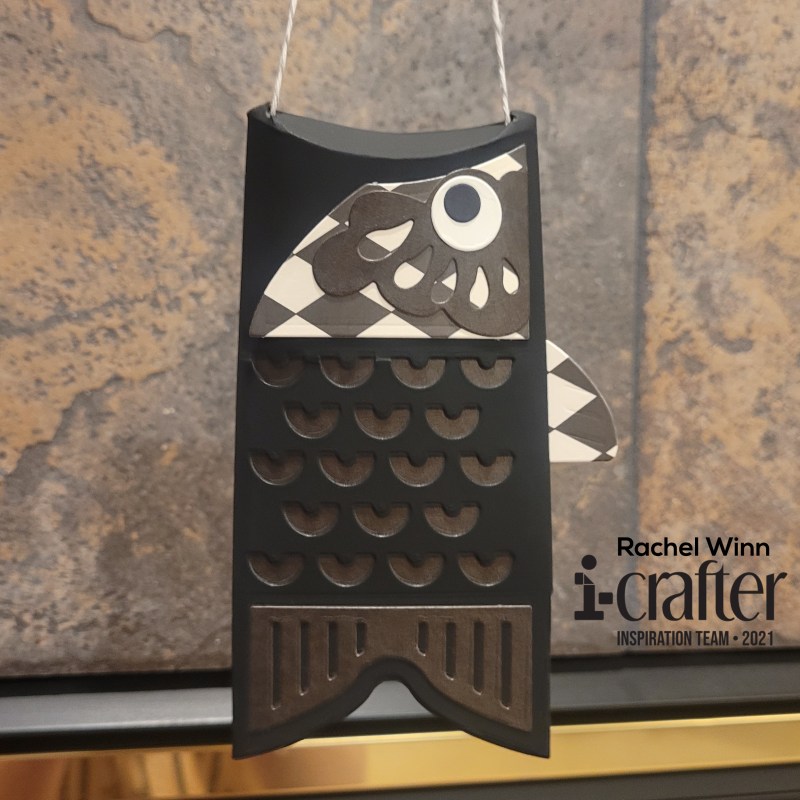
My next Koi Pillow Box is black, which represents overcoming an obstacle, which is another excellent time to receive a gift. I started with a black chalkboard cardstock, this cardstock has a bit of a smooth, soft texture to it, and is really nice and thick. Next, I used a cardstock that was black on kraft paper for behind the gills, the top of the face, and the tail fin. The back of the face and the top fin, I used a black and white diamond patterned paper, I chose this to break up the black a touch since I didn't have 3 different shades of black papers to use. I used the same white for the eyeball and black for the pupil as on the first fish.

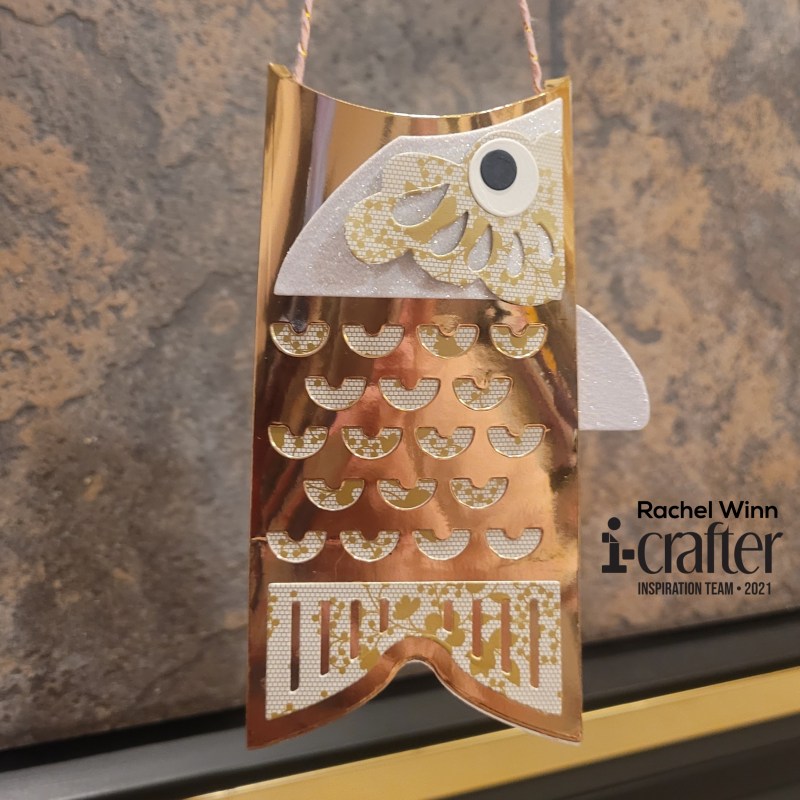
My final Koi Pillow Box is gold, which represents wealth and fortune. For this, I used a metallic gold cardstock for this one, it is thicker and would handle a little more weight than the regular cardstock fishies! I found a gold lace/floral patterned paper to use behind the gills, top face piece, and tail fin. For the bottom face piece and top fin, I used a white glitter paper. I finished this one up with the same white eyeball and back pupil.

I hope you've enjoyed my take on this fantastic die set and look forward to seeing how you create some fishes! If you'd like to follow me, here is my blog, Instagram, and Facebook page. Be sure to join the i-crafter Facebook Fan Club, then follow us on Instagram, and Pinterest too! We love to see your creations using the i-crafter products.


Until next time,

Rachel