Thursday, January 28, 2021

Kindred Stamps Earth Day Birthday Card!

Hi friends!

I am excited to share my card showing off the new Kindred Stamps Earth Day stamp set. I love these little robots and wanted to let them have a little fun in space for my cards.

I began by coloring them with Copic markers. For the white robot, I used VERY light colors in the Blue and Cool Gray families to create a  light shadow affect for her body. Then I covered her face with Nuvo Crystal Glaze I fussy cut both robots out and used a black water-based marker on the edges.


Next, I created a space background with watercolors, I used a mixture of brands, but was really impressed with the new colors I got recently from HydraColour. I used a mixture of different white watercolors to make some little "clouds" like the yellow robot was being propelled by something. I mounted my watercolored background onto a black card base.

I stamped the binary "happy birthday" and "(Happy Birthday)" sentiments from Earth Day onto the Squiggle Mat Die from Stamp Anniething and trimmed it down to put on the top corner of my watercolored background. I used a black paper and stamped in Hero Arts Unicorn Ink. I was pretty pleased with the way it stamped since this was my first time using this ink.


I popped my robots up on some thin foam tape and placed them on the card. To finish my card off, I added some clear droplet pieces from the Unicorn Legend Shimmerz to embellish the card. It's hard to photograph but the card is covered in a fine shimmer creating a magical affect.


The new Kindred Stamps Earth Day set will probably end up being my favorite stamp set ever! I love these sweet little robots and the sentiments are super fun, I chose the happy birthday sentiments because I seem to always be short on birthday cards. I look forward to see what you create with these cuties when they make it to your craft room.

The entire Kindred Stamps January release will be available Friday, January 29 at 8am PST/11am EST. Be sure to subscribe to the Kindred Stamps blog to see a daily line up of sneak peeks from our amazing Design Team and see the full product release on Friday! Come join the Fan Club and release event to be part of the release fun, and you may just win some Kindred Stamps credit!!

Until next time,

~R. Winn

Wednesday, January 20, 2021

i-crafter Cherry Blossom Box Two Ways

 Hello again friends!

I am showing off the new i-crafter Cherry Blossom Box two different ways today!

My first project is using the i-crafter Cherry Blossom Box dies and adding an insert from the Zip Gift Tag die set! This fun pink & black patterned paper seemed like a great chance to create a luminary of sorts.

The star from the Zip Gift Tag die set played nicely with the fun paper. I backed the stars with some light weight paper, it may have been rice paper, but it was from a friend's stash so I'm not positive!
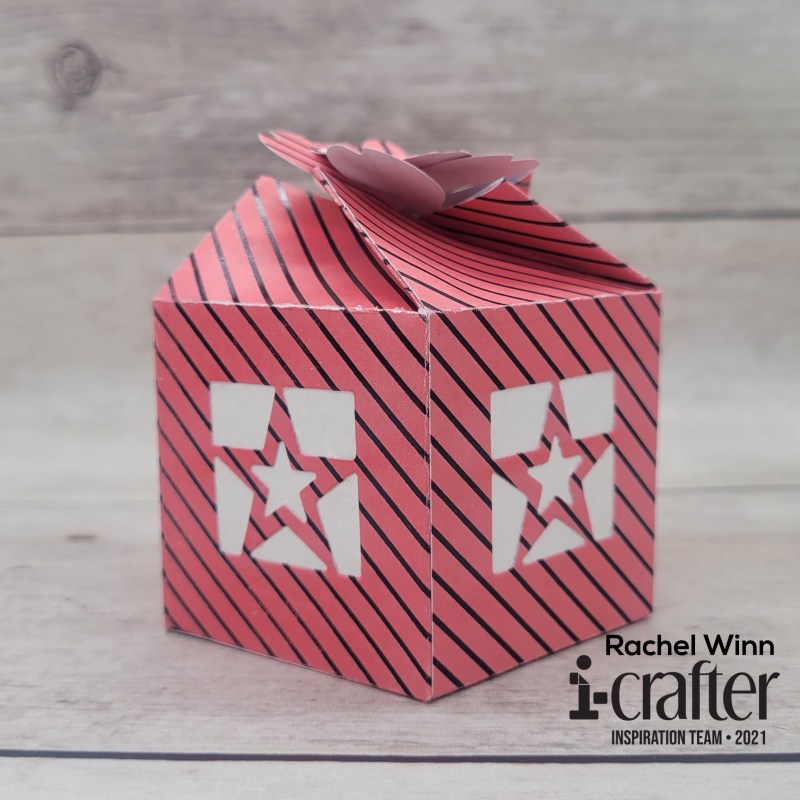
I added one of the cherry blossoms from the Cherry Blossom Box set to the top pedals of the box to help it stay closed. I layered the pink with black stripes, the white paper, and then a yellow paper to create a beautiful cherry blossom.

Here it is all lit up! I used a battery operated tea light to light it up safely. I love the effect from the lights and the star inserts really gave it a fun, rather than traditional feel.
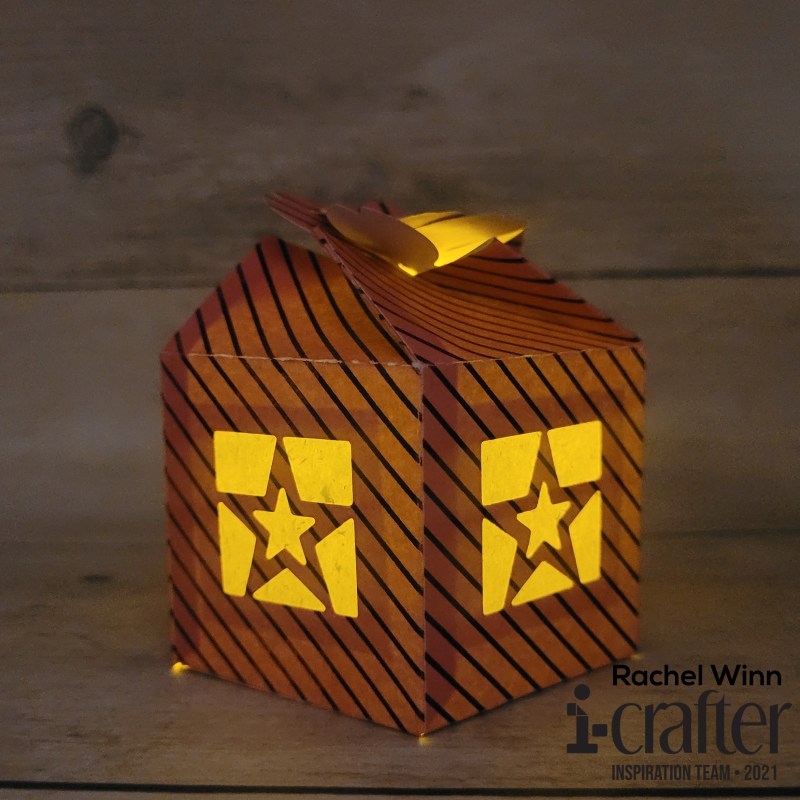
Even the top is gorgeous lit up.

My next Cherry Blossom Box is a candy box! My best friend LOVES candy and had all this gorgeous patterned paper that played well creating a candy box for her with some gummy cherry candy.

The paper that I used was double-sided. I started with the red side, featuring this cute "You're cherry sweet!" saying and cut out one panel with that saying centered. I then cut out 4 more panels using the blue background covered in cherries.

I filled my Cherry Blossom Box with cherry gummy candies.
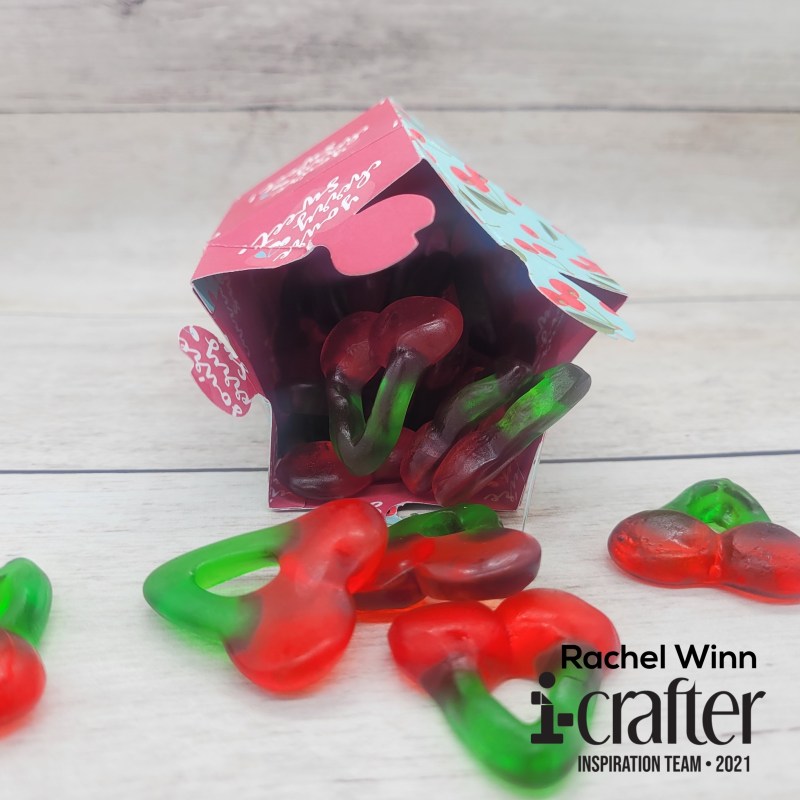
I added just a single die cut stamina to the top petals to help keep it closed.

I hope you enjoyed my take on the i-crafter Cherry Blossom Box! Be sure to join the i-crafter Facebook Fan Club, then follow us on Instagram, and Pinterest too! We love seeing all of your creations using the i-crafter products.


Until next time,

Rachel

Sunday, January 3, 2021

Koi Pillow Boxes by Rachel Winn

 Hello friends,

I am excited to be joining the i-crafter Inspiration Team! Today, I am showing you my take on the new i-crafter Koi Pillow Box die set! I spent some time researching what different colors meant in Japanese culture, and used that as the inspiration in the colors I used. I settled on creating fish that were blue, black, and gold.

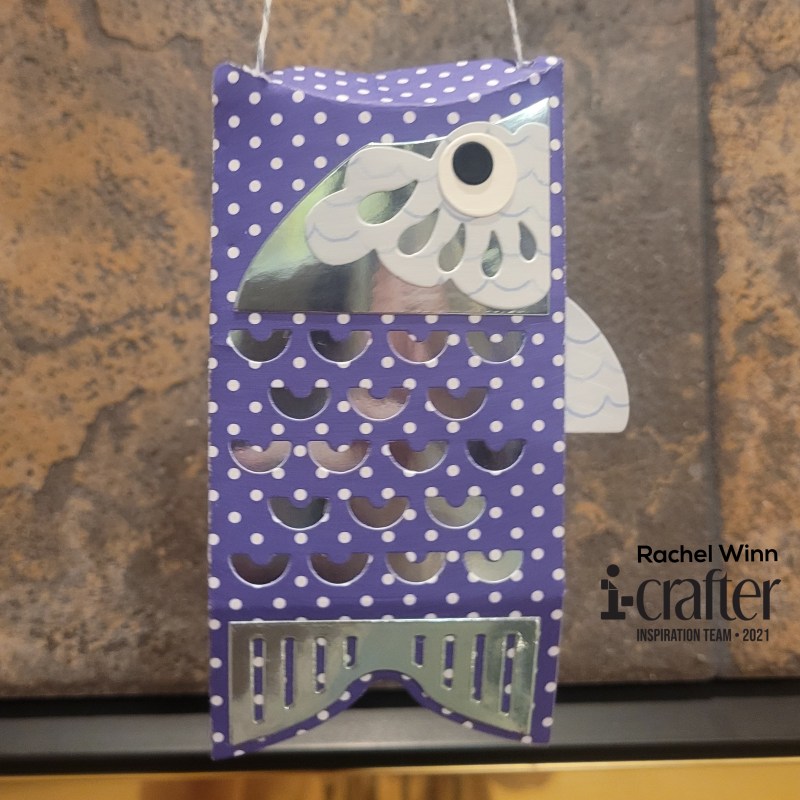
I started with the blue Koi Pillow Box, blue representing peace and tranquility, seemed like an excellent hidden meaning to a gift. I decided on using a combination of patterned papers, and a pretty shiny metallic paper. For the body, I used a 6"x6" dotted patterned paper. I decided that I wasn't a fan of the gills being open, so I backed the gills with a piece of the metallic paper. I used the same metallic paper for the back of the face and the tail fin. For the top fin and front, kinda frilly piece of the face, I used a paper that looked like waves to me. I finished with plain white paper for the eyeball, and plain black for the pupil.
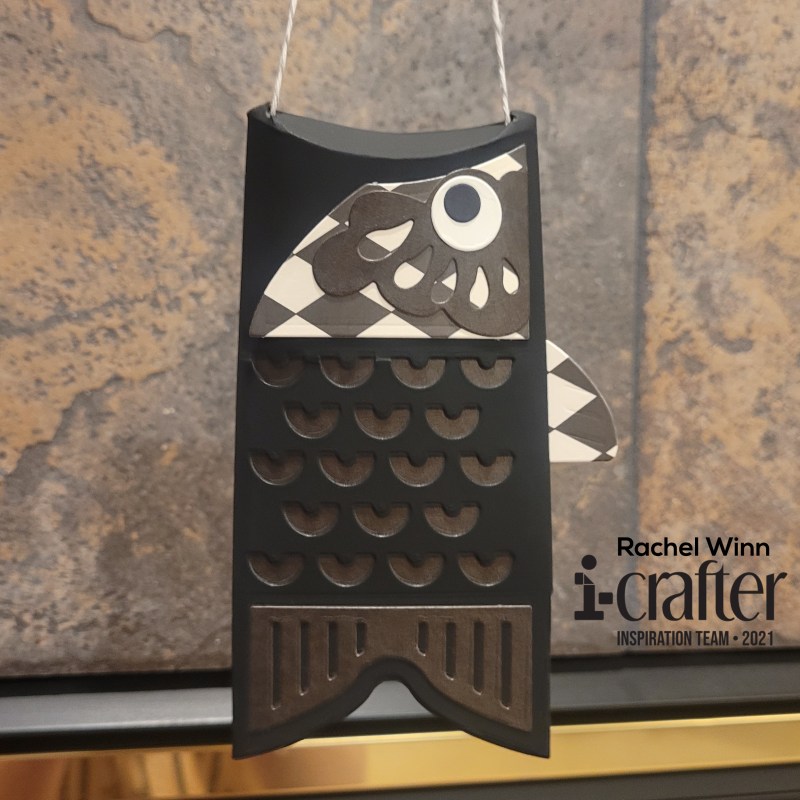
My next Koi Pillow Box is black, which represents overcoming an obstacle, which is another excellent time to receive a gift. I started with a black chalkboard cardstock, this cardstock has a bit of a smooth, soft texture to it, and is really nice and thick. Next, I used a cardstock that was black on kraft paper for behind the gills, the top of the face, and the tail fin. The back of the face and the top fin, I used a black and white diamond patterned paper, I chose this to break up the black a touch since I didn't have 3 different shades of black papers to use. I used the same white for the eyeball and black for the pupil as on the first fish.
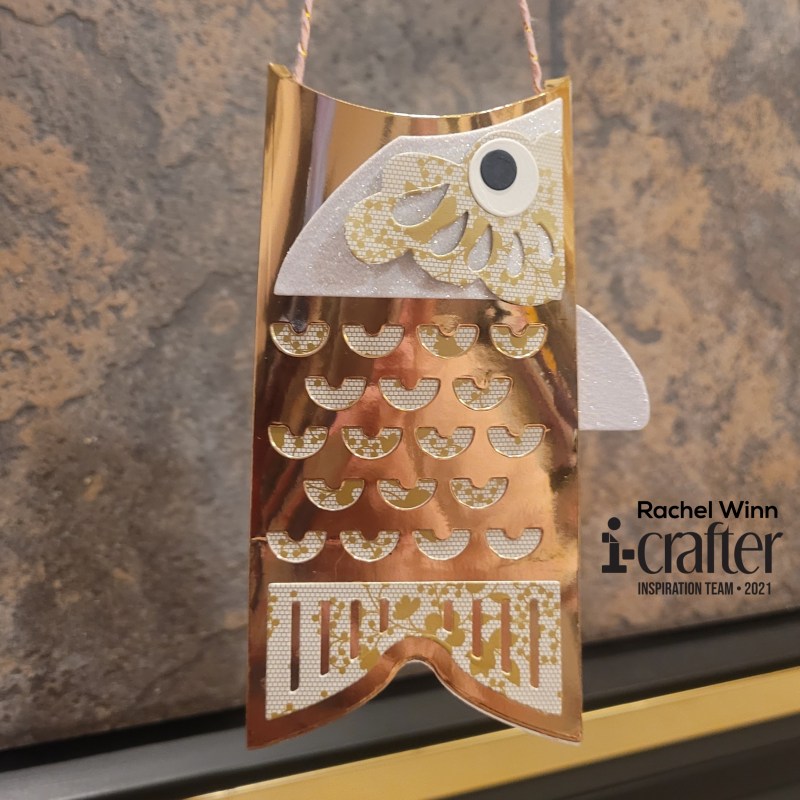
My final Koi Pillow Box is gold, which represents wealth and fortune. For this, I used a metallic gold cardstock for this one, it is thicker and would handle a little more weight than the regular cardstock fishies! I found a gold lace/floral patterned paper to use behind the gills, top face piece, and tail fin. For the bottom face piece and top fin, I used a white glitter paper. I finished this one up with the same white eyeball and back pupil.
I hope you've enjoyed my take on this fantastic die set and look forward to seeing how you create some fishes! If you'd like to follow me, here is my blog, Instagram, and Facebook page. Be sure to join the i-crafter Facebook Fan Club, then follow us on Instagram, and Pinterest too! We love to see your creations using the i-crafter products.


Until next time,

Rachel

Friday, January 1, 2021

i-crafter Kokeshi Dress Up Scrapbook Page

I am so excited to to join the i-crafter Inspiration Team! 

Today, we are releasing a whole new line of Japan inspired products. This line up is gorgeous and SO much fun to create with! I am showing off a scrapbook page that I made for my sister-in-law using the new i-crafter Kokeshi Dress Up Dolls.  Her sister and nieces live in Japan, and these little dolls were perfect to use on a page to remind her of them.


First, I cut the pieces of the dolls' body and hair from plain Copic paper and then used Copic markers to color them up. For the skin, I used E21, E11, E13, E15, & E04 with R22 for the blush. I used E27, E77, E47, E37, & E57 for the hair. 


I used mostly papers from HAI Direct and a few scraps for the doll clothes and added shadows to them using Copic Gray W01, W0, & W00. I added foam tape behind the draped part of the sleeves to add some dimension. On the red paper, it is harder to see the shadows, but on the white paper, it shows up more!


I backed the girls with some pretty, sparkly blue paper and hand cut a trim around them. I used a purple cardstock to back the photos of the girls. 

 I used pieces from the i-crafter Mini Album, Accordion die set to create a little notebook page with the same purple cardstock that I had backed the photos of the girls with. Next, I took the i-crafter Alphabet, Carly dies and spelled out "Auntie Charissa's Little Girls" in a shiny, holographic cardstock. I backed the notebook page with a piece of thin foam to give it some dimension.


My final touch was a trio of Cherry Blossoms from the i-crafter Cherry Blossom Bursts dies to add some delicate embellishments to the page. 

I absolutely love the Japan inspired products in the January i-crafter release. Lynda used her heritage and family history to bring us such beautiful things to create with. Be on the look out for more creations from me using them later this month!

You can shop all the new arrivals here! Be sure to join the i-crafter Facebook Fan Club, then follow us on Instagram, and Pinterest too! We love to see your creations using the i-crafter products.

Until next time,

R. Winn