Sunday, January 3, 2021

Koi Pillow Boxes by Rachel Winn

 Hello friends,

I am excited to be joining the i-crafter Inspiration Team! Today, I am showing you my take on the new i-crafter Koi Pillow Box die set! I spent some time researching what different colors meant in Japanese culture, and used that as the inspiration in the colors I used. I settled on creating fish that were blue, black, and gold.

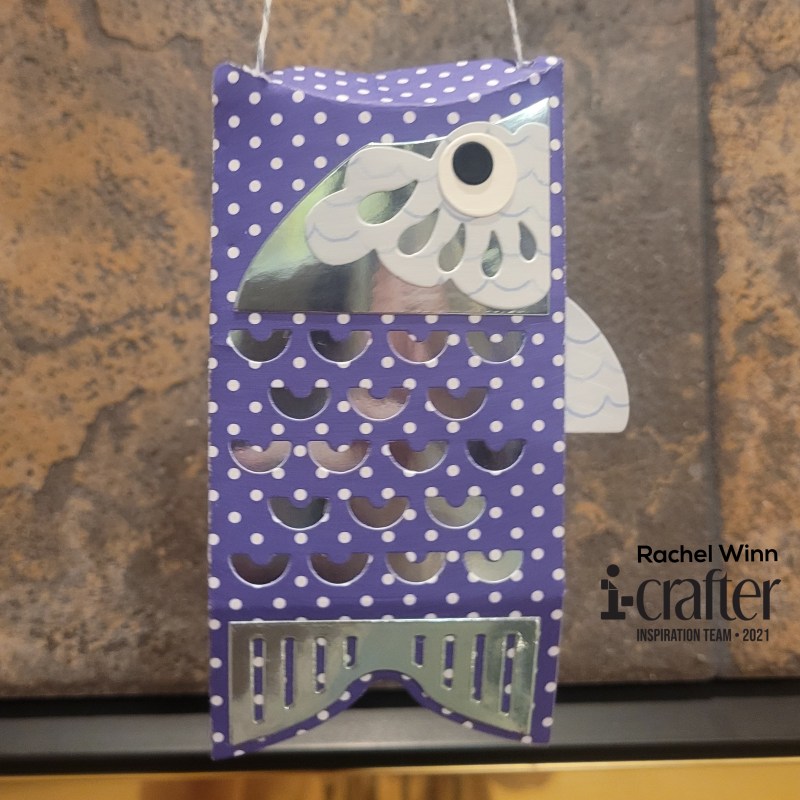
I started with the blue Koi Pillow Box, blue representing peace and tranquility, seemed like an excellent hidden meaning to a gift. I decided on using a combination of patterned papers, and a pretty shiny metallic paper. For the body, I used a 6"x6" dotted patterned paper. I decided that I wasn't a fan of the gills being open, so I backed the gills with a piece of the metallic paper. I used the same metallic paper for the back of the face and the tail fin. For the top fin and front, kinda frilly piece of the face, I used a paper that looked like waves to me. I finished with plain white paper for the eyeball, and plain black for the pupil.
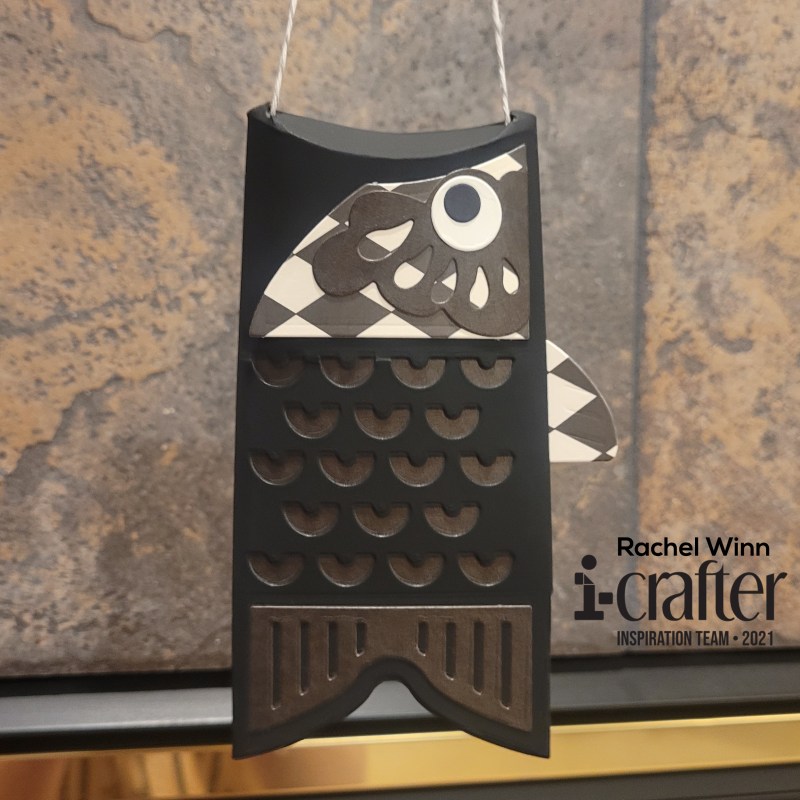
My next Koi Pillow Box is black, which represents overcoming an obstacle, which is another excellent time to receive a gift. I started with a black chalkboard cardstock, this cardstock has a bit of a smooth, soft texture to it, and is really nice and thick. Next, I used a cardstock that was black on kraft paper for behind the gills, the top of the face, and the tail fin. The back of the face and the top fin, I used a black and white diamond patterned paper, I chose this to break up the black a touch since I didn't have 3 different shades of black papers to use. I used the same white for the eyeball and black for the pupil as on the first fish.
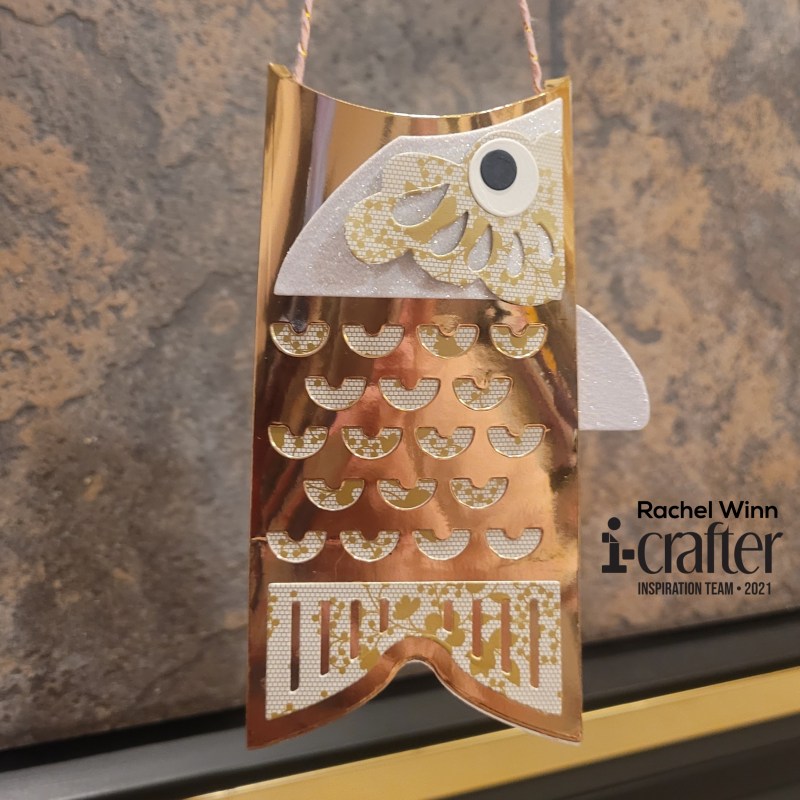
My final Koi Pillow Box is gold, which represents wealth and fortune. For this, I used a metallic gold cardstock for this one, it is thicker and would handle a little more weight than the regular cardstock fishies! I found a gold lace/floral patterned paper to use behind the gills, top face piece, and tail fin. For the bottom face piece and top fin, I used a white glitter paper. I finished this one up with the same white eyeball and back pupil.
I hope you've enjoyed my take on this fantastic die set and look forward to seeing how you create some fishes! If you'd like to follow me, here is my blog, Instagram, and Facebook page. Be sure to join the i-crafter Facebook Fan Club, then follow us on Instagram, and Pinterest too! We love to see your creations using the i-crafter products.


Until next time,

Rachel

Friday, January 1, 2021

i-crafter Kokeshi Dress Up Scrapbook Page

I am so excited to to join the i-crafter Inspiration Team! 

Today, we are releasing a whole new line of Japan inspired products. This line up is gorgeous and SO much fun to create with! I am showing off a scrapbook page that I made for my sister-in-law using the new i-crafter Kokeshi Dress Up Dolls.  Her sister and nieces live in Japan, and these little dolls were perfect to use on a page to remind her of them.


First, I cut the pieces of the dolls' body and hair from plain Copic paper and then used Copic markers to color them up. For the skin, I used E21, E11, E13, E15, & E04 with R22 for the blush. I used E27, E77, E47, E37, & E57 for the hair. 


I used mostly papers from HAI Direct and a few scraps for the doll clothes and added shadows to them using Copic Gray W01, W0, & W00. I added foam tape behind the draped part of the sleeves to add some dimension. On the red paper, it is harder to see the shadows, but on the white paper, it shows up more!


I backed the girls with some pretty, sparkly blue paper and hand cut a trim around them. I used a purple cardstock to back the photos of the girls. 

 I used pieces from the i-crafter Mini Album, Accordion die set to create a little notebook page with the same purple cardstock that I had backed the photos of the girls with. Next, I took the i-crafter Alphabet, Carly dies and spelled out "Auntie Charissa's Little Girls" in a shiny, holographic cardstock. I backed the notebook page with a piece of thin foam to give it some dimension.


My final touch was a trio of Cherry Blossoms from the i-crafter Cherry Blossom Bursts dies to add some delicate embellishments to the page. 

I absolutely love the Japan inspired products in the January i-crafter release. Lynda used her heritage and family history to bring us such beautiful things to create with. Be on the look out for more creations from me using them later this month!

You can shop all the new arrivals here! Be sure to join the i-crafter Facebook Fan Club, then follow us on Instagram, and Pinterest too! We love to see your creations using the i-crafter products.

Until next time,

R. Winn

Thursday, October 29, 2020

Highlander Travels through Standing Stones

Hello friends!


I am excited to show off the new Kindred Stamps Highlander Travels Stamp Set. This is such a fun set and the people are so fun to color up. I colored each of them up with a combination of PrismaColor and Chameleon colored pencils. I don't use gamsol like a lot of folks, but I do occasionally use a PrismaColor Blender pencil.


The first gentleman, I turned into a English Captain with the fun hat that is included in this set. Next, I used the Kindred Stamps Distress Brick Stencil with Catherine Pooler Twilight and Black Jack Inks. For this card, I used i-crafter's Flip Card, Dashed Circle die. I used the small circle to die cut a piece of the brick paper. 


I used a sheet of paper that has text on it for one side of the flip and then for the other side a sheet that looked like a fancy wallpaper. Next, I added the word "legendary" on the front.


My final touch was a sentiment from Kindred Stamps Villainous Sentiments underneath the flap.


My next card is a little simpler, I used a fancy oval die to cut out the new Kindred Stamps Standing Stones Craft Die then ink blended using Catherine Pooler Inks. I added a second oval out of a dark blue patterned paper that looks a night sky. I stamped and heat embossed "dinna fash" from the Kindred Stamps Highlander Travels Stamp Set which means "don't stress" or "don't worry".


My last card had this beautiful family from the Kindred Stamps Highlander Travels Stamp Set in front of the Kindred Stamps Standing Stones Craft Die

I created a blue sky with fluffy clouds using The Stamp Doctor's Cloud Dies and green grass using their Grass Edger Dies. All of this was layered over a sheet from an Echo Park paper pad that reminded me of burlap. 


My last touch for the card was stamping the "Anything is Possible with Family" sentiment from Kindred Stamps Highlander Travels Stamp Set on the same burlap looking paper, and layering that with the same green from the grass for the interior of the card!


The entire Kindred Stamps October release will be available Friday, October 30 at 8am PST/11am EST. Be sure to subscribe to the Kindred Stamps blog to see a daily line up of sneak peeks from our amazing Design Team and see the full product release on Friday! Come join the Fan Club and release event to be part of the release fun, and you may just win some Kindred Stamps credit!!

Thank you for visiting today, I hope that you enjoyed my take on this set.

~R. Winn