Showing posts with label Halloween. Show all posts

Sunday, October 31, 2021

Halloween Wreath with the i-crafter Folded Maple Leaf

 Happy Halloween Witches and Warlocks!

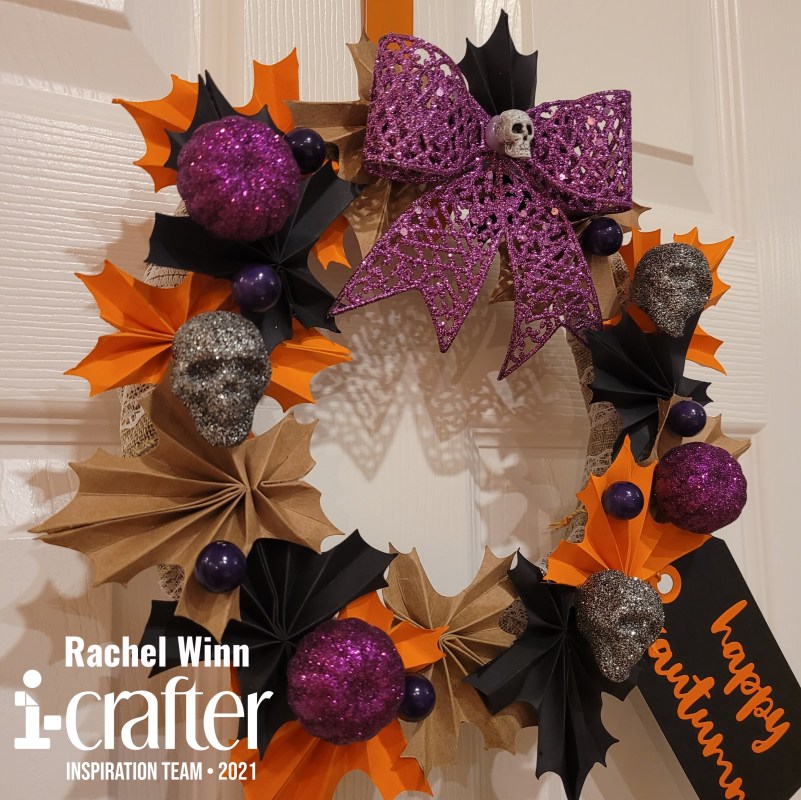
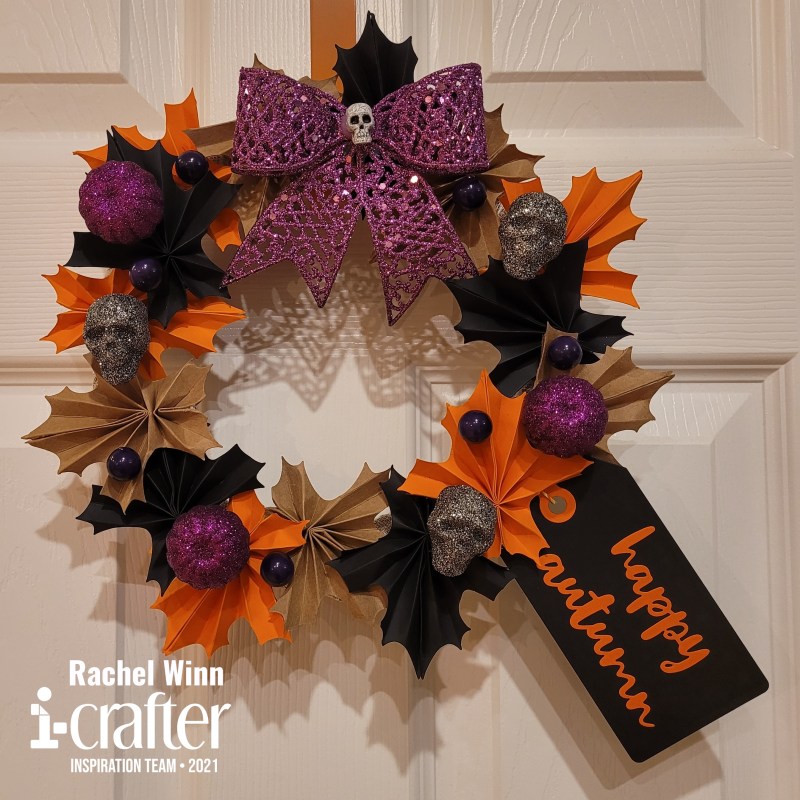
I am so excited to show you the Halloween Wreath that I created using i-crafter's Folded Maple Leaf die set and Tags and Labels die set! My best friend, Molly, and I made this project together, she helped save me time and energy by folding and burnishing the leaves using the i-Press while I die cut them, glued them, and then adhered them to my wreath frame. I used a solid black cardstock, kraft cardstock, and orange cardstock for the Folded Maple Leaves, I cut out at least 5 of each color. 
 

When gluing the leaves, I used a small clothes pin embellishment and a binder clip to keep the sides together while the glue dried, normally I use my i-Grip tweezers to do this job, but I had forgotten them at home when I left to visit for Molly and Evan's birthdays! 
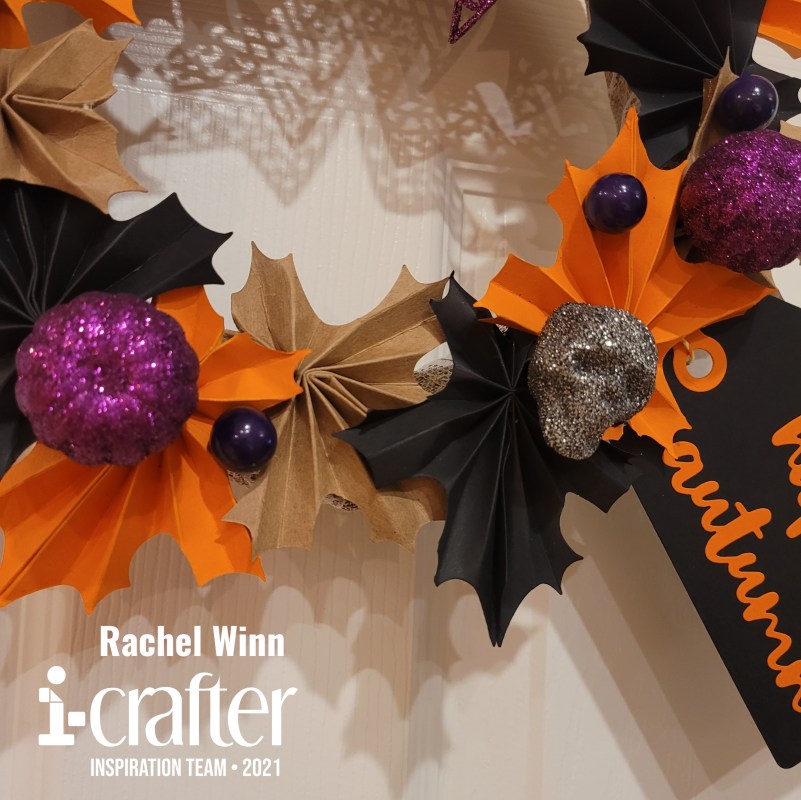
Once I had several leaves glued together, I started to build my wreath, I used a frame from the Dollar Tree wrapped in a burlap and lace ribbon from the Dollar Tree as well. I wanted a solid base that if there were any gaps didn't look funky, no random chunks of green spoiling my project! Next, I used hot glue and glued down my leaves. I wanted to turn them every which way and overlap them as I went.
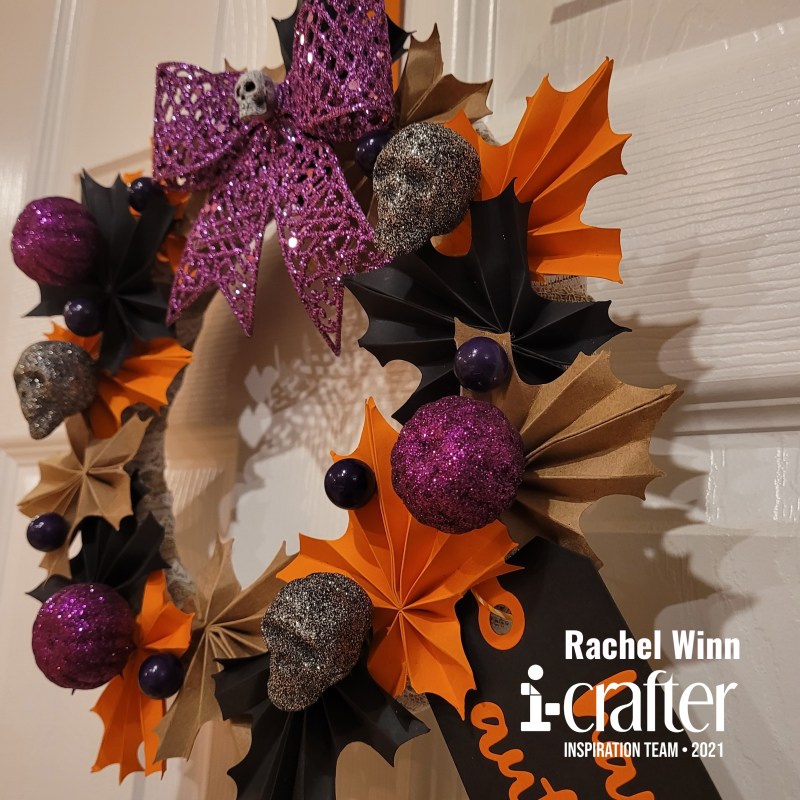
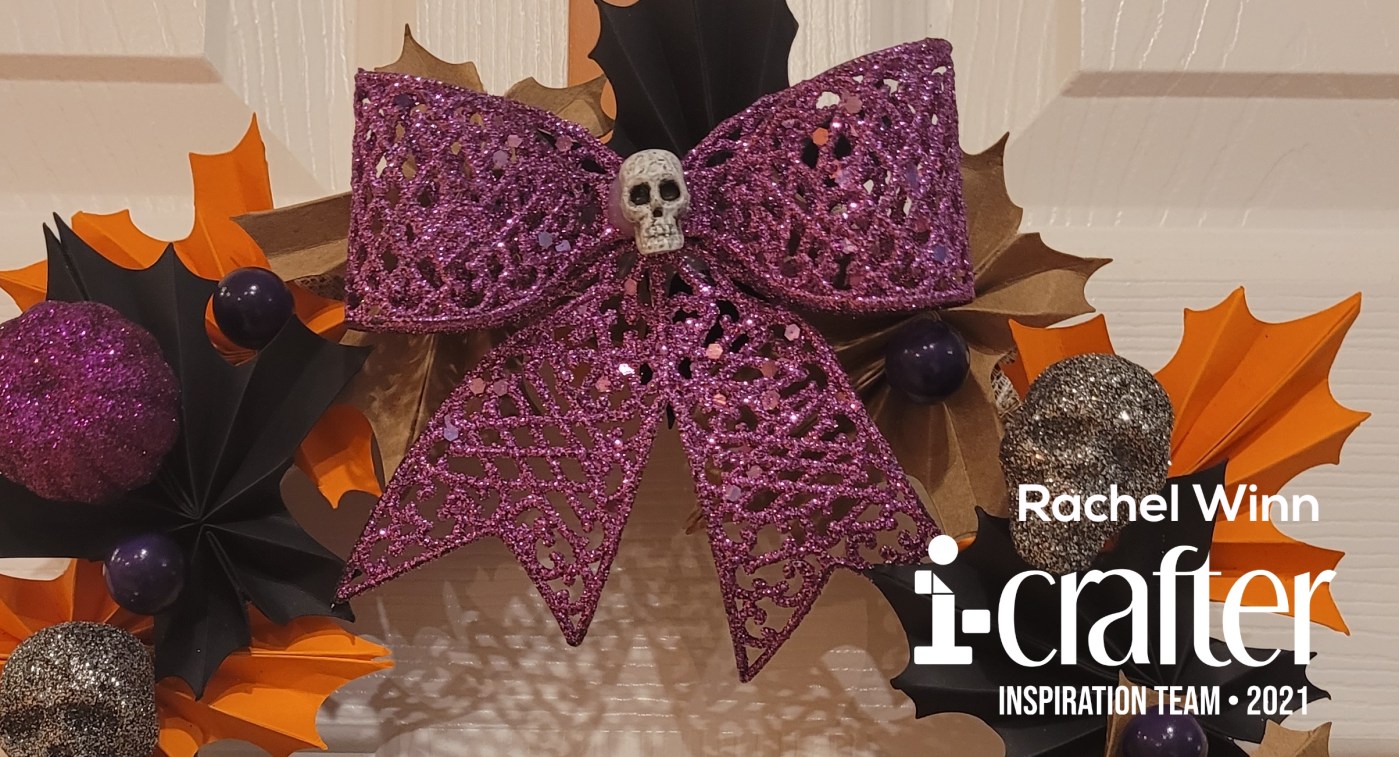
After the leaves were all in place, I began adding the embellishments that I had picked up at the Dollar Tree. I started with a purple ribbon with a skull in the center at the top of the wreath. Then I used purple pumpkins, silver skulls, and purple berries mixed all over the wreath.
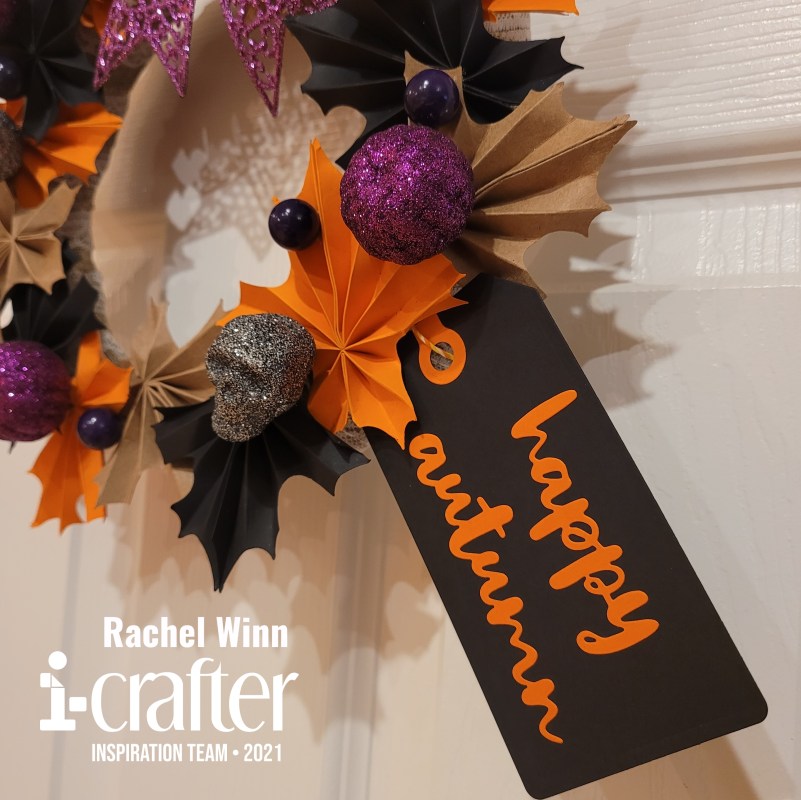
My last piece was to add a "Happy Autumn" tag! The Folded Maple Leaf die set has a beautiful cursive "Happy Autumn" that I though would look so nicely added to the wreath. I thought about putting it on a wooden tag or sign of some sort, then realized that the Tags and Labels die set would be the perfect addition to this project. So, I cut the largest tag out of black cardstock, and cut out the hole reinforcers and the sentiment out of the same orange as the leaves. I used orange and yellow twine to tie it onto the wreath form.
This project was so simple and it was so much fun to make with Molly! It could be done for any holiday or just for fun. I hope that you enjoyed my take on i-crafter's Folded Maple Leaf die set and Tags and Labels die set

If you’d like to see more of my projects, you can follow me here: Instagram, and Facebook page.
 
Until next time,
Rachel
 
For more inspiration, updates, and news make sure to check out these awesome places!
 
 
Thank you so much for stopping by today!

Monday, September 27, 2021

A-Haunting We Will Glow!


Welcome to the A-Haunting We Will Glow Collab Hop with i-crafter and Pear Blossom Press! We're sharing spooky sweet projects for Halloween. Featuring interactive dies from i-crafter, and with help from Pear Blossom Press, they all really light up! Be sure to hop along with us for lots of inspiration; we’ve come up with some brilliant cards. Let me show you mine...

I started with the i-crafter Halloween Treat Lantern dies and a Graphic 45 Halloween Paper Pad. I decided the purple paper would work nicely for my lantern. I used the spiderweb insert for the i-crafter Halloween Treat Lantern and then cut a piece of 2.25"x2.25" piece of vellum to back the spiderweb with. I lightly covered the exterior of the frame and the web strings with Art Glitter Glue to attach the vellum. 


Next, I added the haunted house from the i-crafter Tunnel Card, Halloween Add-On die set cut out of black cardstock. I trimmed it down so that it fit to in the lantern and added it behind the vellum, again attaching it with Art Glitter Glue. I knew that I wanted the lights to shine through the windows so I pried the shutters back into the lantern a bit. After I had the haunted house attached, I flipped it over and used Pear Blossom Press's White Essential Gel Pen to write "Press Me" and drew an arrow to where I planned to place the button for my EZ-Lights to light up my project.


I used a Large Zots to secure the Power Pack of the EZ-Lights to the back of the Lantern, then used Small Zots to position my lights. 


To give me a little more control of the placement, I first wrapped the Zot around the wire just below the LED light, then positioned the light above the window or door, and firmly pressed down to secure the light's position. This allowed me better control of where the light was pointed than simply placing the light on the Zots like I have in the past. 


I used the same technique to secure the wires as they traveled down the back of the haunted house to the Power Pack. Typically I do this with washi tape since I have so much of it on hand, but in order to have a lower chance of them showing the Zots seemed to be a better choice to me.


Finally, to secure the extra length of wire on each string, I gathered it all up and used washi tape to secure it to the Power Pack of the EZ-Lights.


 It was hard to get a good picture of these "guts" because my camera kept trying to focus on one piece or another!


I decorated the front of the lantern last, I die cut the pumpkin from the i-crafter Tunnel Card, Halloween Add-On die set out of orange glitter cardstock and backed it with a small piece of black cardstock. I glued this over the button on the EZ-Lights.


The last piece was the ghost from the Tunnel Card, Halloween Add-On die set, I die cut it out of a White Flock Sheet backed with Foam Adhesive. I backed the ghost's face with a small piece of black cardstock as well. I used a black jewelry cord to create a loop that would allow me to hang this from a door knob or hook.


I love the finished look. It's really neat both unlit and lit up!


Here is a short video showing it light up as well!


Now, be sure you keep hopping to be inspired further by the i-crafter Inspiration Team and the wonderful ladies joining us from Pear Blossom Press. Here is the hop line up:
Rachel Winn (You are here)
Cassie Trask (Next Stop)

Every good hop has prizes, right? So i-crafter, and Pear Blossom Press are each giving away a $25 store credit! Comment on this post by October 4, 2021 to be entered to win. Winners will be announced on October 8th. Ready for more inspiration? Amanda from Pear Blossom Press will be live on YouTube today, and Lynda from i-crafter will be live on Facebook today at 11:00am. Be sure to tune in!

Thanks for stopping by,
R. Winn

For more inspiration, updates, and news make sure to check out these awesome places!


Thank you so much for stopping by today!

Wednesday, September 1, 2021

Monster Party with i-crafter!

It's release day with i-crafter and that means I have something spooky to share! I got to play with the new Impossible Box, Monster die set and created 3 fun projects to inspire you!

We'll start with my favorite, I'm calling this one a coffin. I used the pieces meant to create a mummy to create the coffin. I created different colored by smushing multiple shades of Catherine Pooler brown inks onto a sandy colored cardstock. I spritzed the cardstock, sponged some color off with a towel then blow dried it most of the way with my heat gun. Next, I used the Kindred Stamps Woodgrain stencil and dry embossed the cardstock to create a wood texture. 

I cut the mummy pieces out repeatedly, and added a few of the vampire hair pieces in as well (with the points covered by the other pieces.) My box was a darker solid brown. I covered all four sides and the bottom of the box with these panels layering them so they looked like a roughly built coffin. I chose to use red and white for the eyes to make them really POP out at you. The top I left as is so it didn't interfere with the open/close mechanism.

Next up is a fairly simple box! I used old Halloween patterned paper from a Graphic 45 paper pad to create a simple box, I added some bat sequins that I found in the dollar section at Target. I really love that this box can be used dressed up or stand-alone!


I wanted to show the box in use so I added a few of the bats to the inside... then spilled them out for effect. 


Last, we have the first box I created. I want to put the disclaimer out there that this was my learning curve box and it can be done much better than this one... but he's sure a cute little vampire either way!

I added details using Copic markers, using Cool Grays for his hair, blue to add details to his eyes, and red to color his lips. I added buttons to his vest and shirt with a fineliner.


The last few details may be a bit silly, but I thought they were fun. For his cape, I cut the shape out twice, once in black and once in red. I backed the red with the black, then used my i-Press tool's round handle to curl the edges of the cap inwards. 


I hope that you have enjoyed my project for today and can't wait to see how you use the new Impossible Box, Monster die set in the future!

Until next time,
R. Winn

For more inspiration, updates, and news make sure to check out these awesome places!

i-crafter
i-crafter Instagram
i-crafter Art Facebook Page
i-crafter Pinterest
i-crafter YouTube

Thank you so much for stopping by today!

Tuesday, October 8, 2019

Chilling Birthday Card

I played with the Kindred Stamps "Witch Please" Digital Stamps, ok, I only colored one but, still! I adore this chill dude and couldn't wait make a card with him on it. I didn't really know what I was doing until I did it, I'm not much for pre-planning my cards.

I started by trimming down a piece of watercolor paper that I used Catherine Pooler Color Burst on the night before. I ended up with a very magical looking piece, it reminds me of the colors you see shooting out of wands and fingertips in movies and tv shows involving witches and wizards. The trimmed piece I mounted onto a black card base.

Next, I cut out several pieces from The Stamp Doctor's Halloween Dies #1, in black and orange sparkly paper, and gold foiled paper. I decided these would make a fun filling for a shaker card!
I used Close to My Heart's Shaker die set and cut out a gray background and maroon front piece.


It was time to build my card! I placed my shaker housing over a darker piece of the background that I wasn't happy with, the CTMH kits have a foam circle to use for your cards, the piece is white so I colored the exterior with a gray marker so it doesn't stand out on the darker background. I put my die cut pieces in and added a bit of stardust sequins from Stamp Anniething into my circle. 

My sentiment was stamped onto the acetate using black Stazon Pigment ink (OMG, this is a must have ink!) I added my maroon circle to the front of the card to finish the shaker.  I add my chill dude to the right of the shaker. I finished my card off with 3 black glitter bats from The Stamp Doctor's Halloween Dies.

My shaker doesn't really shake, because I may have used a bit too much filling, but I still love how this card turned out.

Head over to The Stamp Doctor and use my coupon code "RWINNCREATES" for 10% off any and all items not already discounted!

 I hope you've enjoyed my card and will see you again soon!

Thank you,
~R. Winn