Saturday, June 20, 2020

Pear Blossom Press and HAI Supply Light Up Hop!

It's time to get inspired with Pear Blossom Press EZ- Lights and all sorts of goodies from HAI Supply!  HAI Supply has all sorts of amazing Washi Papers from Japan and fun new embellishments.  We are pairing them up with EZ-Lights today to really help them shine (pun intended!)


I decided to do an anime inspired card, so I began by coloring up "Moon Girl" from The Sassy Club using Copic Markers and stamped in Ink on 3's Fadeout Ink for a No Line colored image. I fussy cut around her and added a bit of Nuvo Glaze to the "button" on her backpack. She was set aside and I started building other pieces of the card. 

I had this vision of making i-crafter's Cherry Blossom Bursts light up, so I die cut the cherry blossoms twice, once from HAI's Japanese Handmade Washi paper, I chose a gorgeous blue sheet for my cherry blossoms. The second was from a scrap of red cardstock backed by i-stik adhesive. I also used HAI's Japanese Handmade Washi paper for the center's of the Cherry Blossoms, this time a soft yellow sheet and backed this with i-stik as well.  

After I built the Cherry Blossoms, I punched a hole in the center of each flower so that my lights could shine through. I used these holes to mark where I wanted to hole punch the background and where I wanted my EZ-Lights to be placed on the card base. Next, I put down glue dots to hold my EZ- Lights in place, and put my switch down at the bottom. I actually had to switch the way my switch was facing after I took this picture so that the battery can be swapped without killing the card completely. 


I used washi tape from HAI Supply to hold my wires in place. Then started using doubled up foam tape to build up around my cardbase so that I can place my background next. 


I did have to grab some washi tape that was a bit more heavy duty because my wires were being unruly. Before I adhered my background to the cardbase, I used a sheet of washi paper from the HAI Summer Cranes pack on the bottom part of the background sheet to give a separation from the top where my cherry blossoms would be. These washi sheets are smaller 4"x4" but are adhesive backed which is super handy!

I carefully lined up my pre-punched holes at the top of my base and firmly pressed my background on to the cardbase. Next, the colored up Moon Girl when in the bottom right of the corner. Over the button that controls the light switch, I used this amazing clay rainbow piece from HAI's Clay Rainbows and Clouds embellishment pack. The clay star that rests at the end of the rainbow wasn't quite big enough for me to stamp on (I tried) so I punched out a small star, stamped "Press Here" from Heffy Doodle's Interactively Your's stamp set on it and glued it on top of the existing star. I lined the star up over the switch and made sure it worked to turn my lights on and off, then used large glue dots to glue it down.


I added a sentiment from The Sassy Club's Moon Child which I added a bit of color to the moon and stars, die cut, covered in clear Wink of Stella, and added a bit of Nuvo Glaze to the moon. 

Then I took my Cherry Blossoms and curled ends of the patterned petals up and pressed the red pieces down after peeling the i-stik backing off and lining the punched holes over the holes in my background. Next, I added a yellow gem from HAI's Rainbow Sunbursts to the center of each Cherry Blossom.


My card was now fully built! I loved a certain anime when I was younger and was really inspired to mesh these gorgeous Japan Washi Papers with a girl who reminded me of the show. Then, lighting up the cherry blossoms reminded me of the magical elements that are in the show. I am in love with how it turned out!


All lit up! I waited until nighttime to take this picture so you can really see how well the the EZ-Lights really light up and shine through the gems!


Click here to try EZ-Lights, use coupon code EZSHIP4 for $4 off $25 or more!

https://pearblossompress.com/ez-light/?wpam_id=3


Finally, a little video to give the full effect of the lights!


Thank you for hopping along on the HAI Supply & Pear Blossom Press Collab Hop! For more inspiration, check out all of the stops in the hop...

Rachel Winn - you are here
Julie Ebersole - next stop

*** PRIZES ***
Hops are always more fun when there are prizes, right?? Four prizes will be awarded to four separate winners, chosen at random, from comments left on participating blogs and videos. Prizes include $25.00 gift codes from Pear Blossom Press, and $25.00 gift codes from HAI Supply. No purchase necessary. Comments must be posted by 11:59 pm PST on June 27, 2020. Only one comment per blog or video will be counted, but you can comment on multiple blogs and videos in the hop for additional entries. (This is to prevent spam.) Contest open internationally to participants over 18 years of age. Void where prohibited by law. Any personal information collected will only be used for the purposes of contacting winners, your information will never be shared or sold. Comments left on YouTube videos must not violate community guidelines. This contest is not sponsored by YouTube. Winners will be announced on July 6, 2020 at pearblossompress.com and prizes must be claimed within thirty days of announcement, or new winners will be drawn.

*** DISCOUNTS ***
One code, two stores! Enter discount code EZSHIP4 at checkout on Pear Blossom Press and HAI Supply for $4.00 off your total, on orders over $25.00 (before tax and shipping), valid until June 27, 2020. 


Until next time,
R. Winn

Thursday, June 18, 2020

i-crafter Meets Sassy & Crafty

I am so excited to show off my card for the i-crafter and Sassy and Crafty blog hop.  I used the Sassy and Crafty stamp set "Sassy Girls - Sweet" and colored them up really brightly inspired by neon colors and comic books using Copic Markers! 
Next, I created a background with Rina K Electro Pop inks. I started with the the i-crafter Cosmic Flare stencil and the red ink, I flipped it after the first coverage and used the orange ink next. I put the Sassy and Crafty Comic Book 2 Stencil down the center and used the yellow ink last. 

Next, I die cut "OMG" out of the top of the background using i-crafter's "Comic Words" dies, I cut the "OMG" out of black glitter paper as well. I covered the back of the background piece with acetate where the letters were cut out to create a window for my shaker card. Next, I took the outline of the black glitter letters and glued them inside the "OMG" of the background to give it a good anchor so you could see the shaker clearly; I also added the center piece of the "O" back in, I used my pieces and built the layers to place the center in the correct location.


In order to build a "box" with the foam tape for my shaker bits, I used a blender pencil to trace my "OMG" after I die cut it, that left a clear imprint of where the "OMG" would land on the card base. This was my guide as I used doubled up foam tape to build my box. I knew that I planned to use fine glitter in my mix, so I tried to make sure there was not any sort of gapping from one piece to the next. 

I filled my box with a mix of fine glitter from Tonic, and a shaker pack mix from Kindred Stamps. I tried to mix them together a bit before I closed my card up so that when I shook it, both showed through. I mayyyy have been a bit heavy handed with my glitter, maybe. I had already added foam tape around the rest of my card base, so I peel the backing off and lined my background up so that the box filled with glitter and bits showed through the "OMG" windows. 


It looked fantastic! I added my girls to the from of my card, then placed a few dome dot things from shaker packs that I got from Kindred Stamps over the from. I wanted to add a few more details to the girls. I touched up both of their lips with Clear Wink of Stella. For the girl on the right, I put Nuvo Crystal Glaze on her glasses, and cherry to add some shine. For the girl on the left, I wanted less dimension and just the shine to be added, so I took a fine paint brush and pained the Nuvo Crystal Glaze on the donuts. The pink donut, I had colored the sprinkles white with a white gel pen. The brown donut, I wanted the drizzled frosting to stand out in some way, I tried to color it with different gel pens and didn't love any of the results. Then I tried white Nuvo drops painted on with a fine paint brush, it wasn't perfect because the brush I had was a bit old and the bristles were spreading, but I was pleased with the results. I added the clear to the chocolate parts as well. 


Thank you for joining us for our fun collaboration between i-crafter and Sassy and Crafty! Each company will be giving away a $10 gift certificate to one lucky hopper. Be sure to visit each blog and comment by June 25th at 11:59 PM PST in order to enter. We hope you'll enjoy the comic inspired projects our teams have come up with. 

Rachel (You are here)

I hope that you've enjoyed my take on these fantastic products from i-crafter and Sassy and Crafty! Be sure to take a look at each store and find some goodies that need to come home with you.

Until next time, thank you!
~R. Winn


Monday, June 8, 2020

Scrap buster with i-crafter Hummingbird Happiness

Hello friends!

I have a card up on the i-crafter blog for the first time today! 

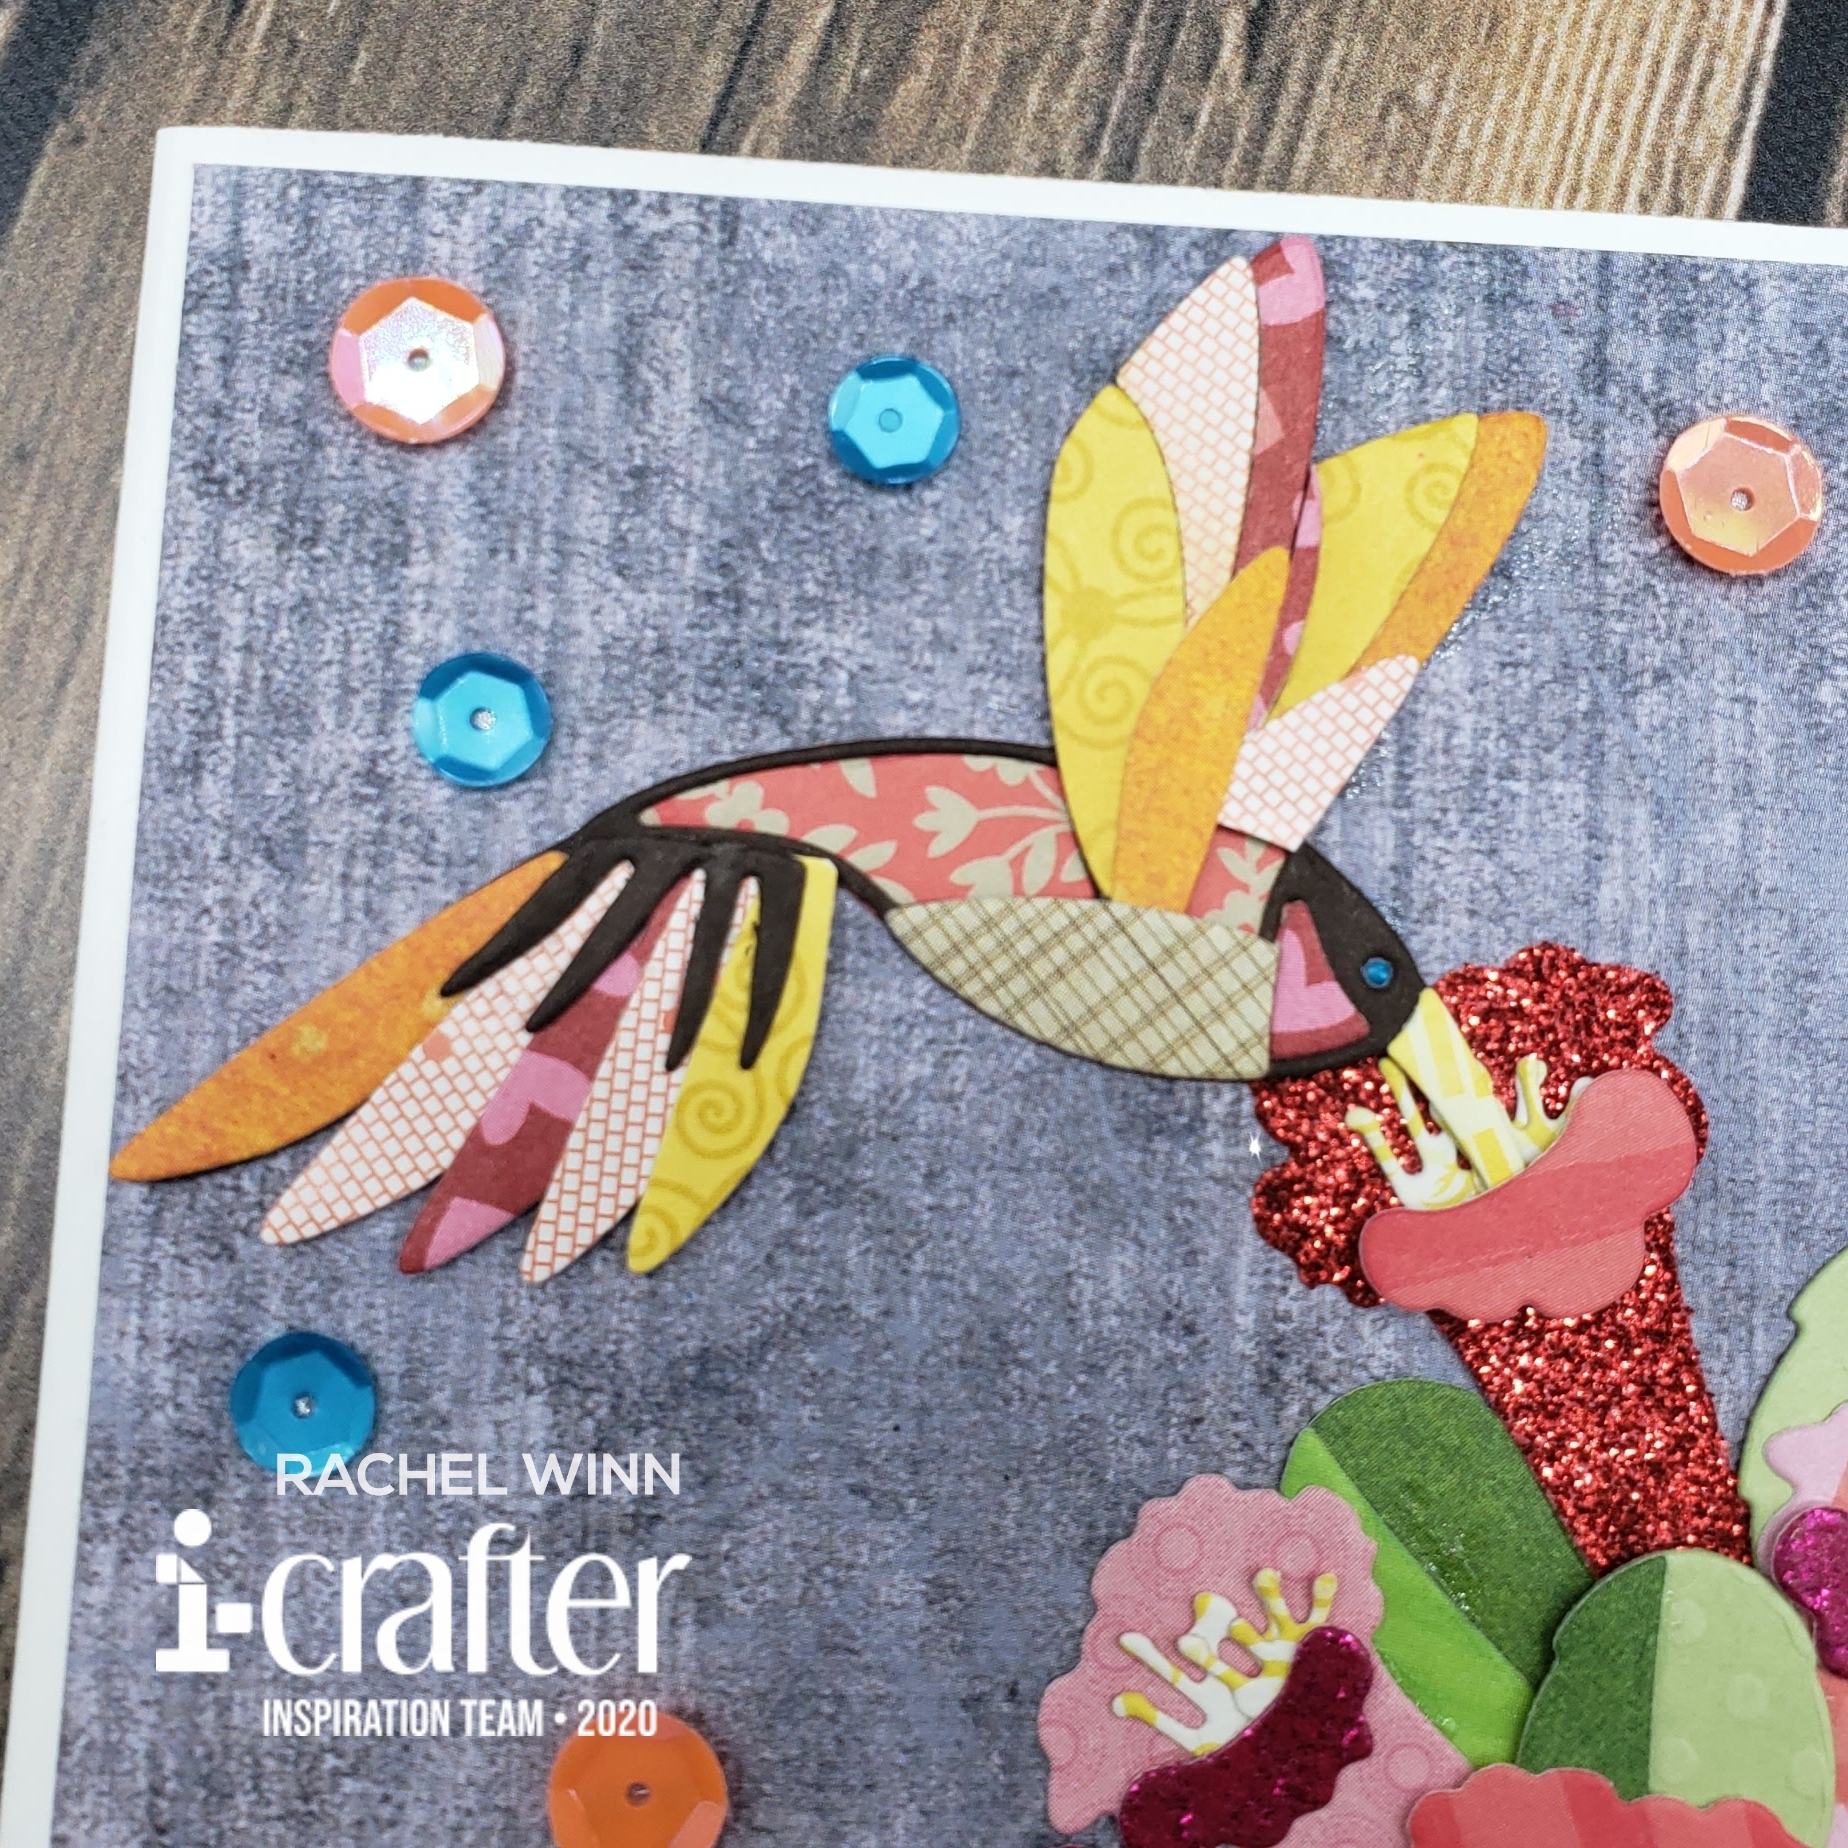
This card was a bit of a labor of love for me, using the new Hummingbird Happiness dies. I typically am more of a colorist, and don't use many intricate dies, but as soon as I saw the Hummingbird Happiness die I knew what I wanted to do with it... use up some scraps! I have these 8.5"x11" clear pockets FULL of scraps, organized by color of course.

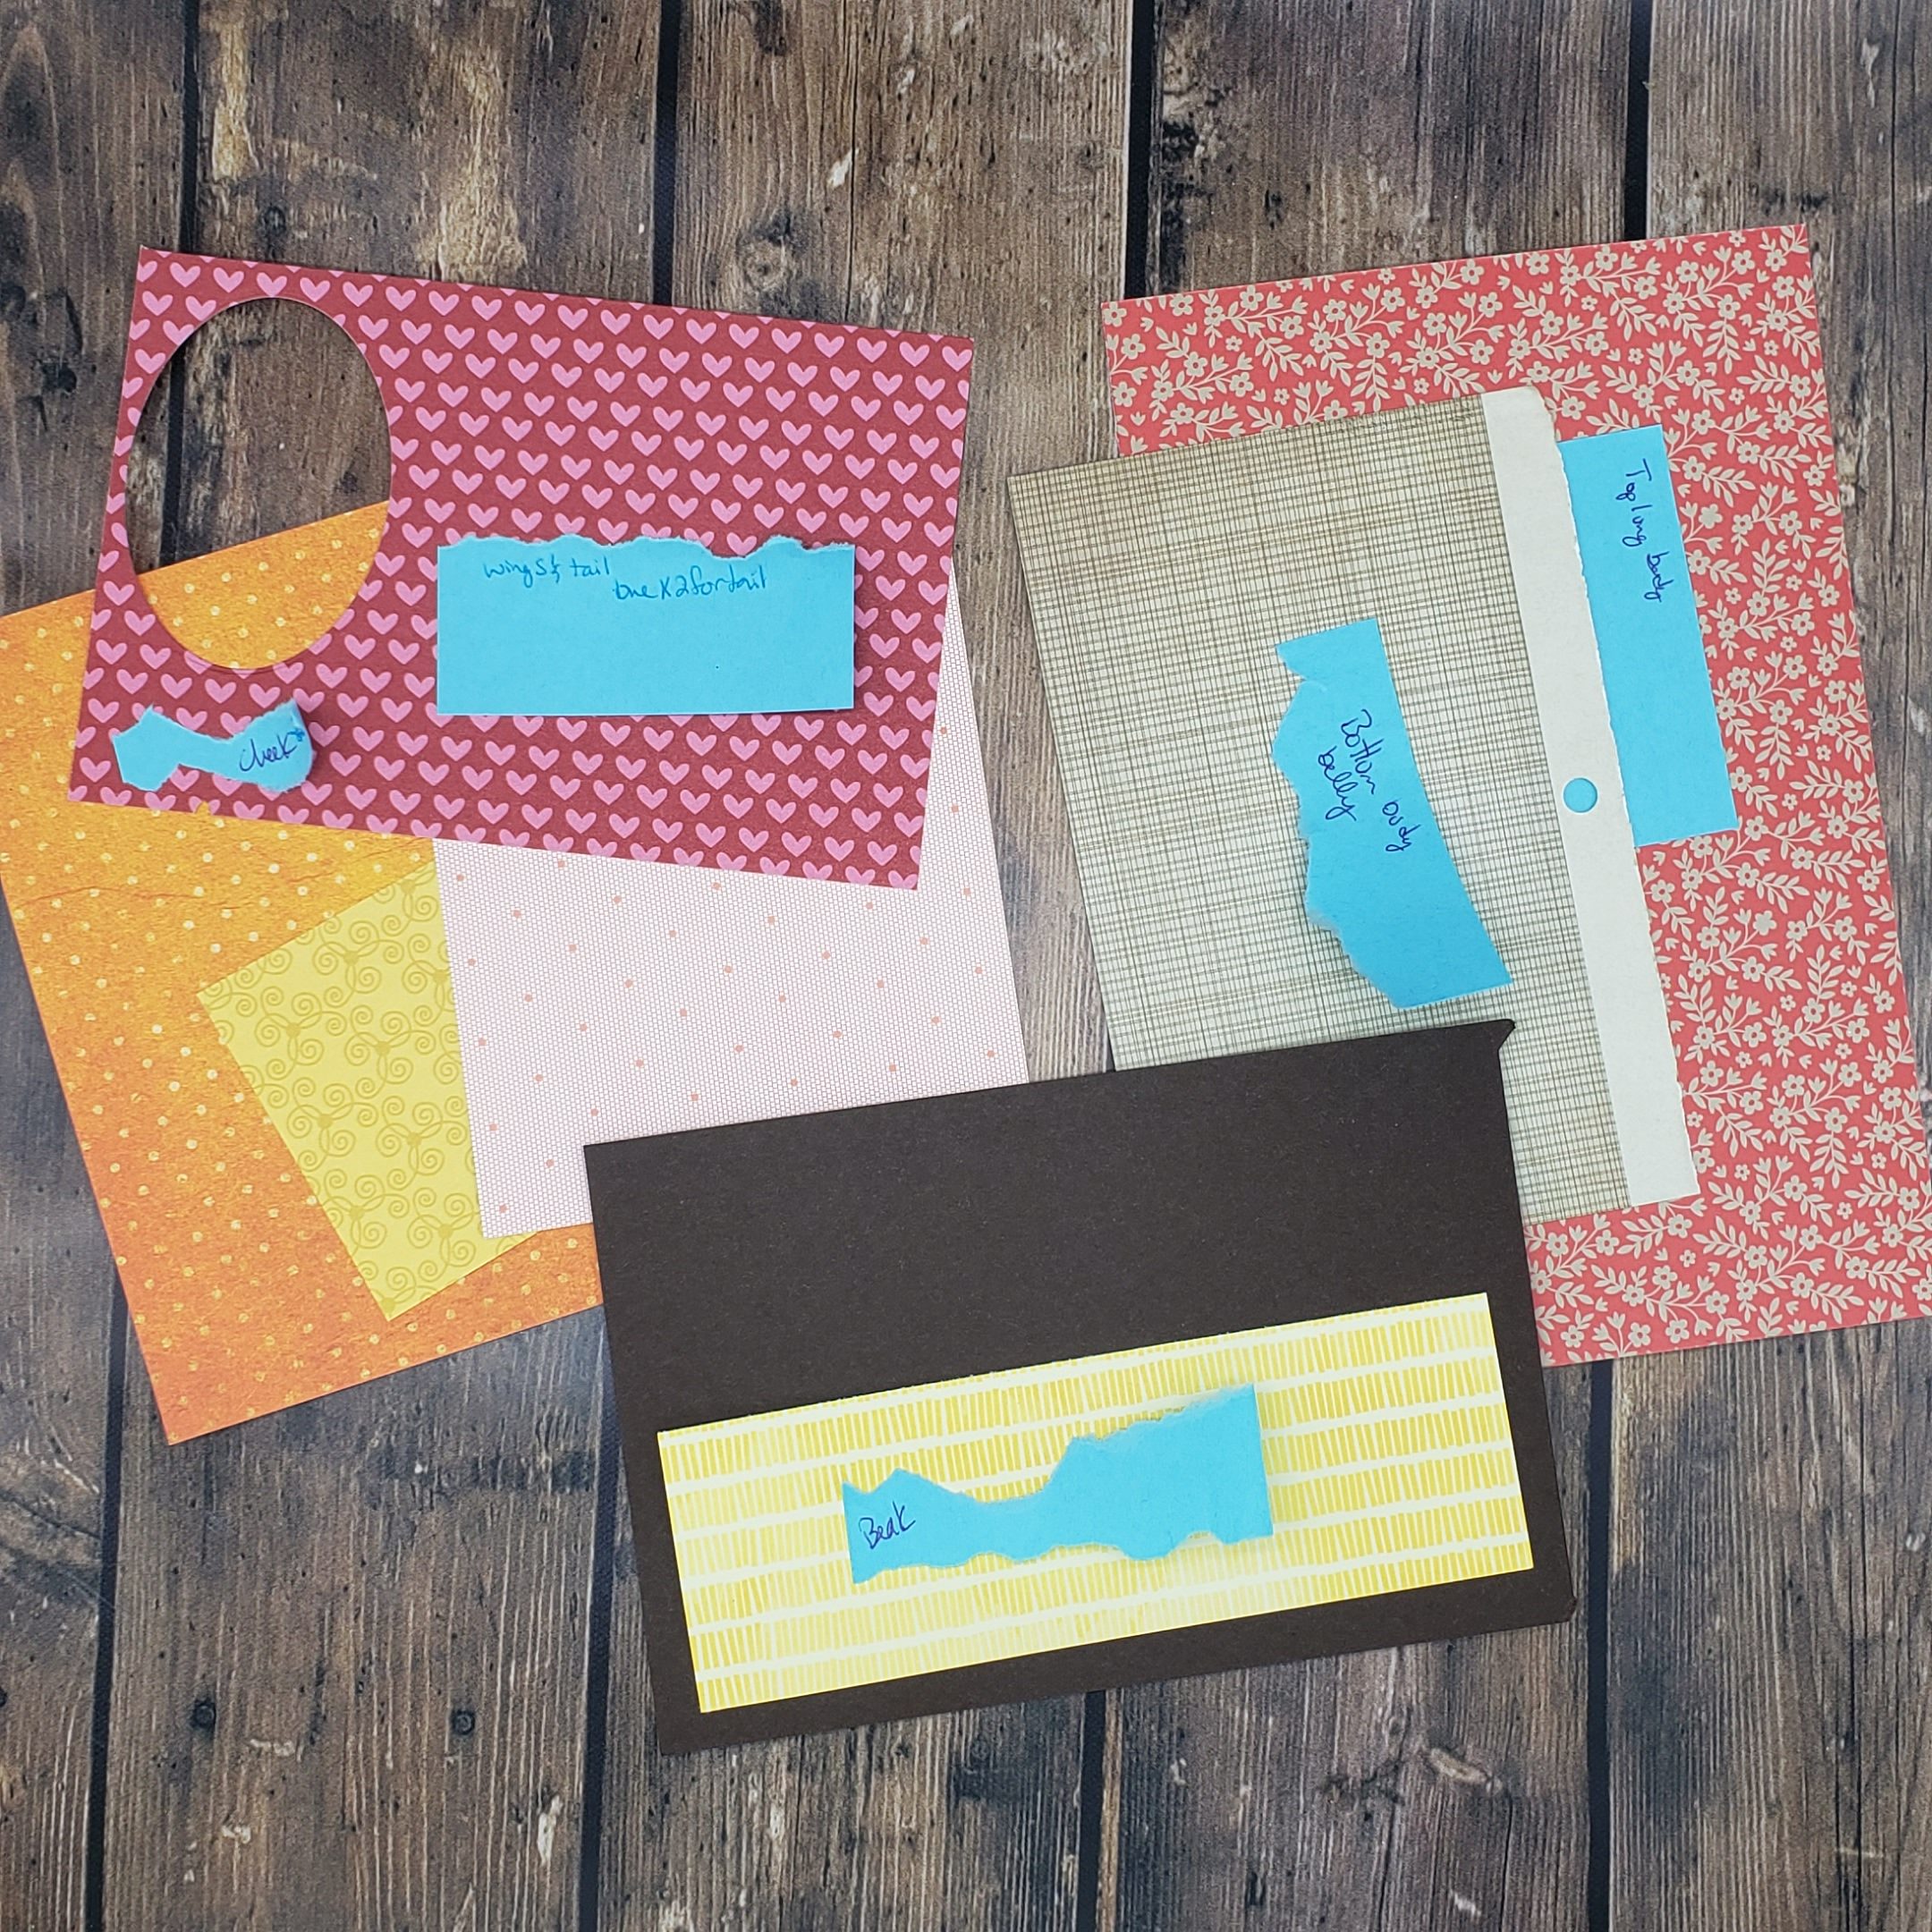
I started by pulling down the Patterned Paper scraps that I have, because I find ways to use the solid colors constantly, but Patterned Paper is harder for to use in general. I pulled out several pieces to decide which I liked together.  I labelled them with how I thought I wanted it all to go with sticky notes.

20200604_110241

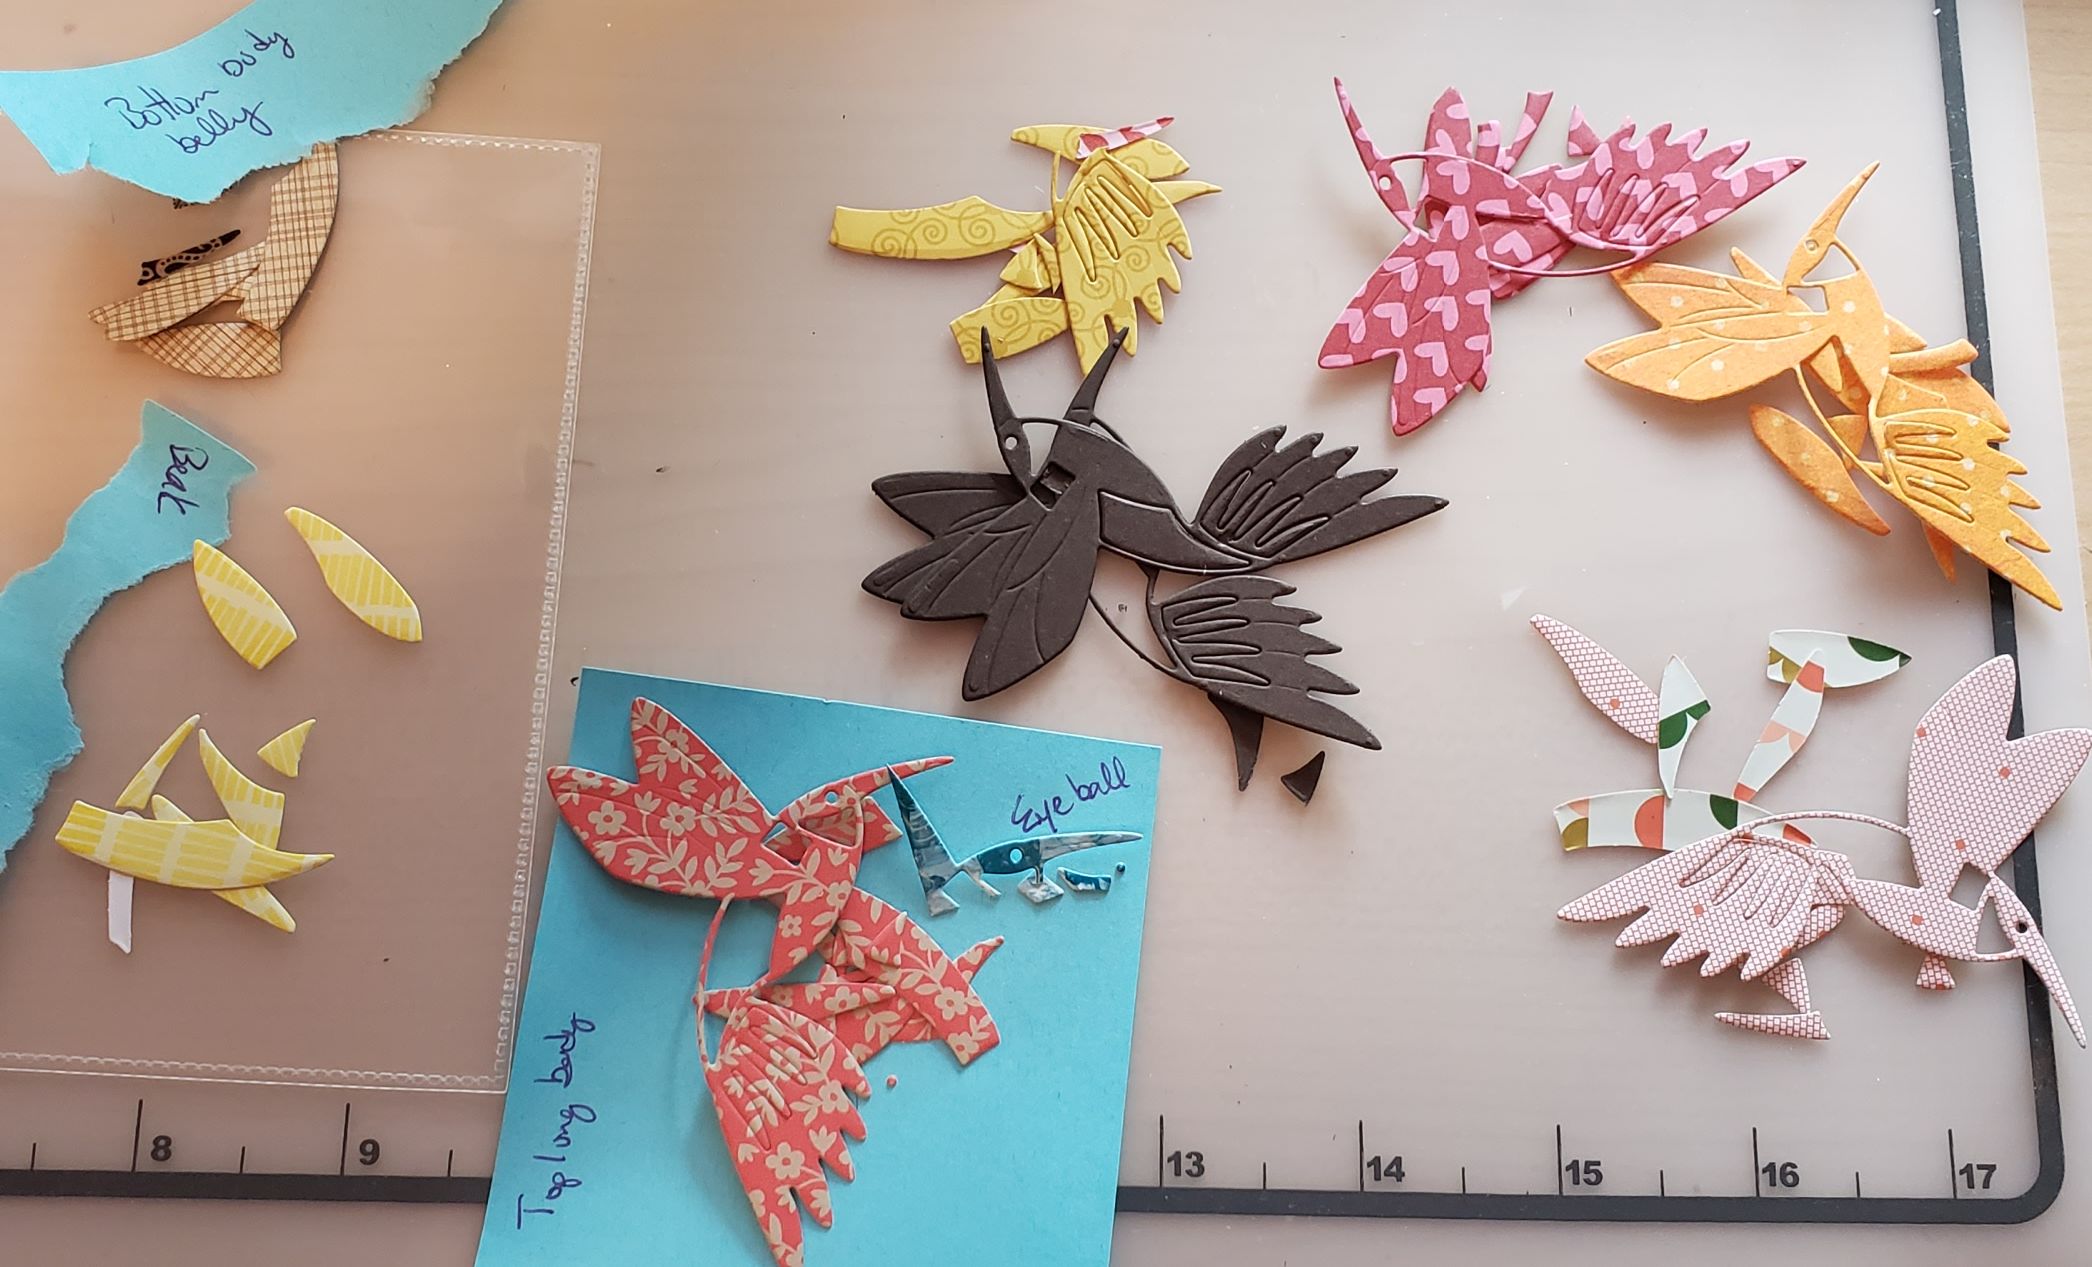
After I was happy, I started to die cut. This set takes a lot of cutting. I ended up pulling my mini die cutter out after a bit so I didn't have to keep getting up and down. HA! I inevitably still ended up needing to do more cutting to have all the pieces necessary. 

20200604_124134 (2020-06-06T19_24_11.634)

I followed the picture tutorial for Hummingbird Happiness because complex dies are NOT my forte. Starting with a wing, and building from there. I am not one for worrying about does this side match that side, because in nature, the same color may not be in the same place.  

received_3185441498143143 (2020-06-06T19_37_04.137)

Next, I die cut a million (ok, that's an exaggeration) little trumpet flowers and leaves out of more scrap paper. For the flowers, I focused on pinks and reds, using both patterned and glitter papers. For the leaves, I used more solid or stubble patterns. 

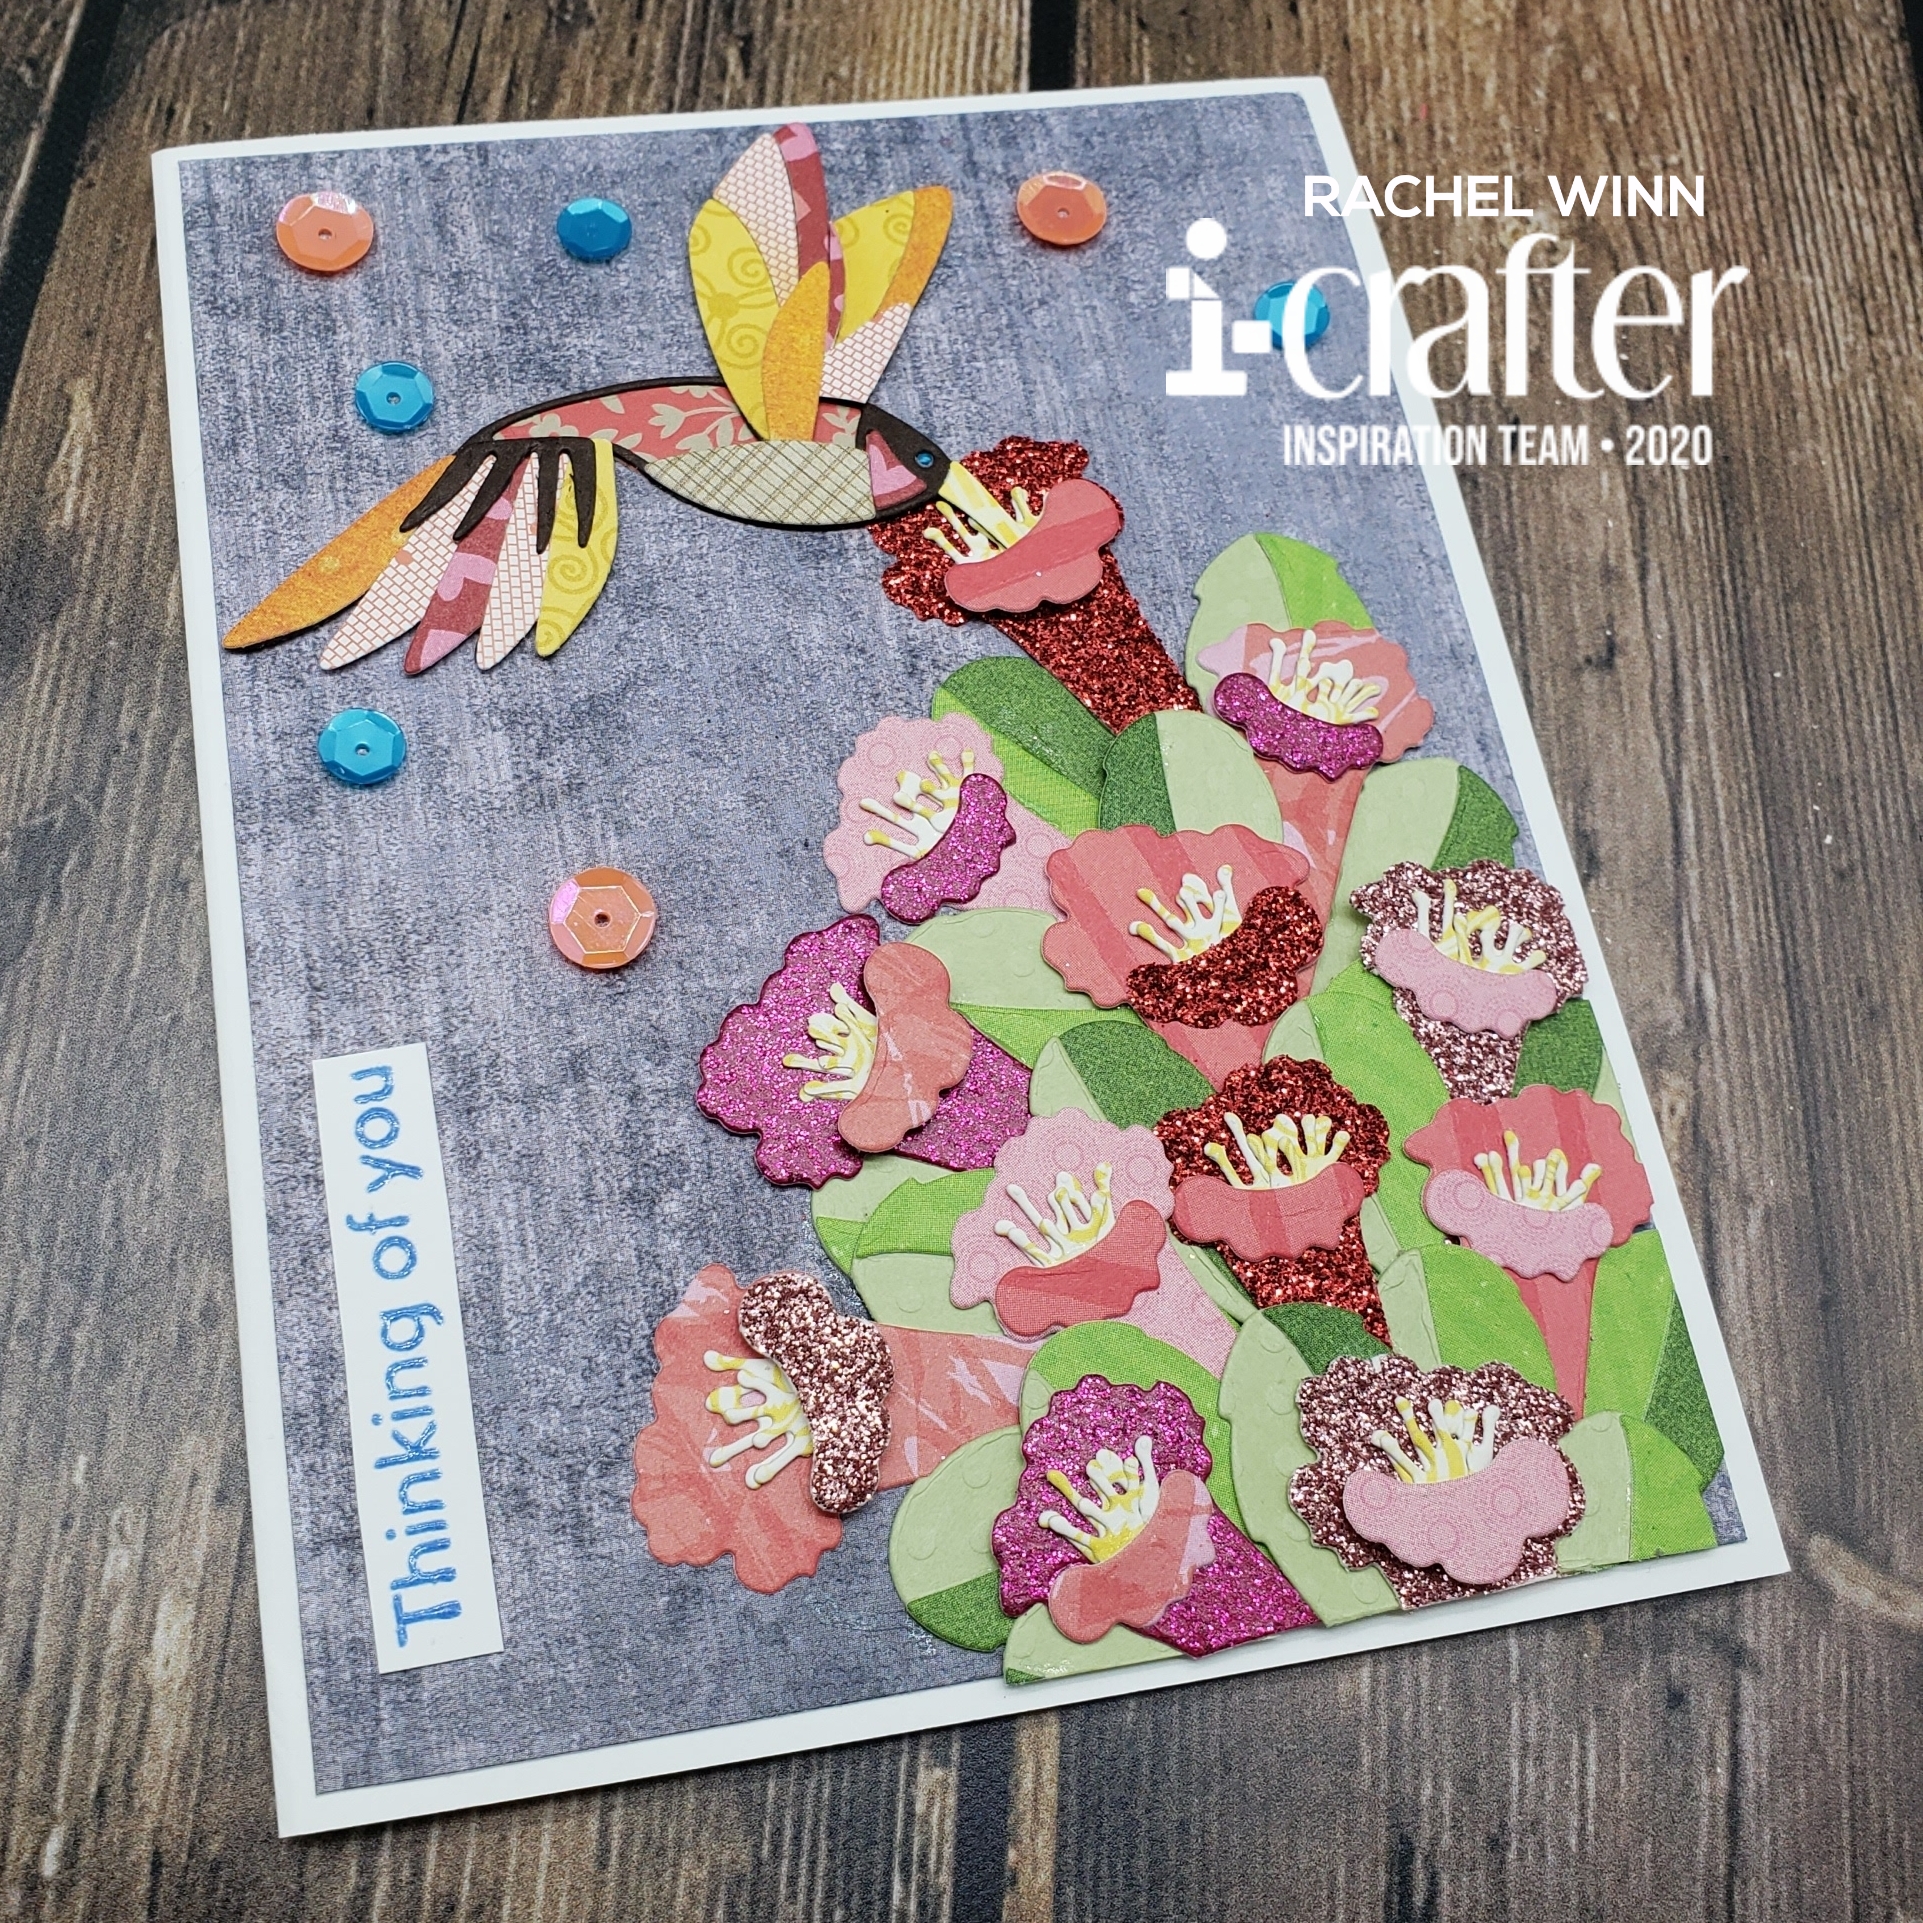
Then I built. I cut down a large piece of purple scrap paper that started as a scrapbook paper for the background, took my hummingbird and one of the flowers that I had used foam tape to have the front petal lifted and stuck his little nose INTO the flower. I layered the leaves and flowers to created kind of a garden or bush look with the flowers. 

LogoLicious_20200606_102532

I kept my background handy and made sure that as I layered, the flowers stayed on the card base.  At the end, I trimmed just a few flowers and leaves on the bottom and right side that flowed over. I was ok with that since I didn't want it to look like the flowers just ended.

LogoLicious_20200606_102135

I stamped "Thinking of You" from the Scattered Thoughts Sentiment Stamps in Skysail Blue Hybrid ink using my Mini MISTI and heat embossed it using clear embossing powder. This was glued in the bottom left corner, then I added a few orange and blue sequins.  

I hope that this has given you some inspiration and that you will grab the Hummingbird Happiness dies, Scattered Thoughts Sentiment Stamps, and the Skysail Blue Hybrid Ink.  I can't wait to see what you make with them, come join our i-crafter Facebook Fan Club to show off your own scrap hummingbirds!

If you want to see more from me, my instagram is HERE, and my Facebook page is HERE!

You will get to see another project from me here on the i-crafter blog later this month!

~R. Winn